
|
 |
||||
Good day on the project today. My friend Bill (EAA tech counselor) came over today to check out the project. Funny thing about him vising me was he was going to KDMW anyways to help his boss ferry his airplane to DMW. Turns out his boss has the hangar just across from me, and lives about 1/2 mile from me. Small world. While I was waiting for Bill to show up, I installed some 3/4" long pan head 4-40 stainless screws into the hinge eyelets on the leading edge of the wingtip hinges. These will act as a stop for the hinge pins, preventing them from going forward, which would either dislodge them from the aft securing block I need to make, or working themselves though the fiberglass tips. 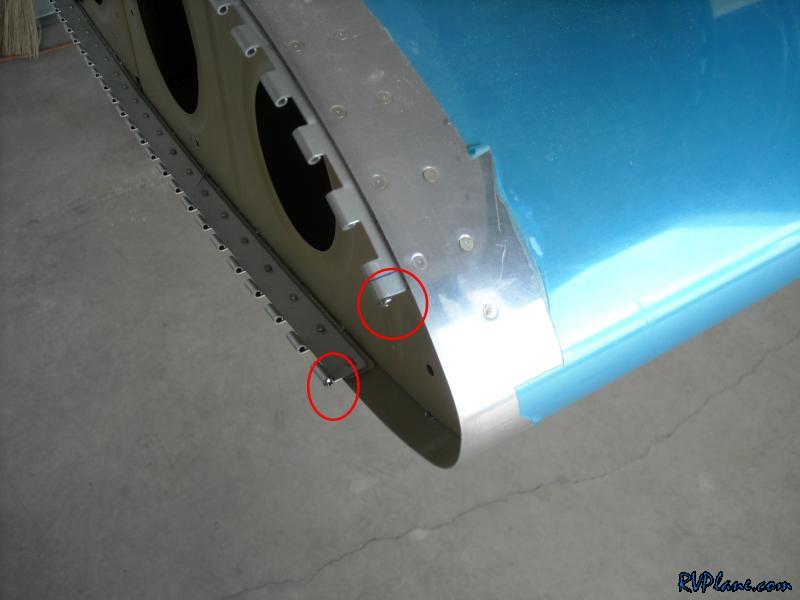 I used the 4-40 screw trick for the hinge on the GPS tray. It worked fantastically. I put some blue locktite on the screws before I installed them. 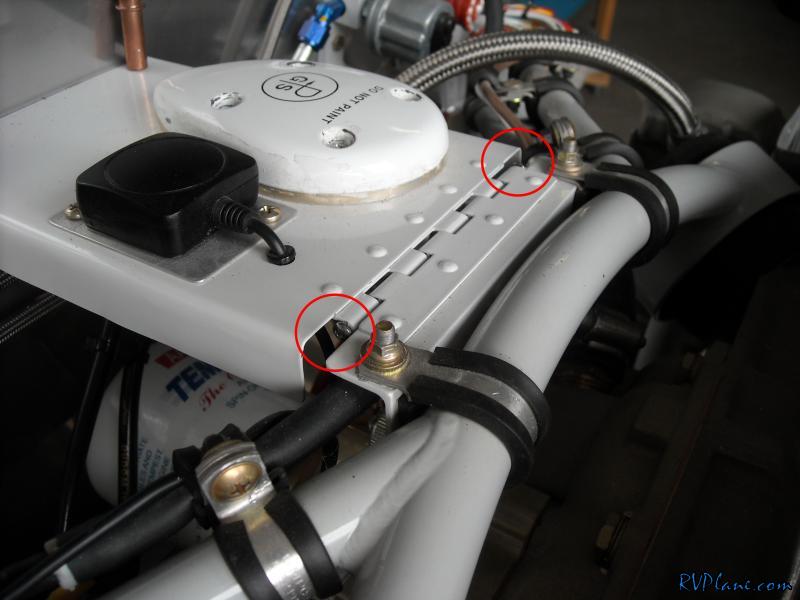 On the left horizontal stabilizer tip I saw a slight bubble in the primer. I picked at it a little and a large section of gel coat just came off! I am guessing there was an issue with this (i.e. air bubble) from the getgo. I don't know why it decided to become apparent today. I picked away at the imperfection and filled it with some micro. 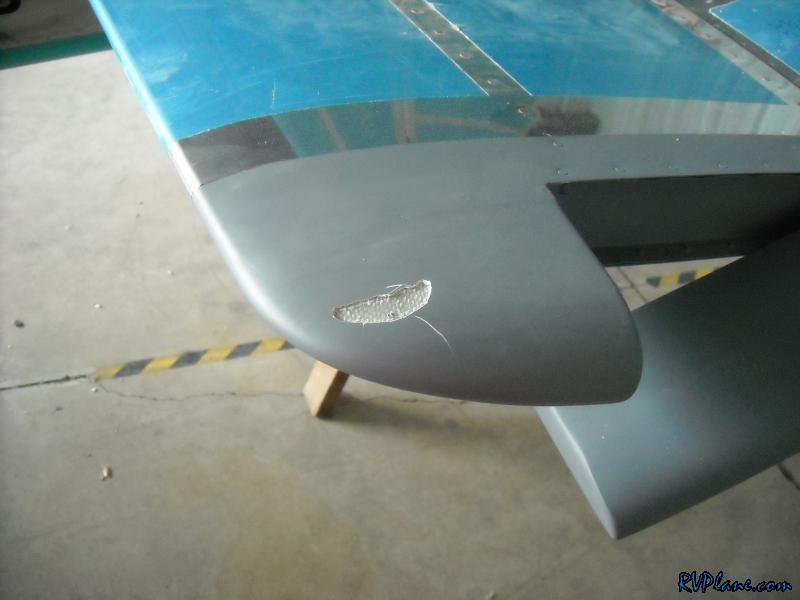 Bill stopped by and went over the airplane. He found a couple of small squawks, most of which he learned from his own experience. These were: 1) Install a jam nut in addition to the single nut holding the fuel servo to the sump. Bill experienced 3 of the 4 of his nuts backing off. 2) How to fix the rubbing issue I had between my alternator and oil return line from my c/s propeller (next pic). 3) Use a casteated nut and cotter pin on the bolts for the end of the controls for the propeller, mixture and throttle. While I am 99.9% sure I am using what Van's recommended, Bill says using a castle nut is standard for production aircraft. Hey, it can't hurt. 4) Safety wire the brake calipers. I totally forgot about that one. Great advice from Bill. I really appreciated him coming over (i.e. walking between the hangars! ;-)). 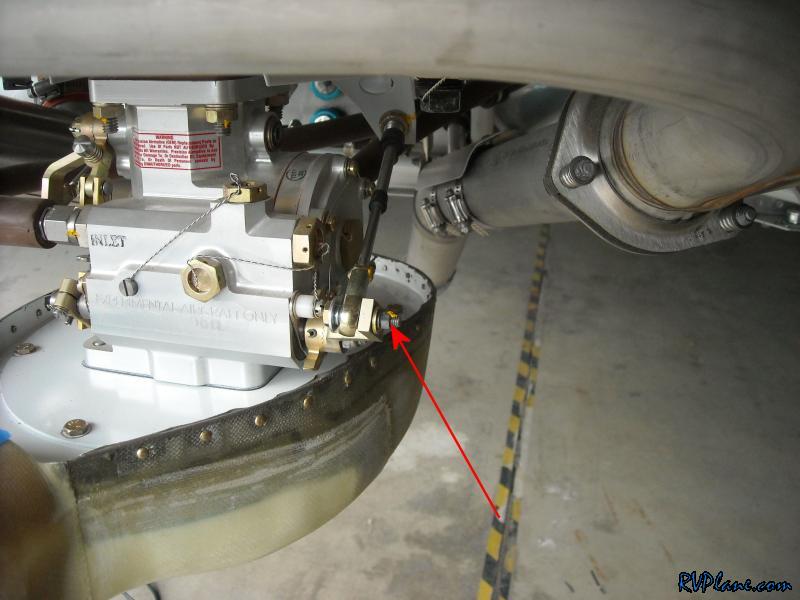 So one of the issues I asked Bill about was the distance between the oil return hose and the alternator. There was maybe 1/2", and I was concerned with vibrations, the two would rub. Bill's advice was with anything that might rub, connect them somehow. He also suggested using the baffle material to wrap around the oil return line. So I drilled a #27 hole in the alternator housing (it is actually not in the real housing, but a cover to the regulator) and used some waxed string to tie the two together. 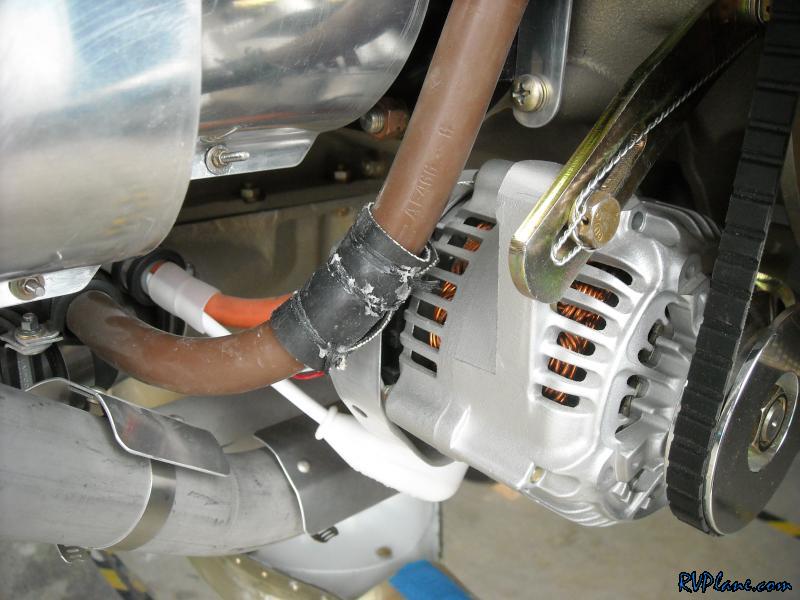 I went down my hit list and worked on some random parts of my project. I did a lot of work on the wingtips, and pretty much all I have to do is prime the wingtip ribs, prime the HID ballast mounting blocks, and then rivet/install them and they wingtips are done. I also installed the back of the propeller spinner. I need to buy some more wrenches to finish this. 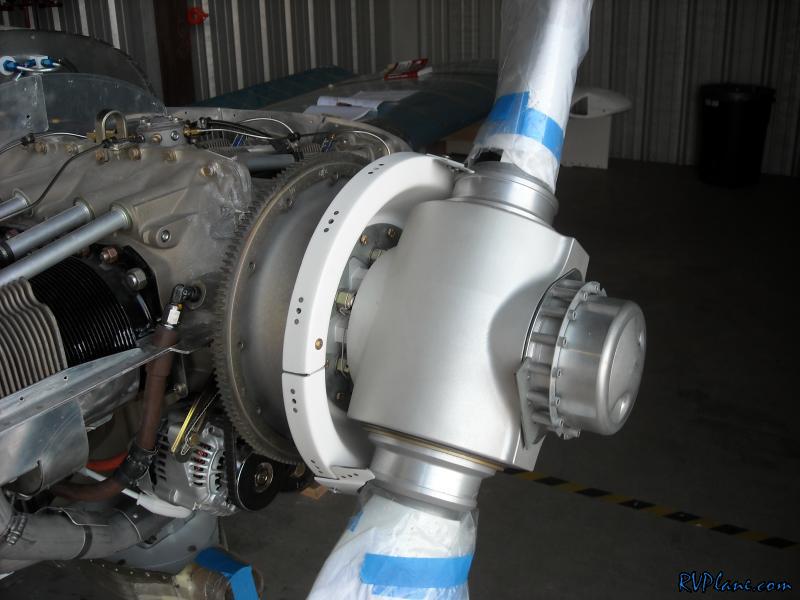 One issue I meant to look at was my #1 EFIS wasn't getting power on its connection to the auxiliary bus. I thought for sure it was a blown fuse, but nope, not that simple. I pulled the connectors hood on the back of the EFIS to do some snooping at the EFIS end of the wire. Sure enough, the wire broke off at the pin. These were crimped by GRT, which is a little disappointing. However, I am glad this one broke when it was on the ground, before the canopy was installed. After I installed a new pin, it was working 100%. 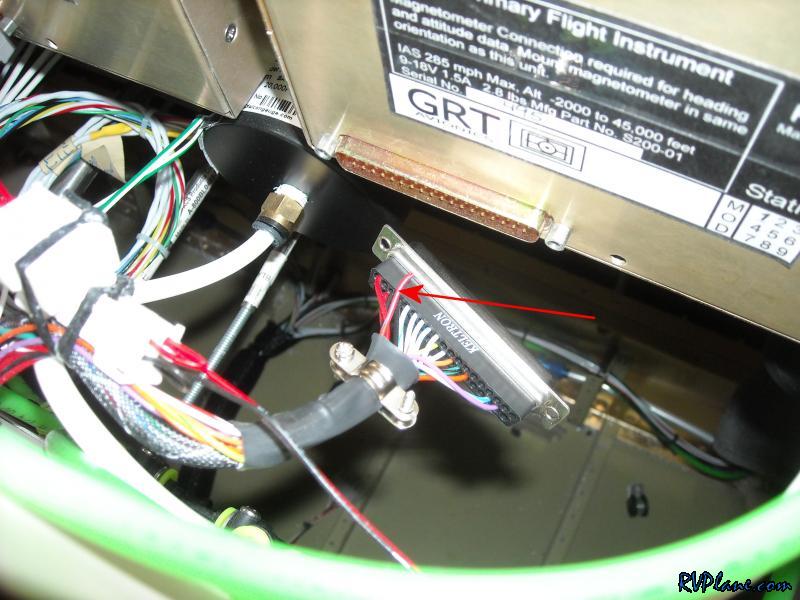 Now this was a total pain. I didn't put nutplates on the bottom of the middle flap UHMW block. What a pain it was to install the nuts on the bottom here. I have no idea what I was thinking. Maybe I was tired of all of the nutplates in the fuselage. For the minuscule amount of time it would of taken me to install two nutplates here at the time of construction, it would of saved me big here. I wasted a good hour getting these two bolts installed. 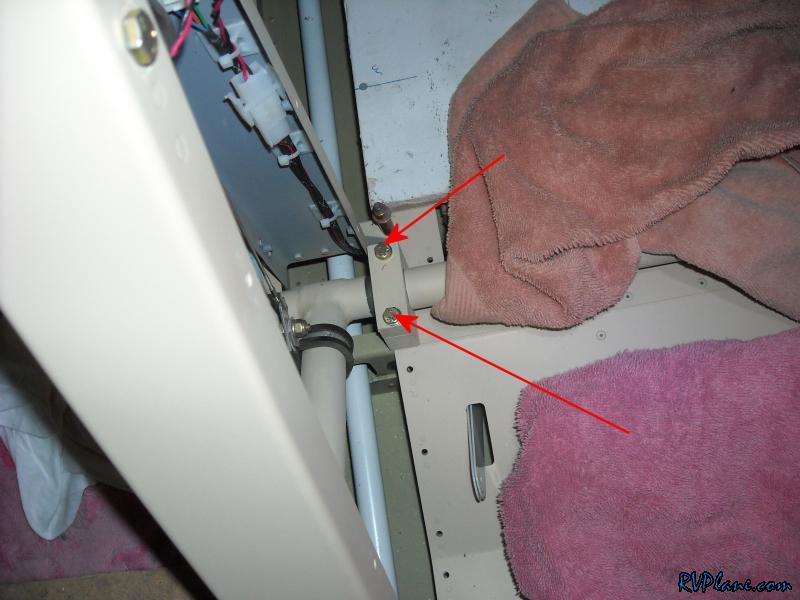
|
|||||
|
http://RVplane.com |
Last Modified: June 22, 2025 |