
|
 |
||||
I have been sitting on the parts for a smoke system for well over a year. I even bought a 55 gallon drum of smoke oil in the fall. I have been dragging my feet installing the smoke system because I couldn't figure out some of the basics - such as where to mount the pump. I wanted it as removable as possible. With Working From Home due to COVID-19, I had a lot of time on my hands to figure out all of these things I have been dragging my feet on. 50 hours - yup, that is what I estimate I have into installing the smoke system. I wanted it PERFECT. And I think I achieved it. It's easy enough to slap one of these systems on, but I wanted my installation to be exceptional. I even designed a custom controller for engaging/disengaging the smoke (not included in the install time!). OK, let's get to the nitty gritty details. The tank is from Marvin @ https://www.smoke-system-helper.com/. It is a work of art. Everything drooled over how good the welds are. Originally I was going to mount the pump on the front side of the tank, but I could never figure out how to make it easily removable. So I ended up making some brackets out of some 3/4"x1/2" 1/16th" angle from Home Depot. I just put two slots in each of them for the hose clamps that keep the pump in place. 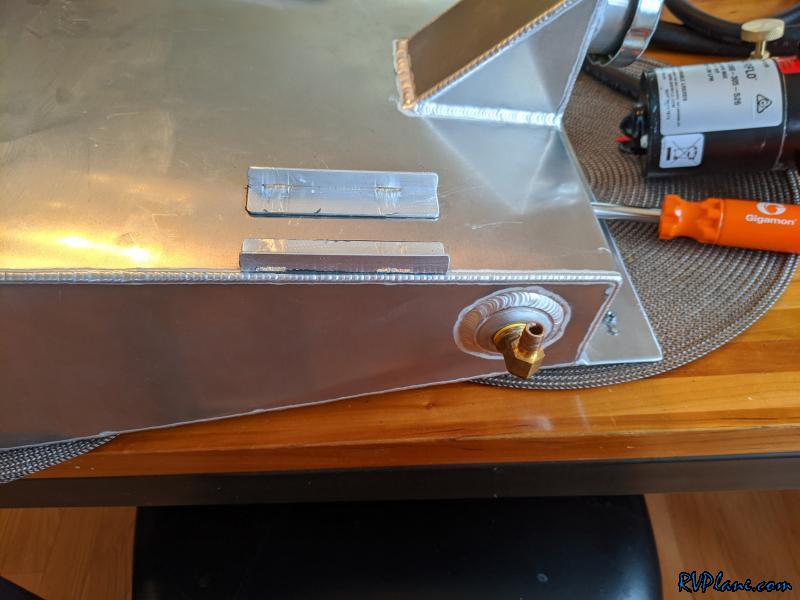 JB Weld MarineWeld did an amazing job attaching the brackets to the tank. Those puppies are on their for good. 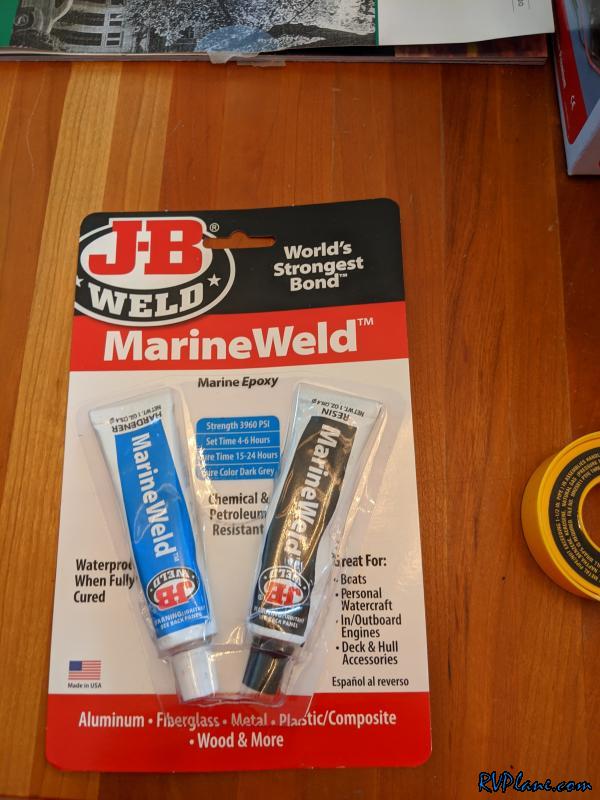 The placement of my brackets to the tank. I masked off the area with electrical tape to prevent seepage of the JB Weld to the surrounding metal. 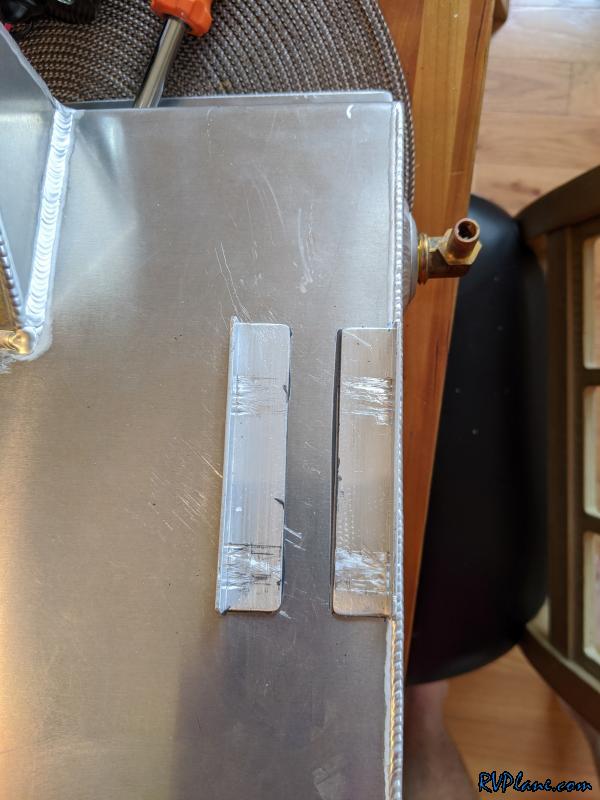 From this angle you can see the slots I made for the hose clamps to go through. Yeah, not my pretties work. 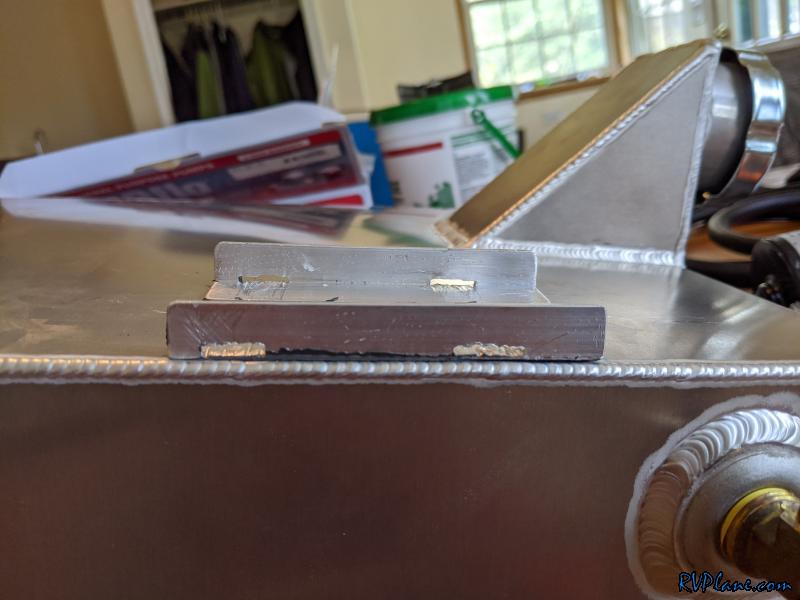 Marvin says don't use metal fittings on the pump because it's easy to crack the casing. I didn't have any issues. Here is an (A) Anderson Metals Brass Hose Fitting, 90 Degree Elbow, 1/2" Barb x 1/2" Male Pipe (p/n: 57020-0606, $5.75 on Amazon). The tubing (B)is 3/8" ID from the auto parts store. 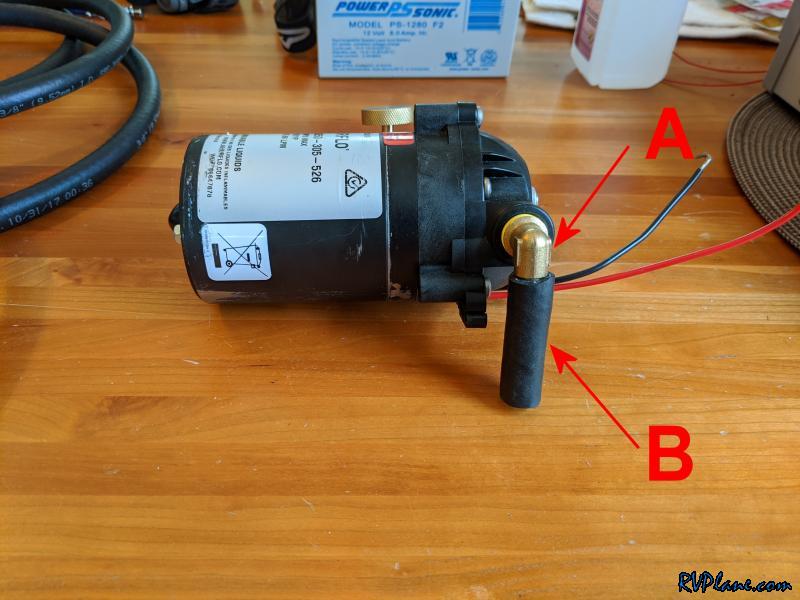 This side of the pump is slightly more complicated. There is a needle valve to control flow, and I added a dripless quick disconnect. This was probably the most complicated thing to figure out in the whole system - how to make a compact hookup. Took A LOT of trial and error and spare parts! OK, here are the details of the parts in the next pic! 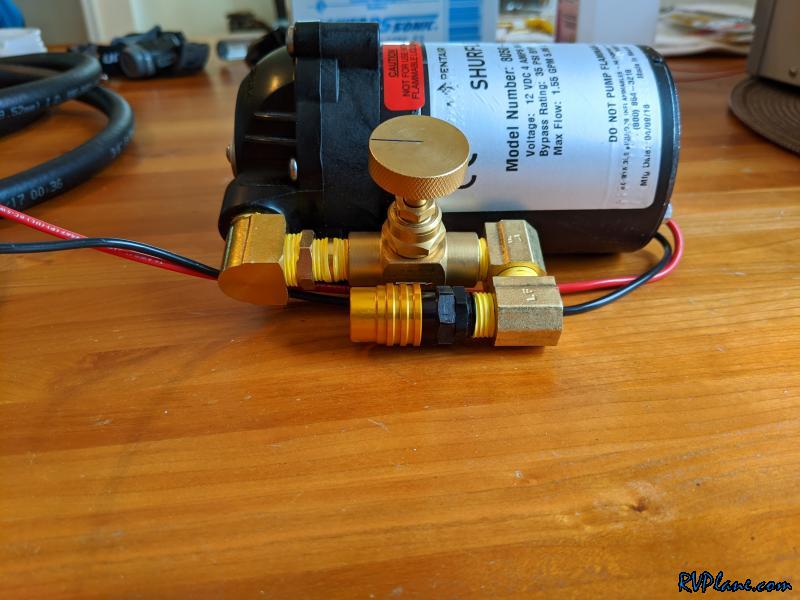 (A) Everbilt 3/8 in. MIP x 3/8 in. FIP 90-Degree Brass Street Elbow Fitting (p/n: LFA-782, $6.26, Home Depot) (B) Tailonz 3/8 Inch NPT Male x 1/4 Inch NPT Female (p/n: 8414721674990, 10 pcs $10.99, Amazon) (C) Everbilt 1/4 in. x Close MIP Brass Hex Nipple Fitting ($2.86, Home Depot) (D) Weksler Needle Valve, 1/4" NPT inlet/outlet (p/n: BBV4, $17.69 Ebay) (E & F) Everbilt 1/4 in. MIP x 1/4 in. FIP 90-Degree Brass Street Elbow Fitting (p/n: LFA-739, $5.18, Home Depot) (G) Jiffy-Tite 2000 Series Quick Disconnect, 1/4" NPT, Socket (p/n: JT21804, $35.29, Pegasus). Yeah, that quick disconnect is NOT CHEAP! But it is very high quality and lightweight. I originally thought I could cheap out and get a 1/4" hydraulic coupler. It was HUGE and HEAVY. Learned a hard lesson there! 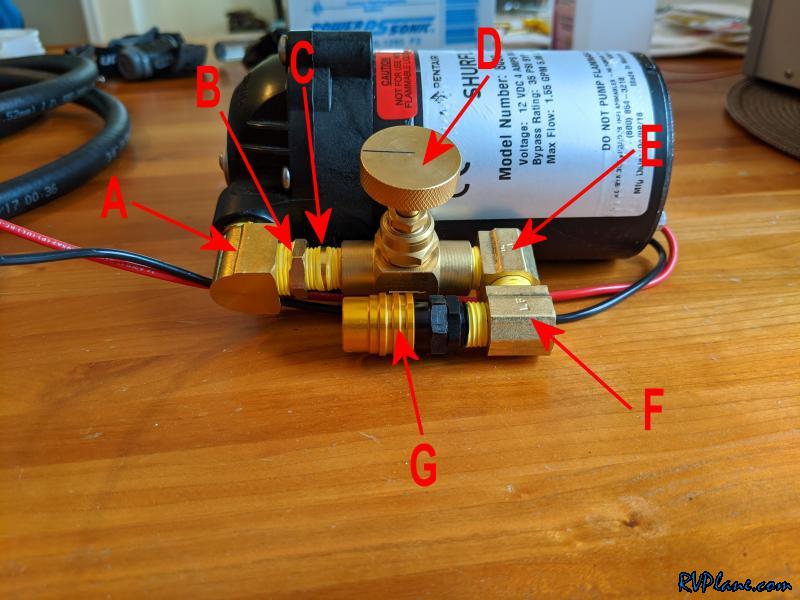 The hose clamps took some finagling to get right. And for the first time ever I actually had the right side clamps in my basement! 1.5"-3.5", size 48 worked very well for me. I trimmed a few of the teeth off so there was barely any overhang. Sort of a pet peeve of mine when it comes to hose clamps. It only takes a minute or two and the result is much more visually appealing. Plus the weight savings!! 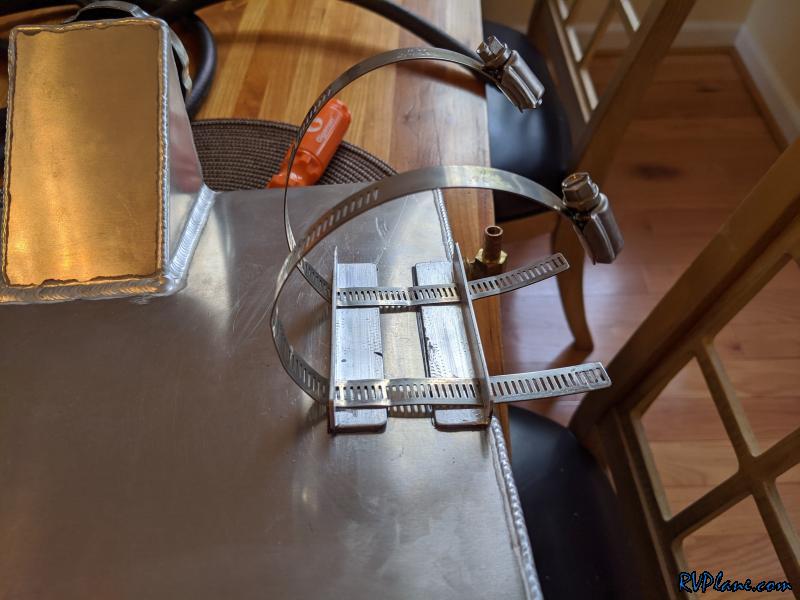 Boom! Everything installed. The quick disconnect on the 3/8" hose side is a Jiffy-Tite 2000 Series 3/8" Barb, Plug, p/n JT22506P....and only $13.99 from Pegasus. A bargain compared to what the socket costs! I am really happy with how my plumbing turned out. Compact and neat. 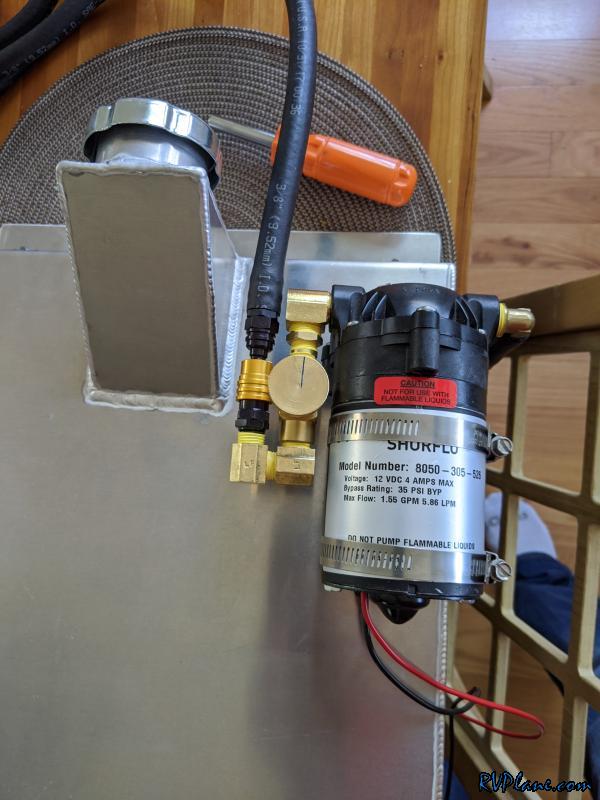 A veiw from the side. I still need to install some safety wire as hose clamps on the soft tube, but there is a good chance this will come off again before it's permanently in the airplane. 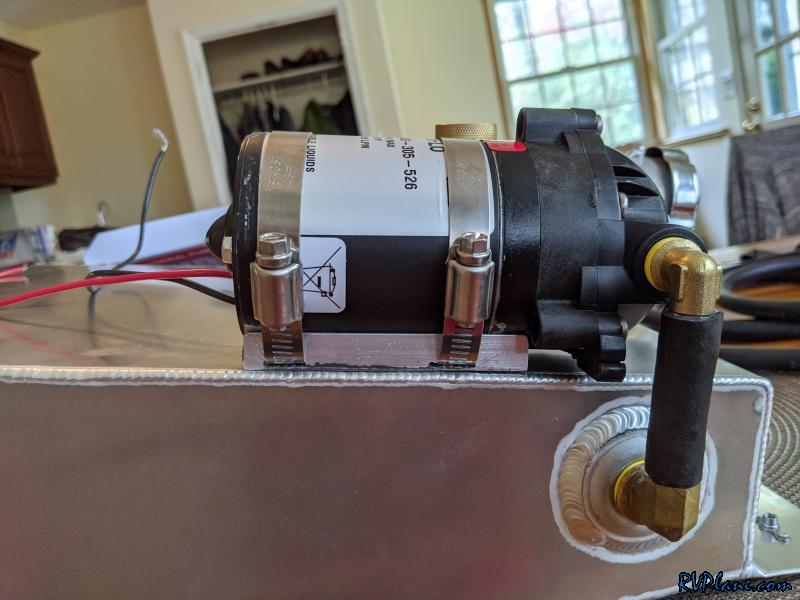 OK, onto the firewall forward! I found this SWEET PTFE braided stainless steel tubing kit on Amazon - Evil Energy KT00615AN4SR-HW, $49.99. Comes with the installation took and all 6 fittings. Very high quality kit! 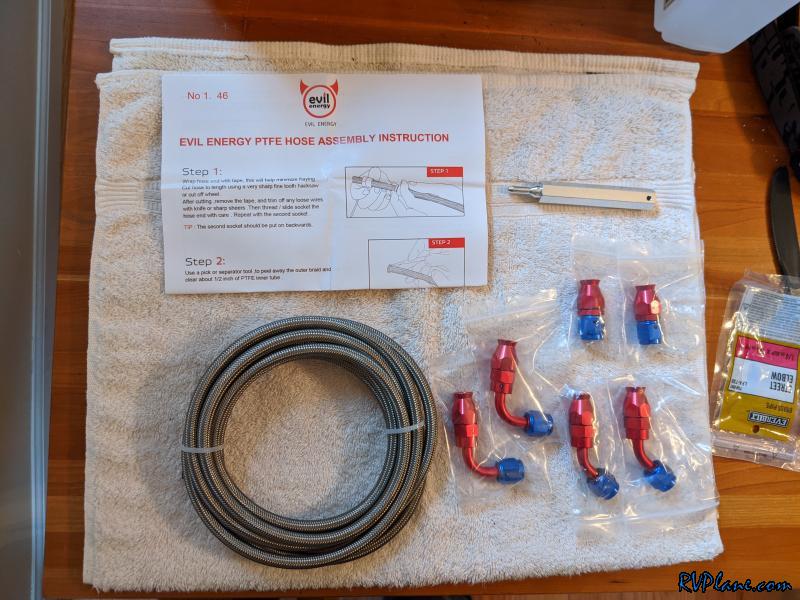 OK, onto injector mounting. Another task where I stared and stared and stared at the exhaust until I found a place that made sense. 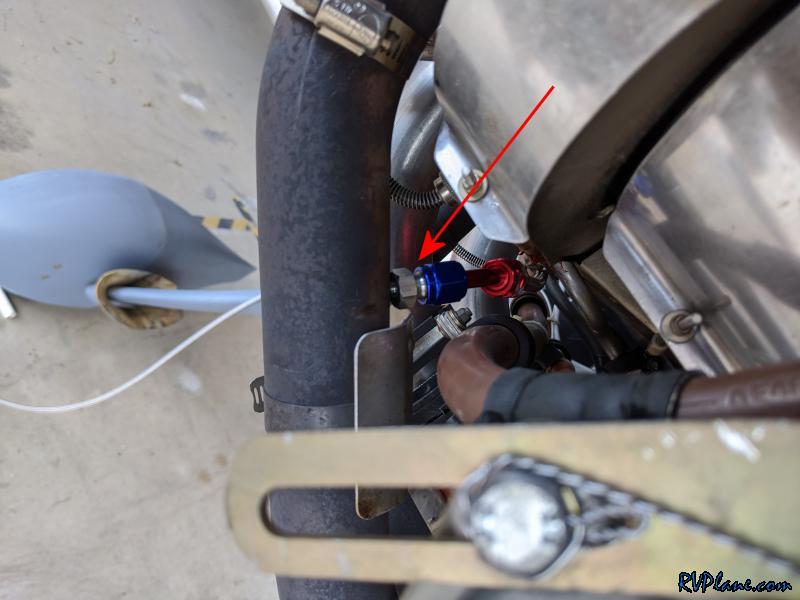 the injector (all the way right) and the proposed hose routing. Looks like a winner! 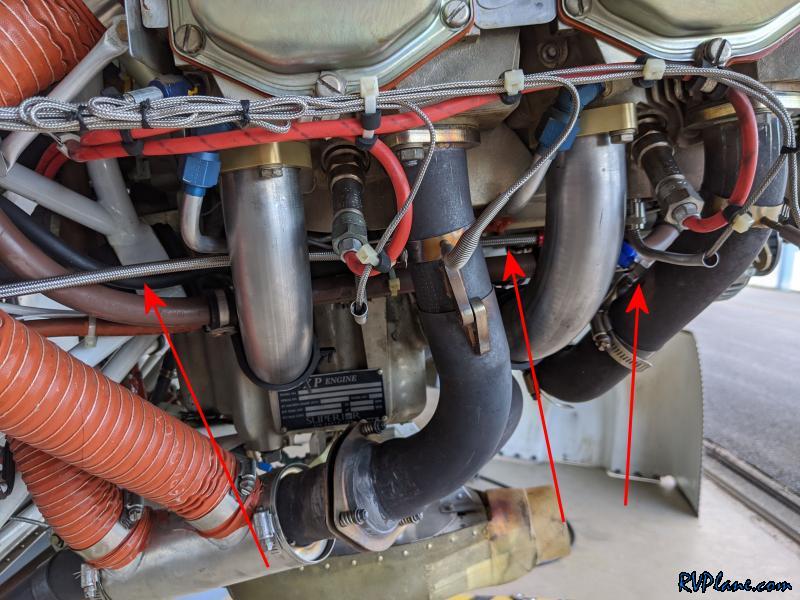 It was quite difficult to mark the spot as there was not easy way to get a marker on the engine side of the exhaust. To drill this hole I needed to drop the #1/#2 exhaust pipes. I used to loathe installing the exhaust as it was a royal pain to get the gaskets in proper place. That is, until I used to use some thin 040 safety wire to keep everything place....Safety wire and Duct Tape...is there anything they can't do???? 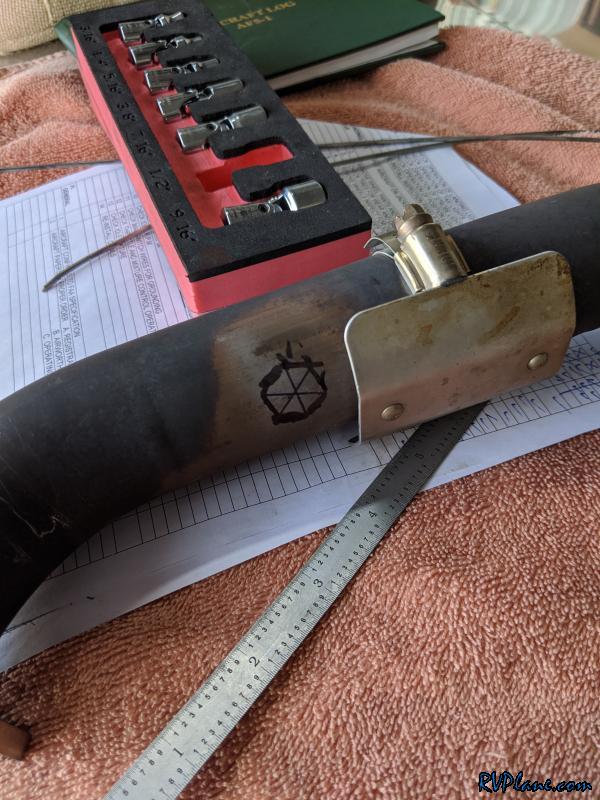 Hole drilled and injector installed! 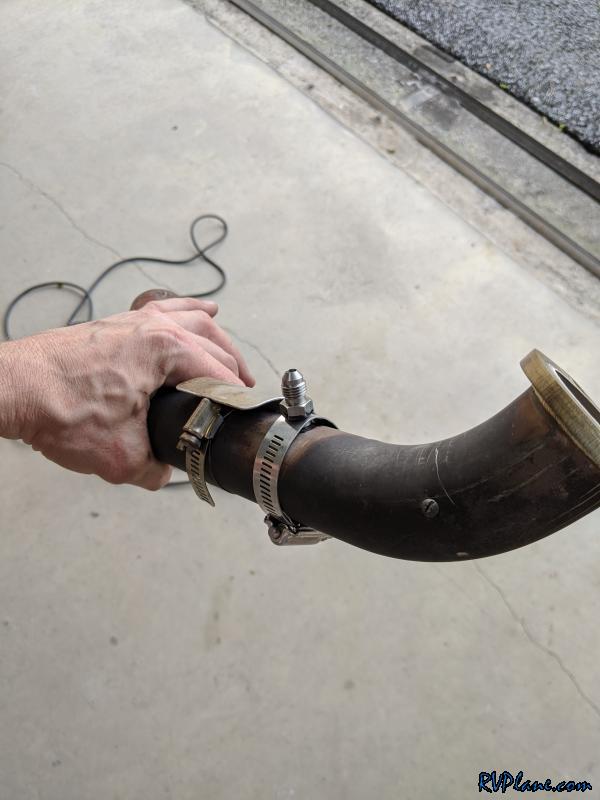 I used a 45 degree AN4 fitting here to align the braided hose to be parallel with the existing hose/wire runs (prop oil hose and starter wire. 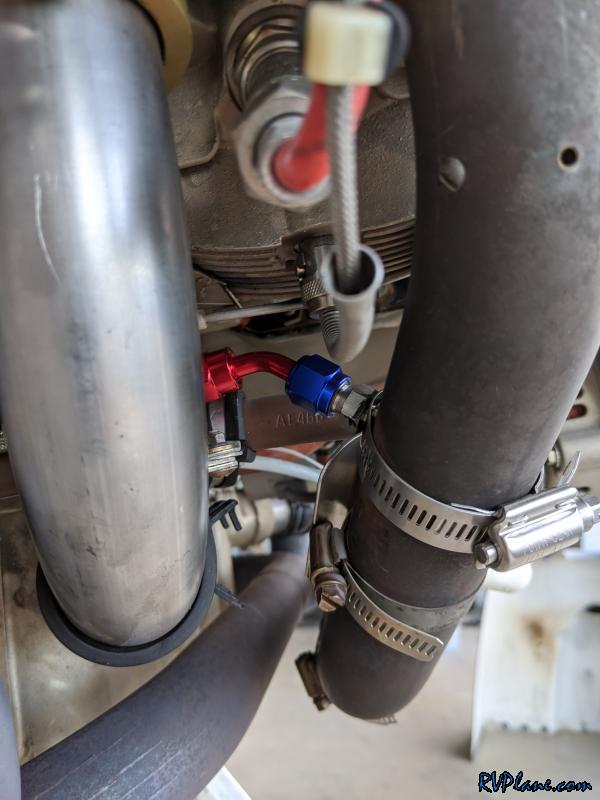 Another view. 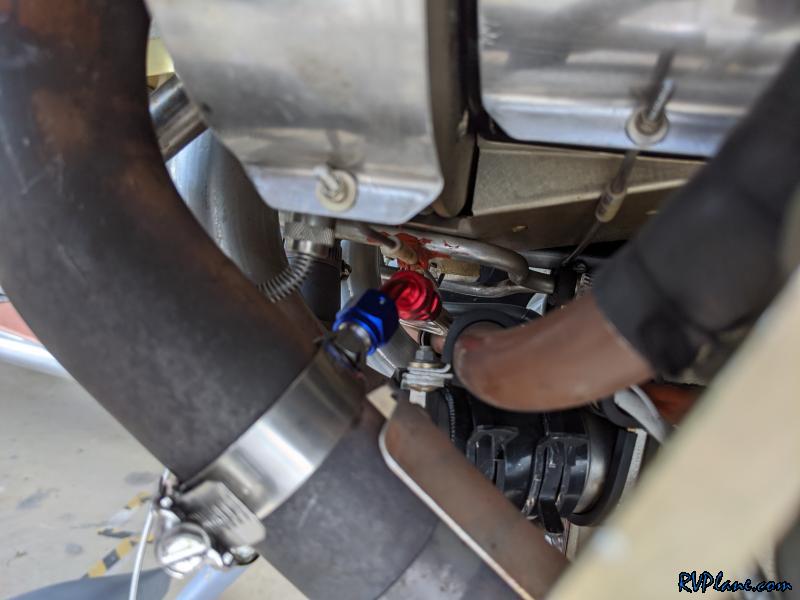 The other injector was much much much easier to mount on the #4 cylinder. You may ask any #1 and #4? Why not #3 and #4 and make your life easy? Well the instructions say to put the injectors in a place there the longest amount of exhaust pipe exists, and have them exit in separate pipes. Because this is a crossover system, the #1 and #4 are the longest runs. 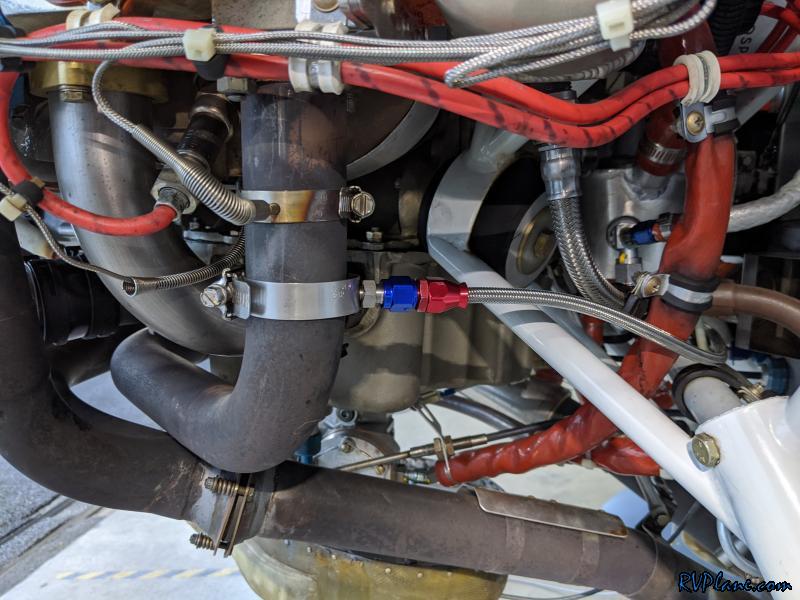 Another decision I agonized over - where the firewall penetration point should be. Do I mount it high (no, battery interference). So I decided here. Nothing else was near here on the firewall. 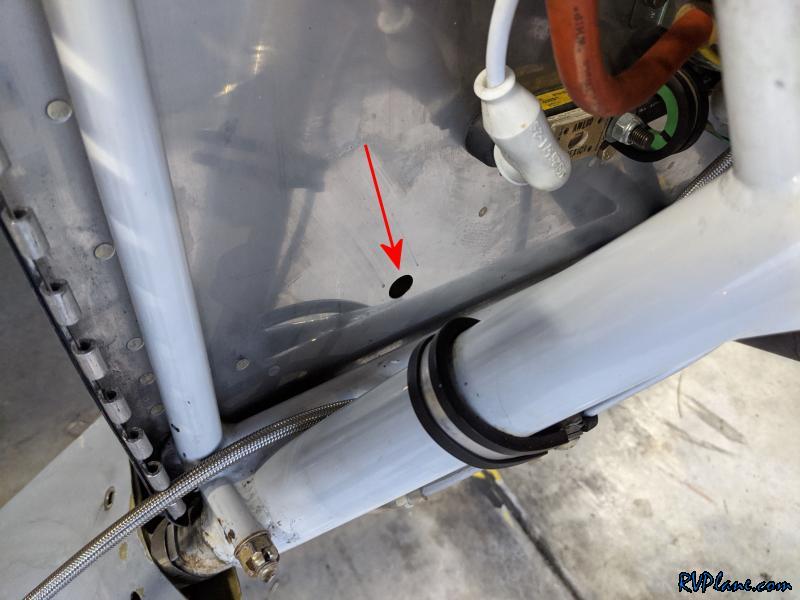 I installed the Tee fitting. I needed to shim it as it was a one-man install. 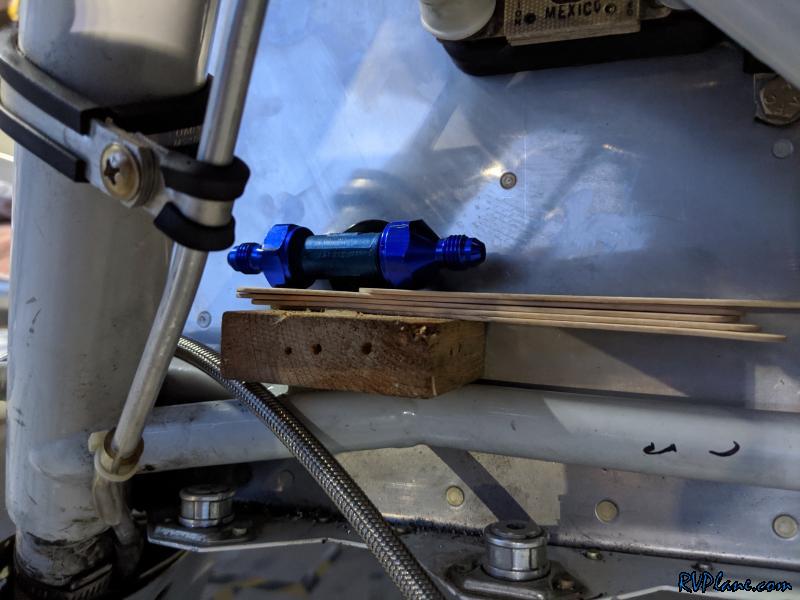 The right side was relatively straight forward to figure out how to run the tubing. 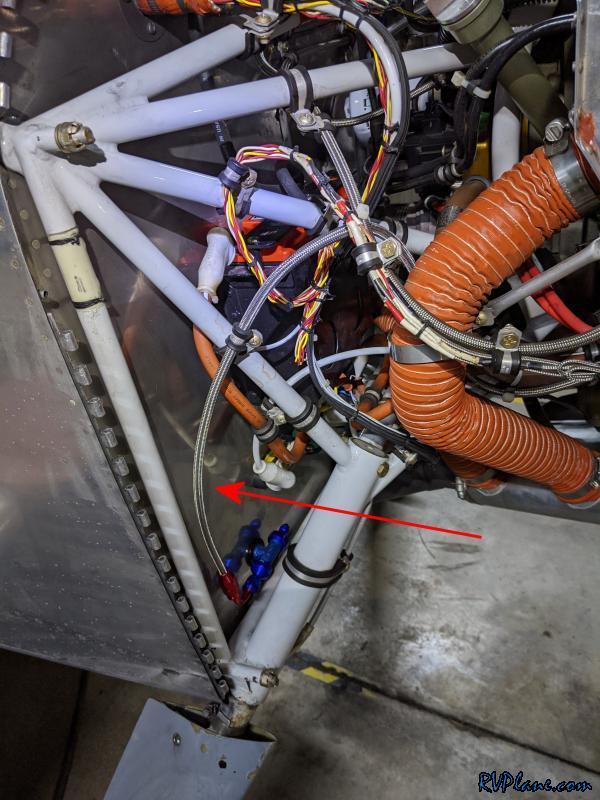 Here it is all tied up and secured. I am really happy wit how this side turned out. 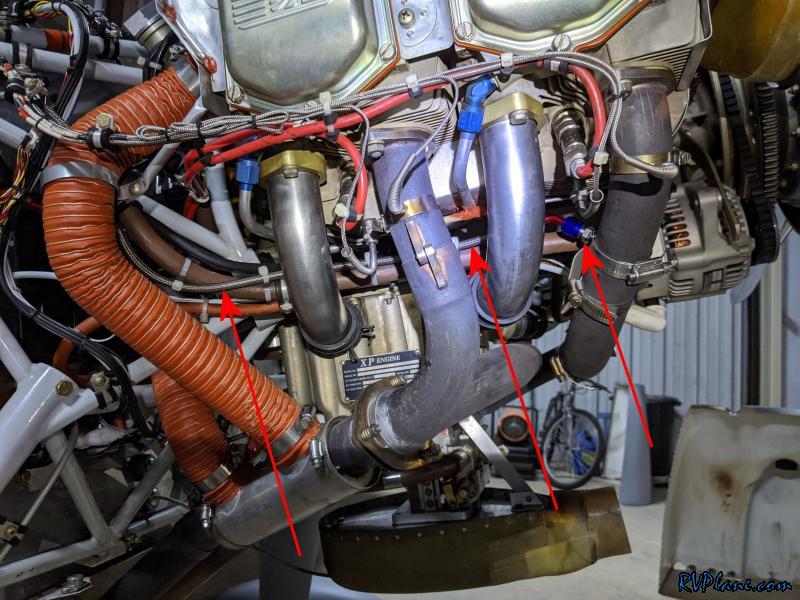 While the left side was easier to drill the injector hole, it was more complicated as far as running the tubing. I didn't like the idea of using the braided tubing, as if it rubbed against other tubing (i.e. brake lines), it could cause them to burst. So I made a hard line from the "Tee" fitting over to the left side of the engine. 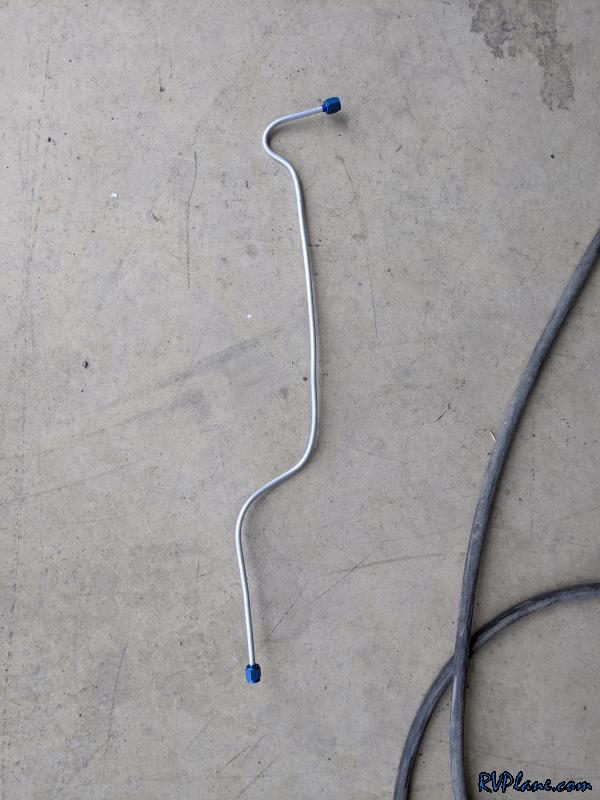 You'll see in a few pics what this is used for, but it's my transition from hard-line to soft-line. 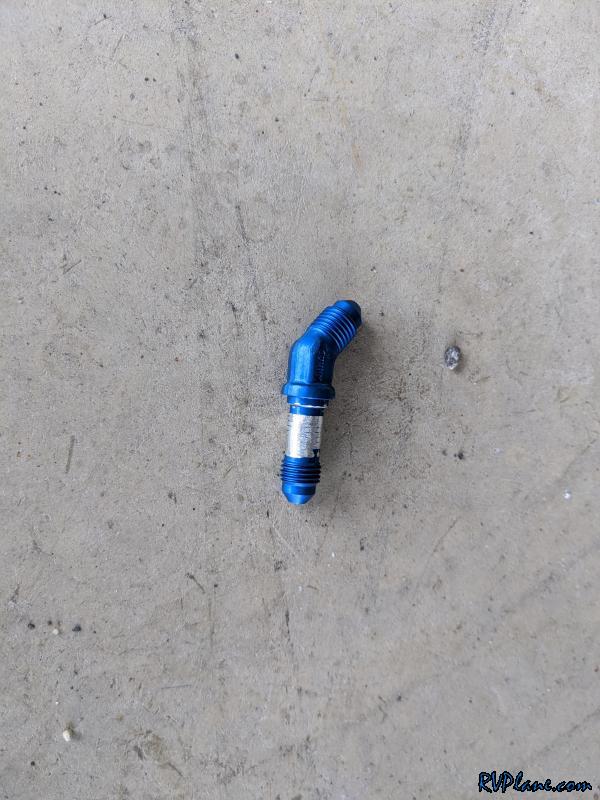 Here the hard line is coming out of the "Tee" fitting. 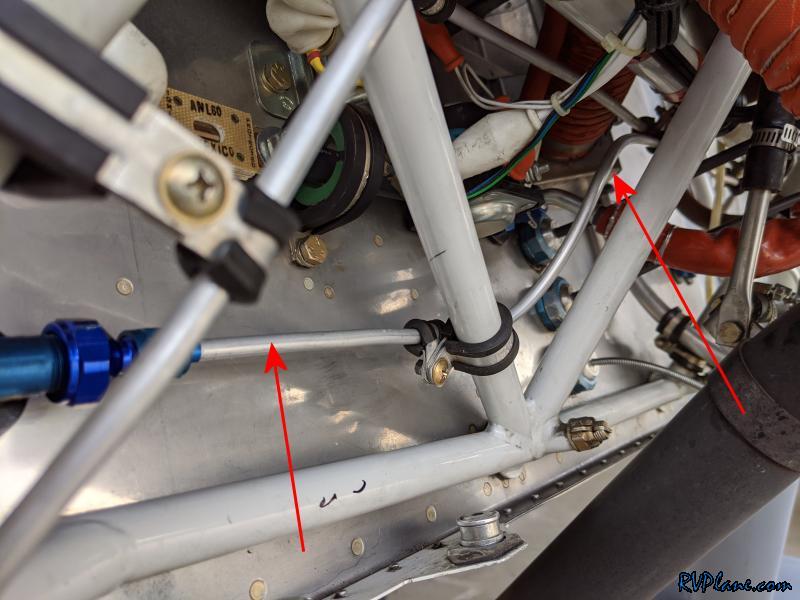 Now you see where the 45 degree fitting is used. I used some adel clamps to secure it to the firewall. 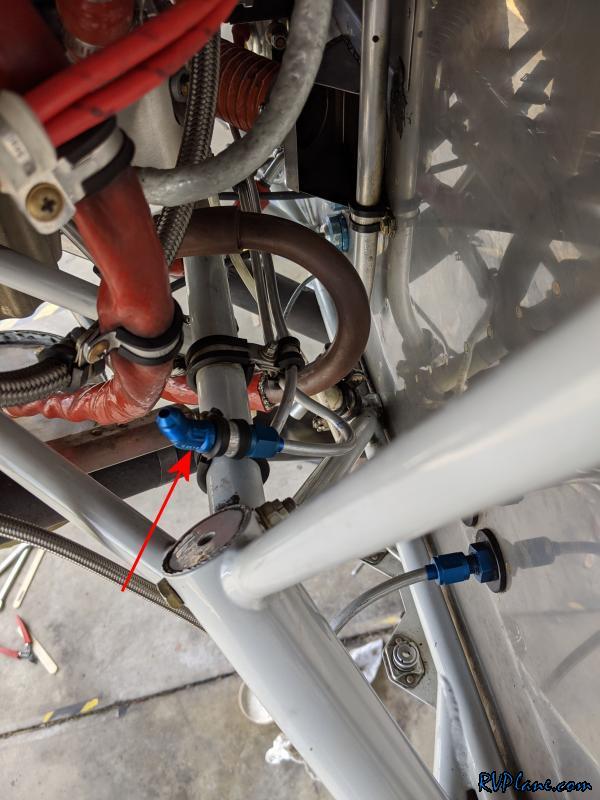 And the transition to the braided line and into the injector. I am super thrilled with how this turned out. 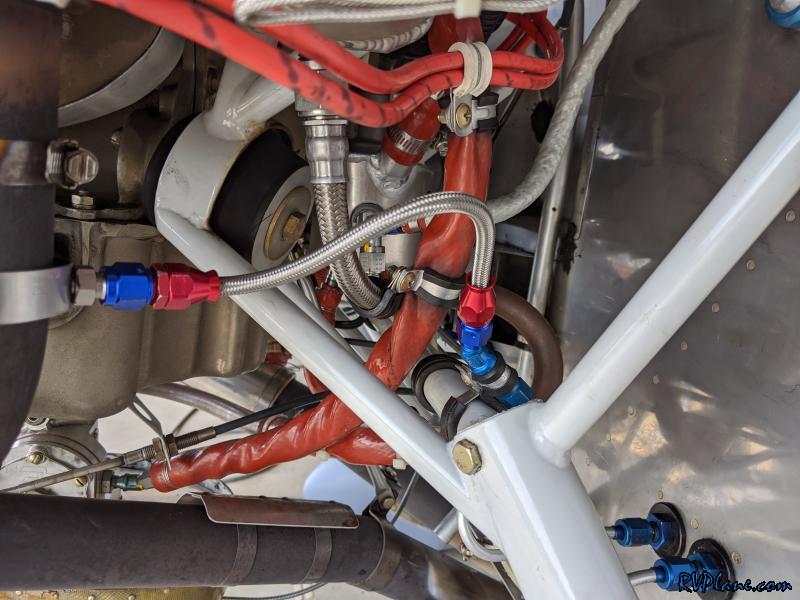 One last view of the left side plumbing. 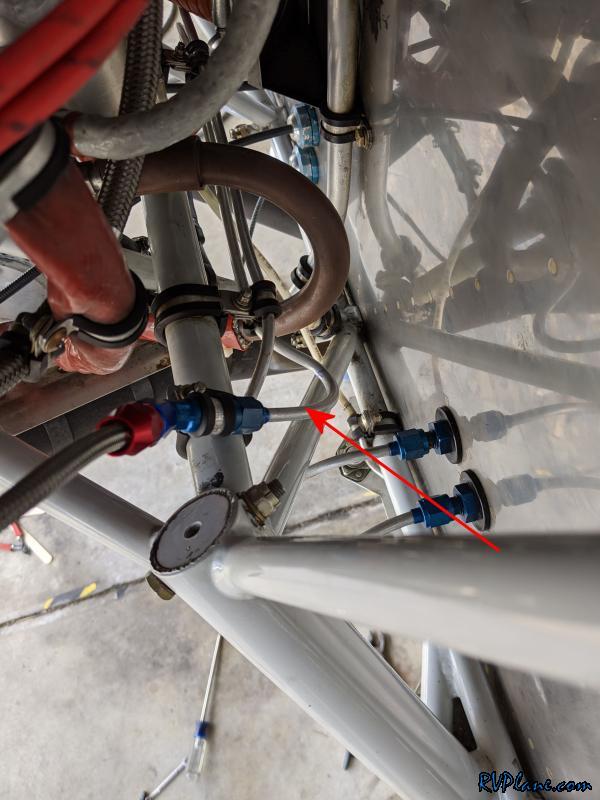 OK, onto the installation on the aft side of the firewall. I bought a AN6 Swivel to 3/8" barb fitting from Pegasus (p/n 3288-06-90, $16.99) to go from the inside portion of the "Tee" fitting and transition to the 3/8 tubing. Safety wire works so much better than a hose clamp. Constant tension around the circumference of the barb, low weight and visually appealing. 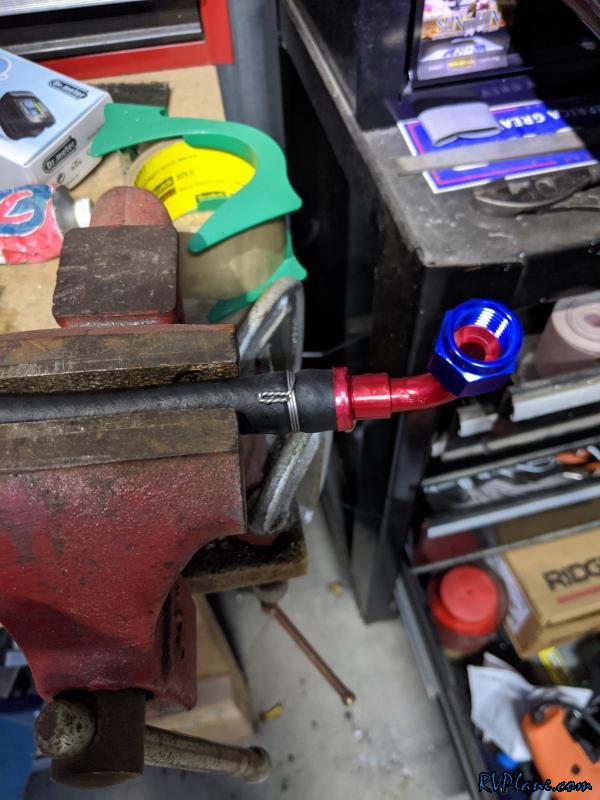 Here is the routing I used. One of the main reasons I picked the firewall penetration point I did was I could use the fuel vent line to attach the tubing to. 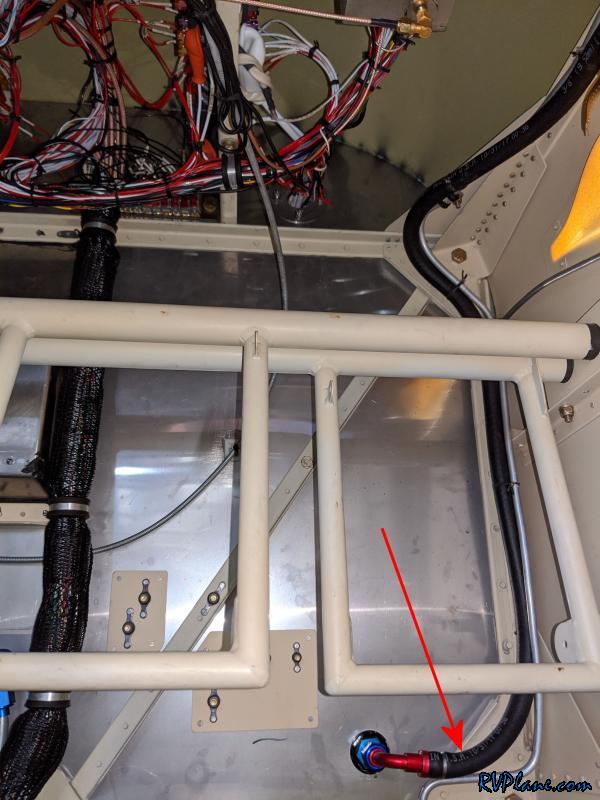 I routed the tubing over the F704 bulkhead and on the underside of the F-721B aft canopy deck. It routes easily behind the canopy latch without interference. 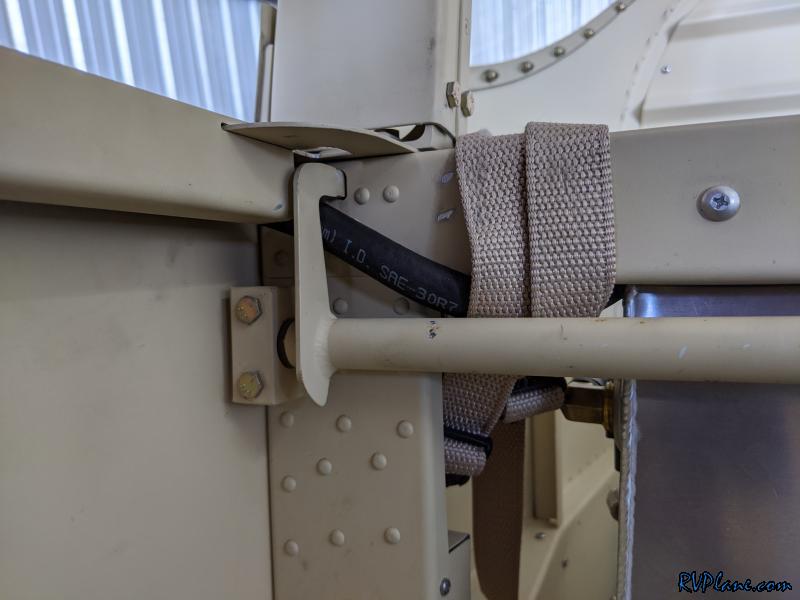 I installed the included nutplates and brackets into the floor. This is where the base of the smoke oil tank attaches to. 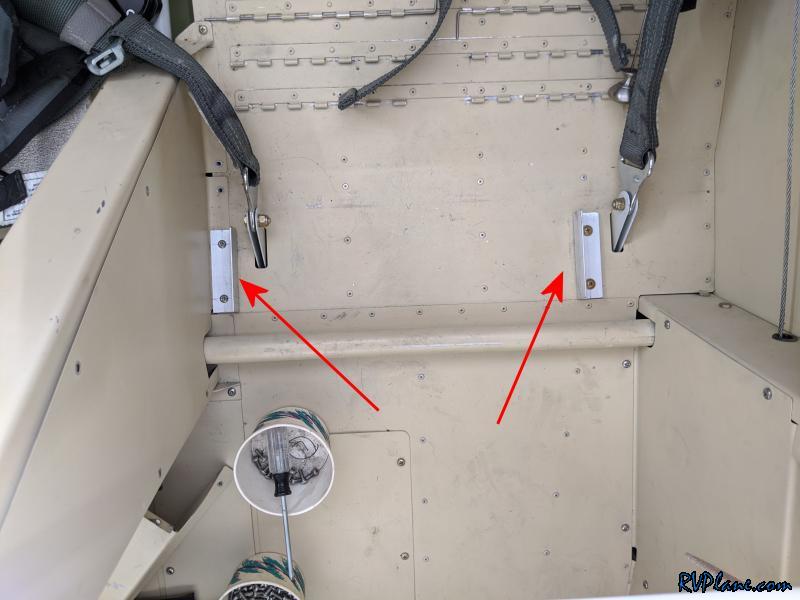 This could be the only thing I screwed up on - I wanted 4 perfectly aligned screws to attach to the top of the oil tank. Clearly I measured once and drilled once. Oh well, you can't see this with the seat installed. 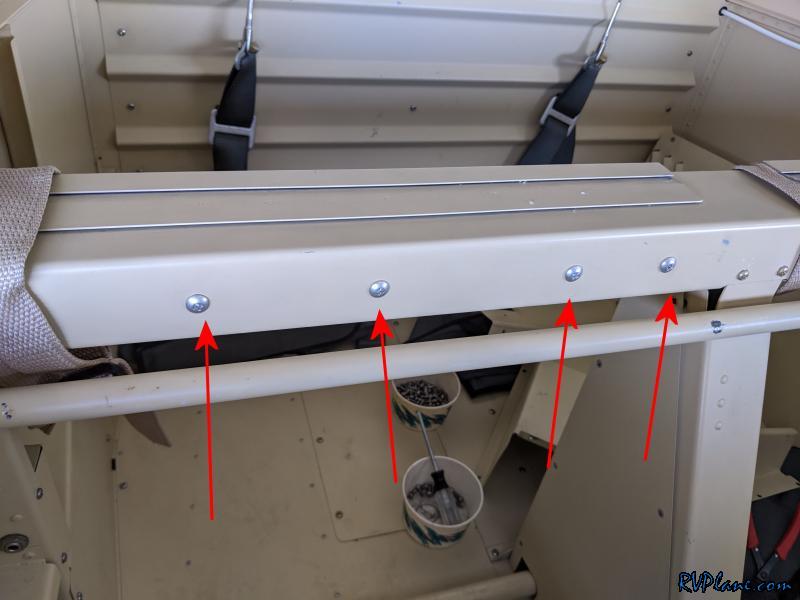 I final installed the pump and used safety wire as clamps. 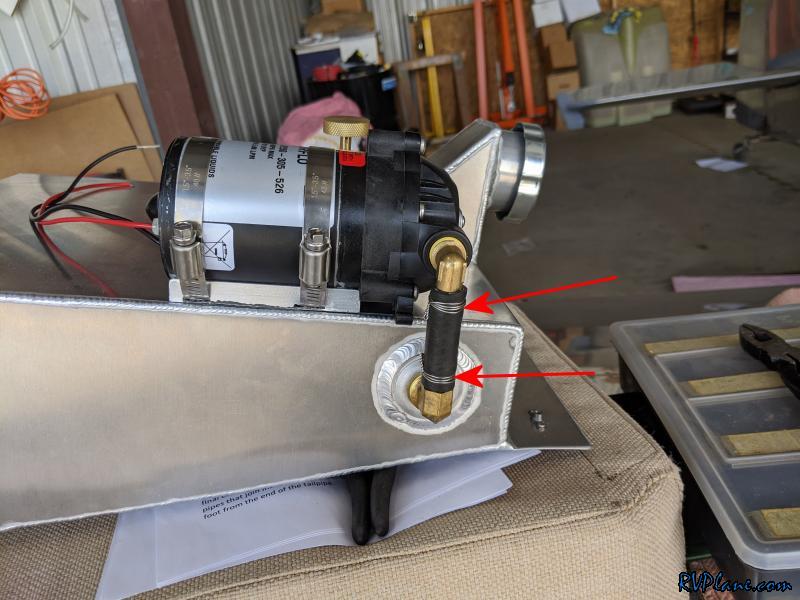 The tubing is connected to the pump now. I really like how this turned out. 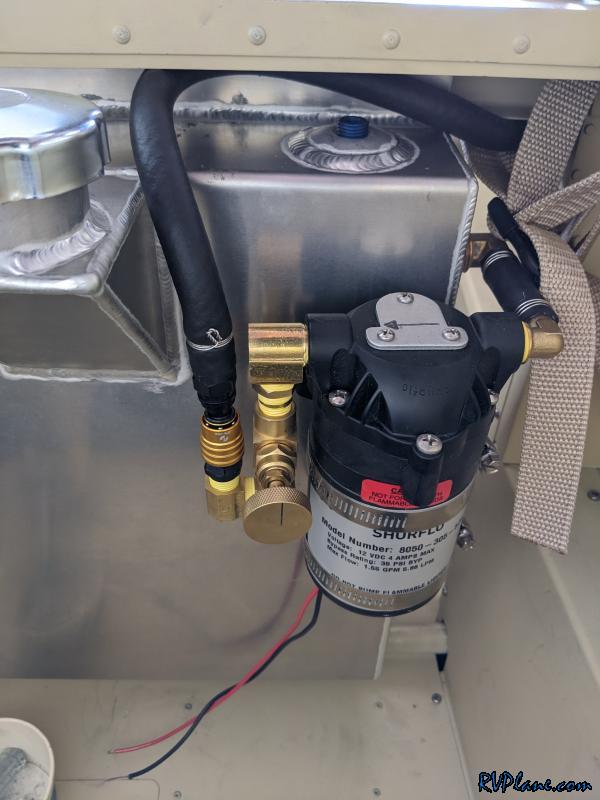 I secured the bottom of the tank with the included hardware. 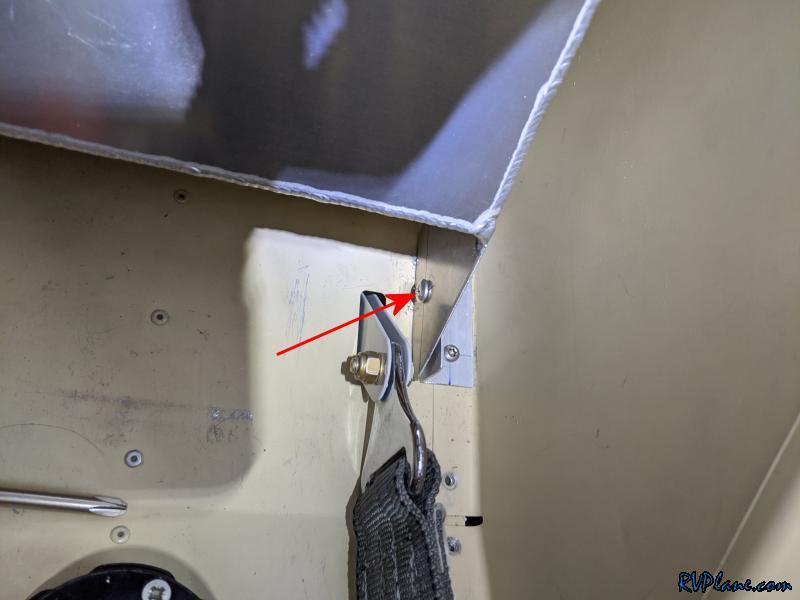 I wasn't happy with any of the existing relays or switches to control my smoke. I had an unused button on my stick that I wanted to use for smoke. I wanted a way to positively tell the system to turn on and off, and with audio feedback for when it is running. I found this controller board on Amazon for a few bucks and it had a programmable PIC microprocessor. So I wrote some code and here is how it functions: 1) When you turn the main "Smoke Arm" switch on, the controller beep two times (connection to the audio panel) letting you know it is armed. 2) If you press the button on the stick twice within 1/2 second, it turns the smoke on. 3) When the smoke is on, the controller beeps once every 2 seconds letting you know the smoke is on. 4) Depressing the button on the stick once disengages the system. Audio feedback of a few consecutive beeps lets you know the smoke system is off. 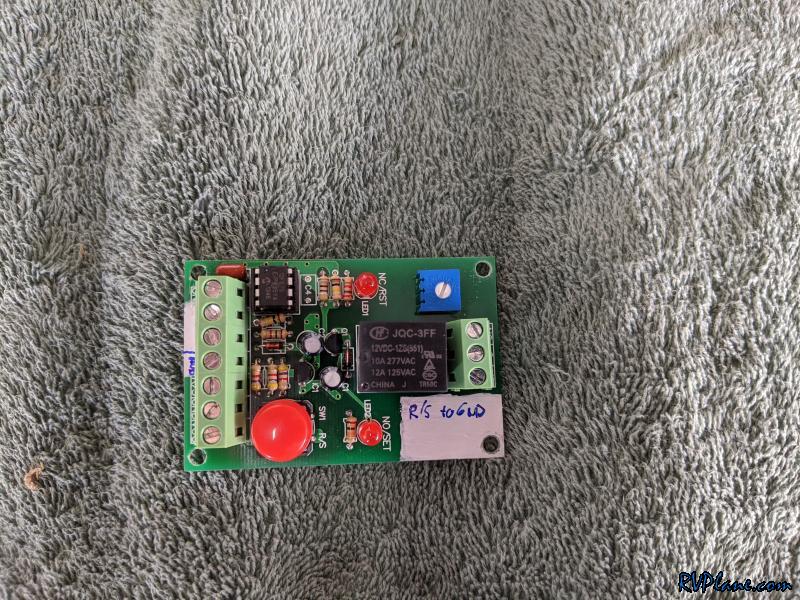 This wasn't a total off-the-shelf solution. I needed to add in a potentiometer (5K) to control the volume to the audio panel, cut a trace and install two jumpers. It worked very well in my home lab. 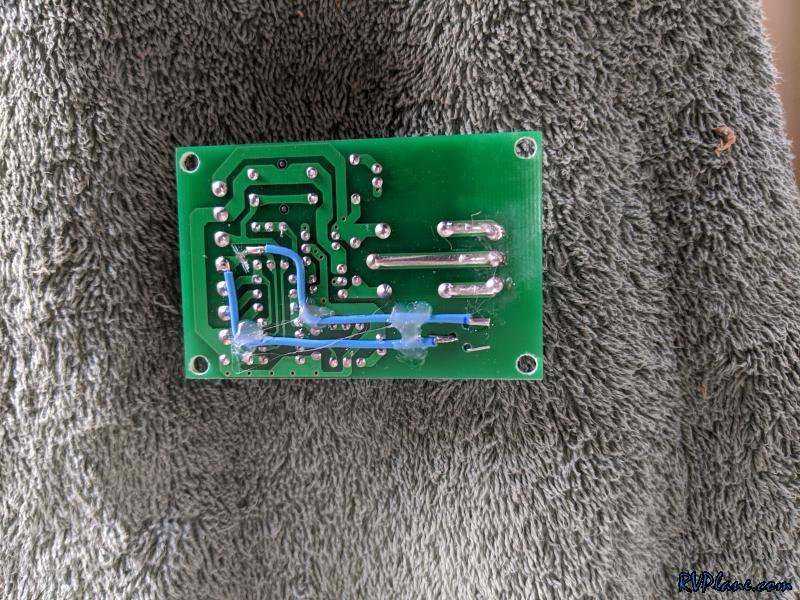 I mounted the controller under the floorboards. 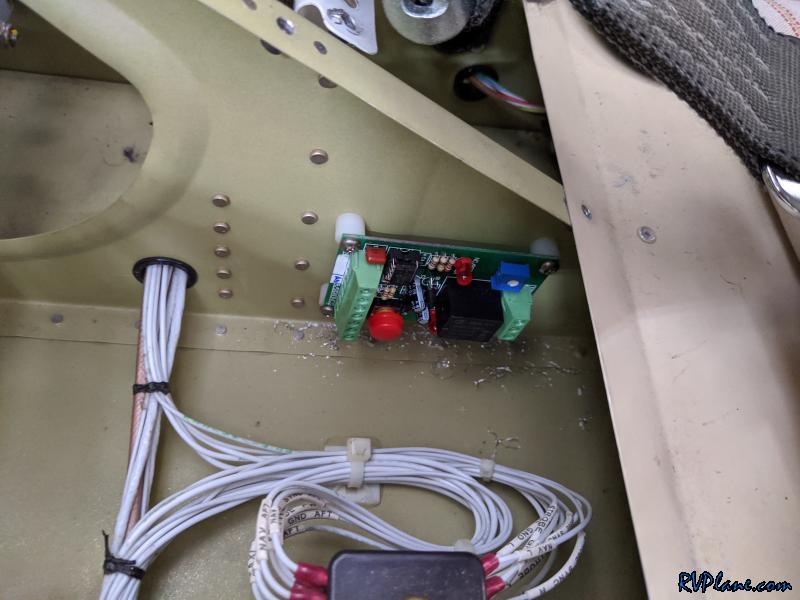 Wasn't too terrible to wire up. The worst wire was the audio panel connection. It was just a long long run!  Lots of parts needed to come off the RV for this installation. I installed it as part of my annual - no reason to take the airplane apart twice is the way I saw it. 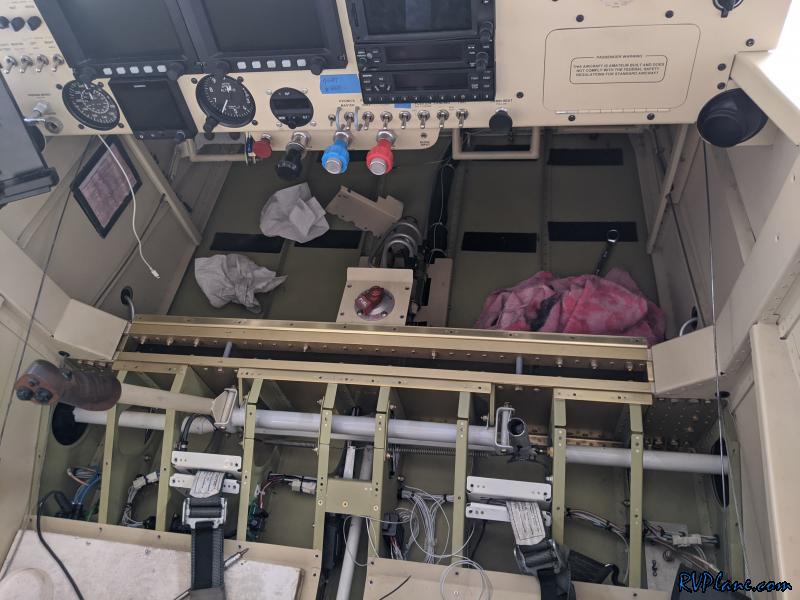 OK, so the smoke system is totally installed! What now? Well I wanted a clever, clean way to fill up the tank. My original thought was to use a SureFlo 110V marine/RV pump, the ones used for the fresh water system. It's basically pressure on demand - when it senses a pressure drop, it turns on. I ended up going a different, more economical route...more on that below. I have a 55G drum of smoke oil, so I needed the pickup to lay on the bottom. I bought a 3/8" barb to 3/8" make NPT fitting and melted some fishing leads to make it weighted. 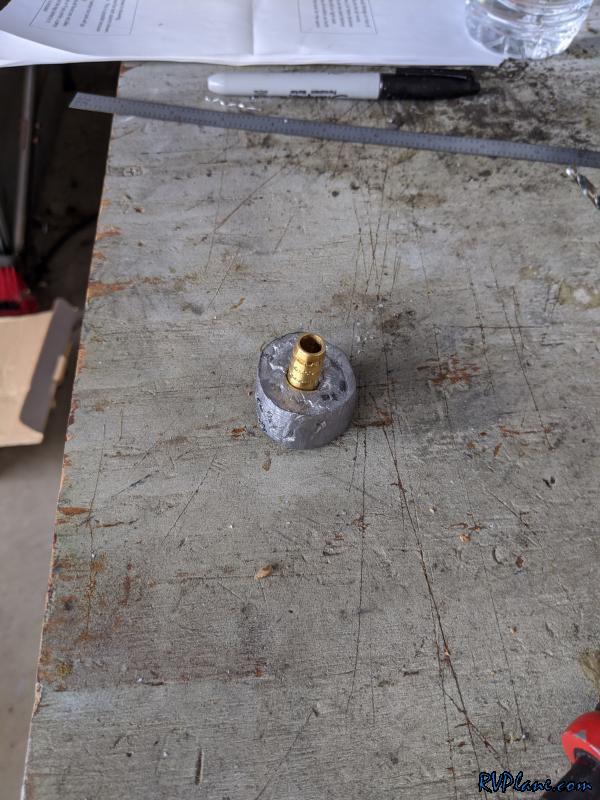 I filed the bottom out so in case it sat flat on the bottom of the drum it would still have suction. 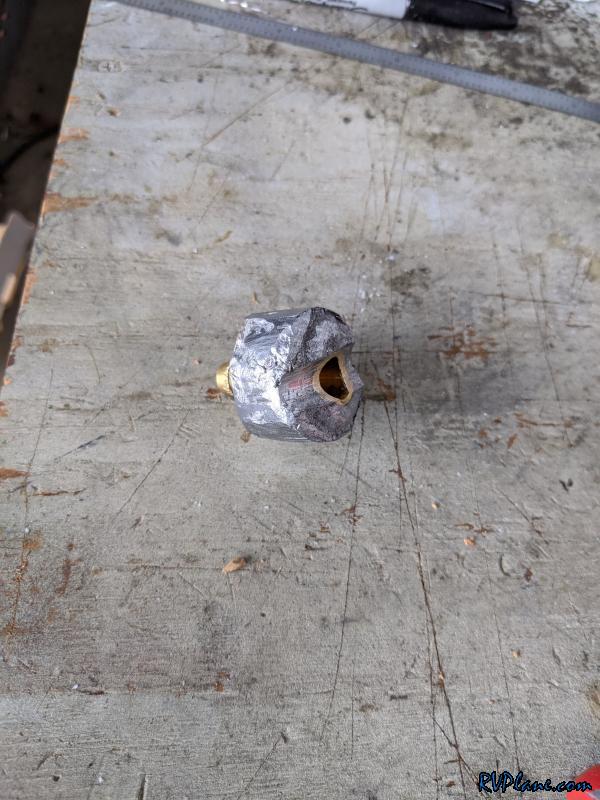 OK, here is the pump I opted for instead of the marine/RV pump - an air operated soda pump. 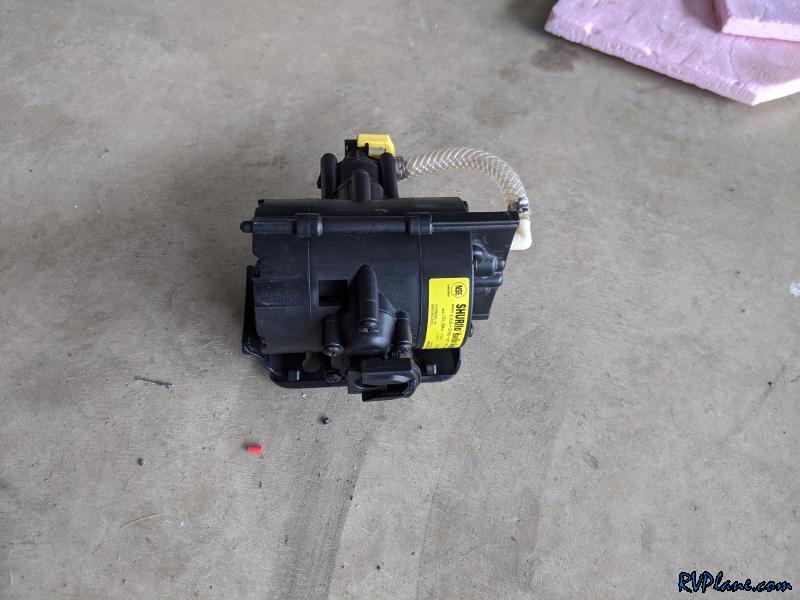 The ShurFlow 166-296-07 has a liquid intake, liquid exit, and CO2/Air intake. The air intake is what is used to power the pump, and it works on demand. Price is right - $35 or so on Ebay. Smells great too - like Sprite! 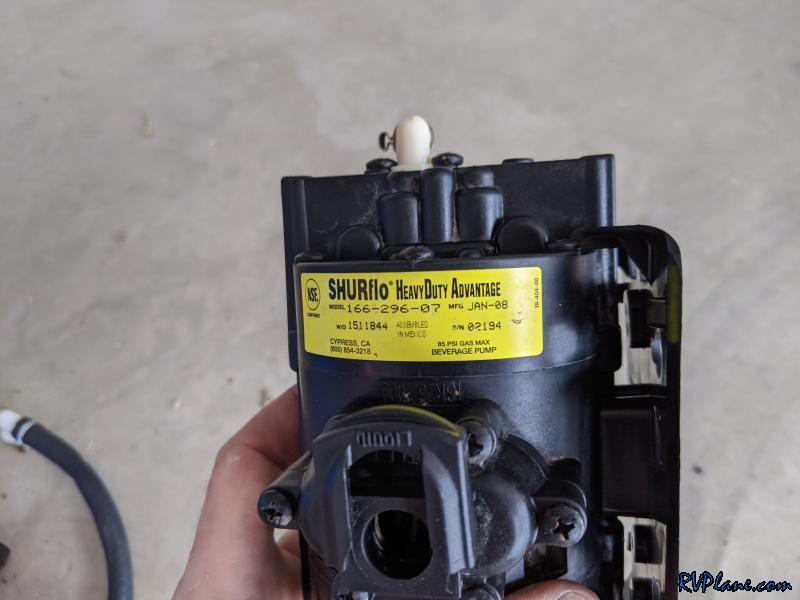 The pump had input pressure recommendations of 60psi or less. So I bought a cheap regulator off of Amazon and made a hookup tube. 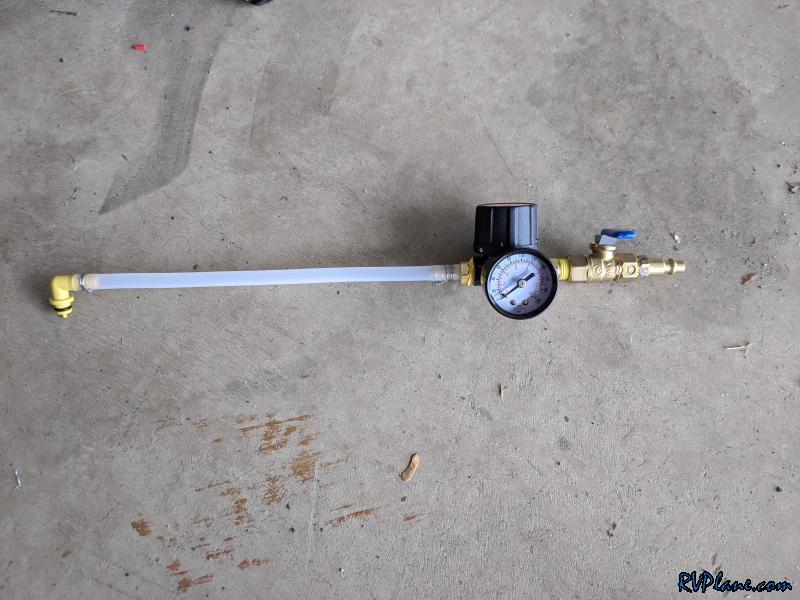 Here is the intake tube - weight on it and at the bottom on my 5G of smoke oil bucket (55G drum is in background).  This is my fill hose - 15' of Goodyear rubber air compressor hose. 1/4" NPT fittings and 3/8" ID. The valve is actuated to fill the tank. **** 7/20/2020 UPDATE **** DO NOT USE THIS HOSE! The smoke oil permeated the rubber material and made a mess on my floor. It seeped out just a little - but the entire hose is covered in an oil slick. I ordered a 25' section of 3/8" ID fuel/oil hose from Amazon. It cost about the same as the 15' section of A/C hose. I was surprised it leaked as much as it did. 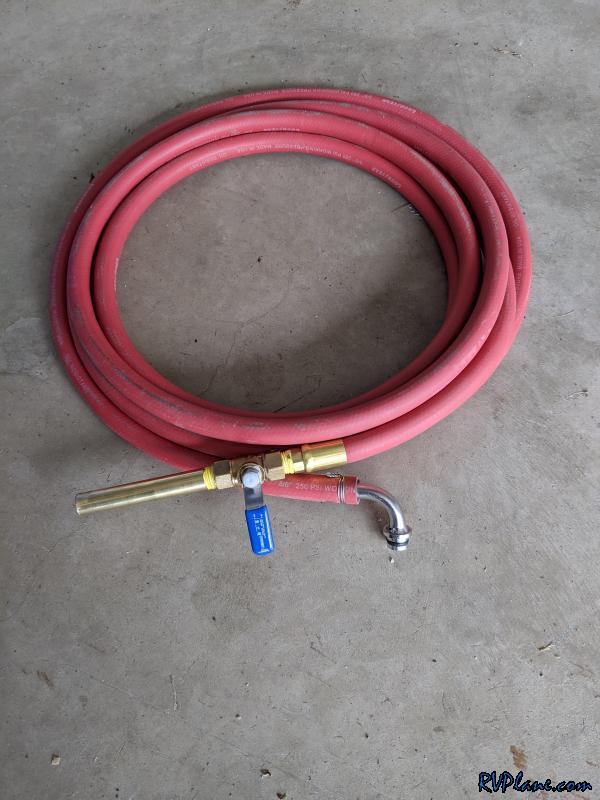 And the complete system. IT WORKED GREAT! I need to clean it up a little and make a permanent mount for on top of the oil tank. But it was a very clean fill - no drip! 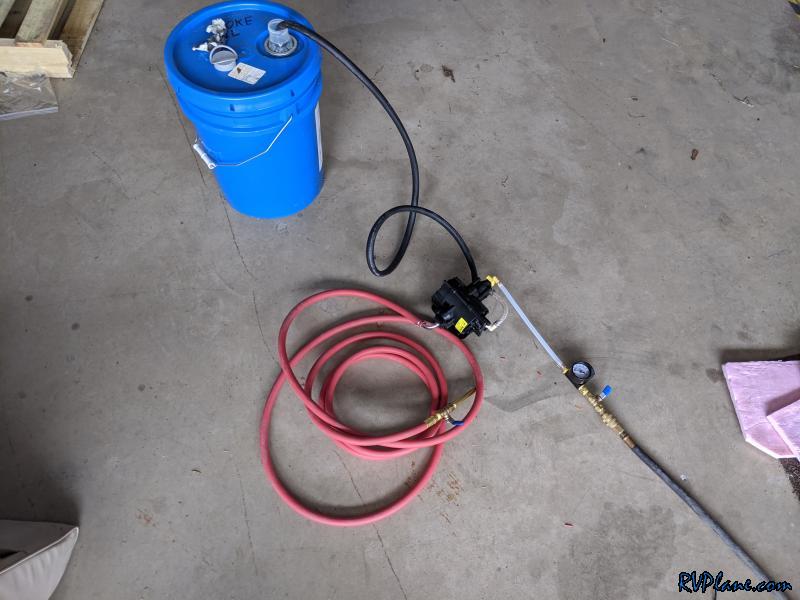 I did a test flight quickly after I filled the tank. My friend Peter was on the ground and said it looked GREAT even though it was a cloudy day. Wow...what a lot of work this project has been. I am thrilled with how it turned out through! SMOKE ON! 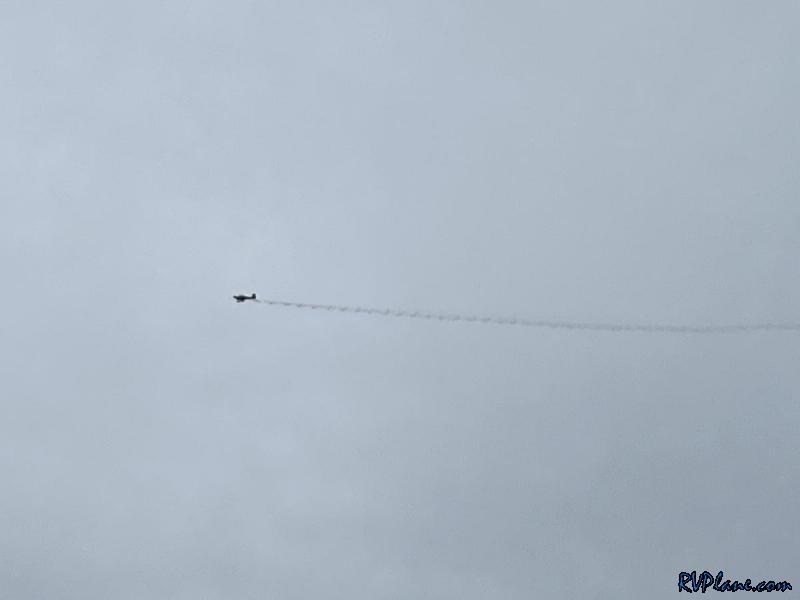
|
|||||
|
http://RVplane.com |
Last Modified: January 31, 2026 |