
|
 |
||||
Today I polished one face of the angle. It was pretty good from the getgo. There were some rough areas that needed some attention. Next I marked a line down the middle. I drilled one hole in it as a starter. All of my holes are perpendicular in the angle. I didn't know whether to do them with respect to the top skin at first. But then I realized that the clecoes are smaller than a #40 and they equalized to the proper angle. I also put a strip of masking tape on the rudder skin that will touch the angle. I didn't want those pesky metal leftovers to put big old scratches in the skins I have tried so hard to keep clean. I clecoed the first hole and started to drill down the line. I started with my air drill but that thing consumed way too much air for my little air compressor for that thick angle. It took it at least two cycles per hole. After the 3rd hole, I needed an alternative. I got my 110V power drill out and did the rest of the holes. I sometimes forget how spoiled I am with the air drill. It is so lightweight compared to other drills. Once everything was drilled, I removed all of the clecoes to deburr the angle. I did another pass of scotchbrite pad to make sure it was smooth. I then clecoed the skin back on to see how the fit was. For 99% of the trailing edge it was perfect. There were 3 holes up top that didn't fit right. I took them out and it turned out that they were the first three holes I did. Under closer inspection, the countersinks were not deep on one side as they should of been. I took the countersink kit and wacked them, reclecoed, and it was perfect! Next I took the AEX wedge and roughed it up with a scotch brite pad. I did this to get the 'bumps' of the primer out and also to give something for the pro-seal to grab onto. I then had a sinking feeling in my stomach that I forgot to do something. I somehow in the mad rush to rivet forgot to take the blue vinyl off of the insides of the skins! DOH! I knew that it was pretty tight getting into the rudder now. Turns out I was able to get all the vinyl off by sliding my hands into the skins. It wasn't a big deal at all except the ones on the ends. I am glad I don't work out anymore of else I would of needed someone else with skinny arms. Next I needed to figure out a good way to make the pro-seal adventure as trouble-free as possible. I had some 1/2 plywood I cut into small chunks to keep the top and bottom edges seperated. In the middle. I tied a string to the ceiling, and then around one of the holes in the upper skin to open the sucker up. There is a ton of clearance for everything I need to do. My plan now is: 1) MEK the insides of the skin 2) MEK the AEX wedge. 2) apply pro-seal to where the rivets on the trailing edge of the stiffener meet. 4) Apply Pro-Seal to bottom side of the wedge. 5) Mate the wedge with the bottom skin (as oriented) 6) spread pro-seal to the top of the wedge. 7) put the uppermost skin down and cleco the whole thing to the aluminum angle. I think that proper preparation will make this whole process a breeze. Too many mistakes with building come with rushing things or not having a plan. This is the first time that you have time to race against in the building process - 30 minutes from what I understand. 2" masking tape to protect my skin.... 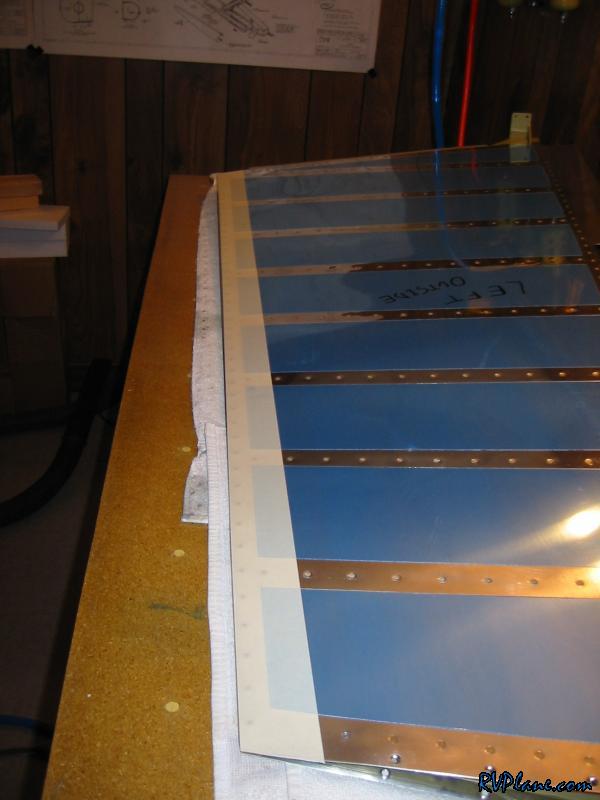 The first cleco...lots of drilling today. 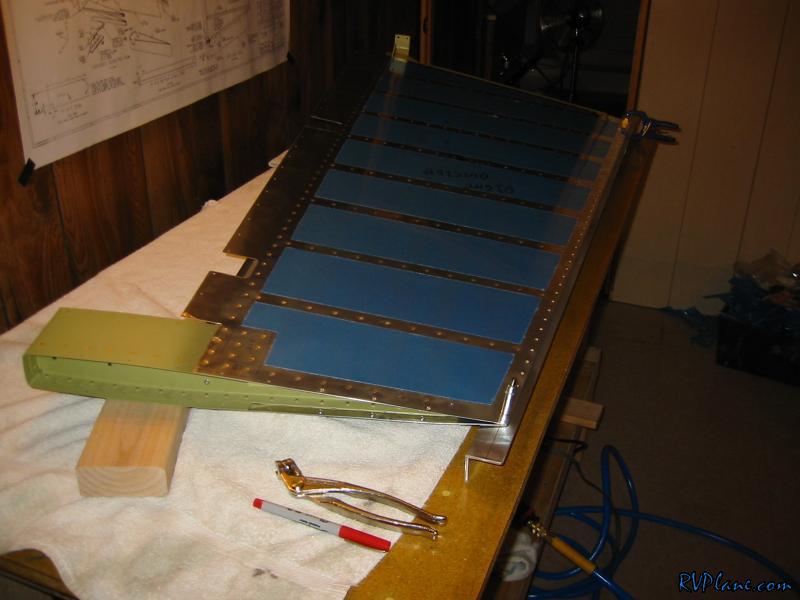 All done. You may ask why I opted to put my line of holes down the middle of the aluminum angle. Why didn't I have the edges hugging each other? I am not going to let the cat out of the bag yet, but I have some idea in the works. 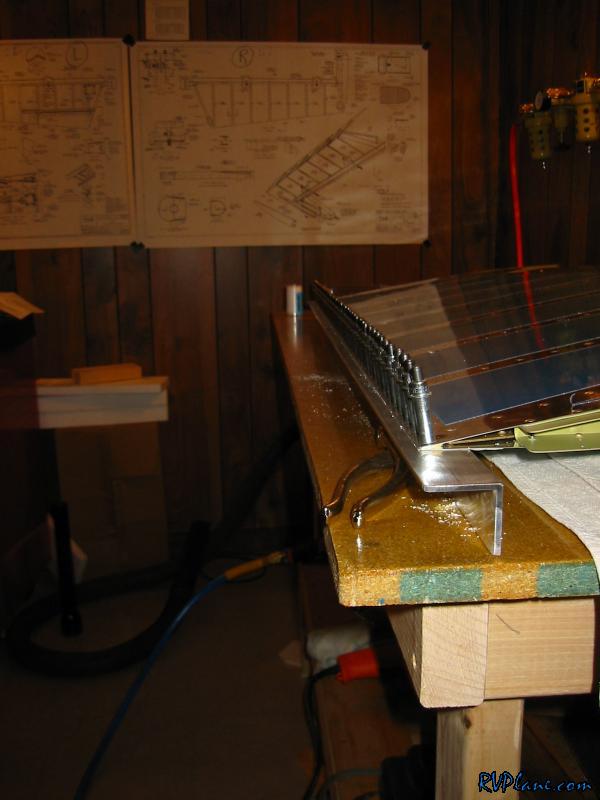 A gratuitous shot of me bending over getting the vinyl out of the rudder. 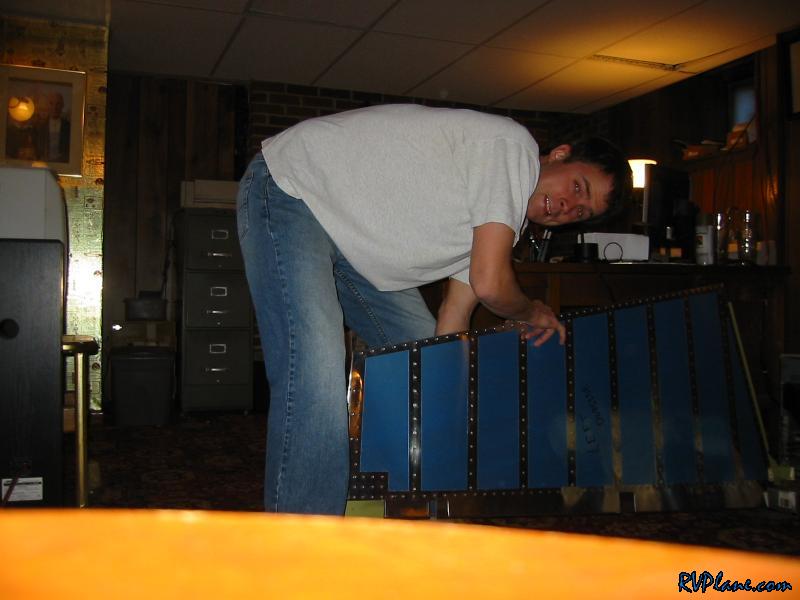 This is how the tip of the trailing edge looked. There is an ever so slight gap that wasn't consistent with the gap of the rest of the edge. Something was up. Did I not fix all of the #40/#30 dimple mixups? Is the skin bent? Are the countersinks not deep enough??? 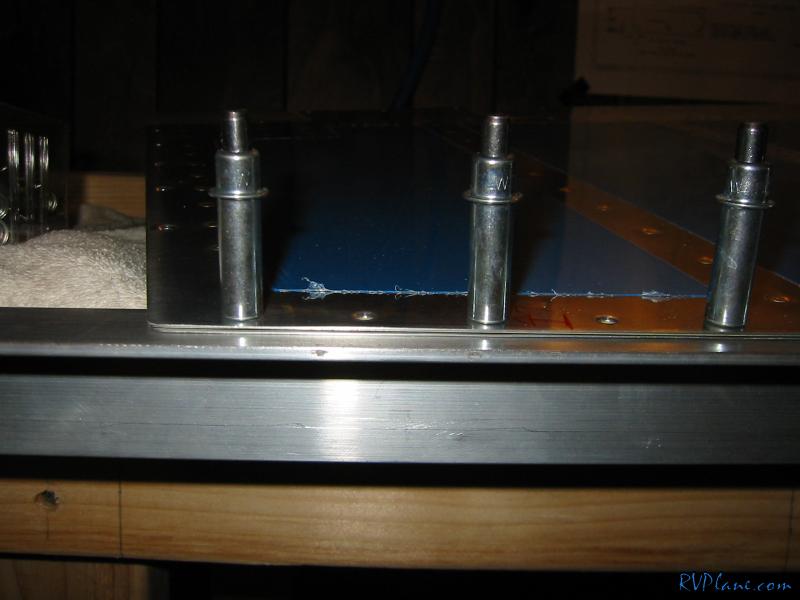 Turns out that these 3 holes were not countersunk properly. I probably wasn;t holding the set flush with the angle when I did it. When I re-did it, I could see that metal was being cut back on the trailing edge and not the leading edge. 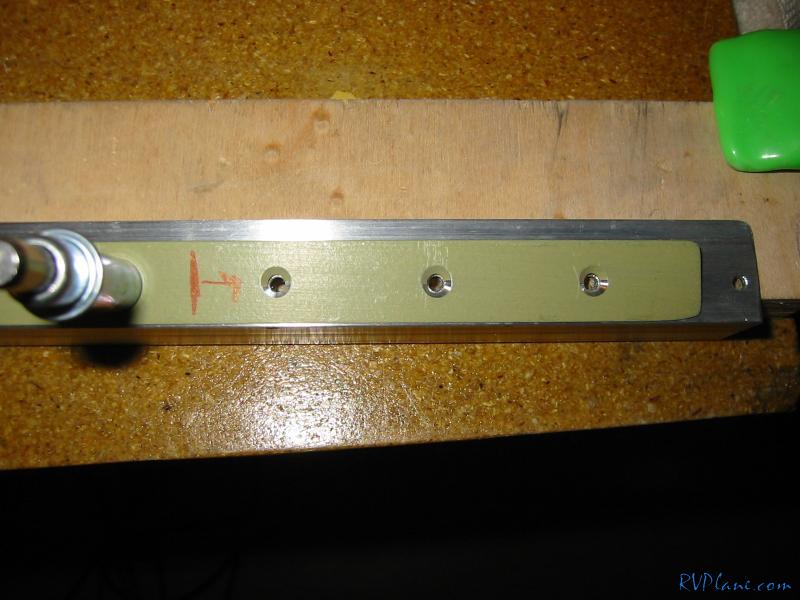 This is what it looked like after. I can't imagine it looking any better. 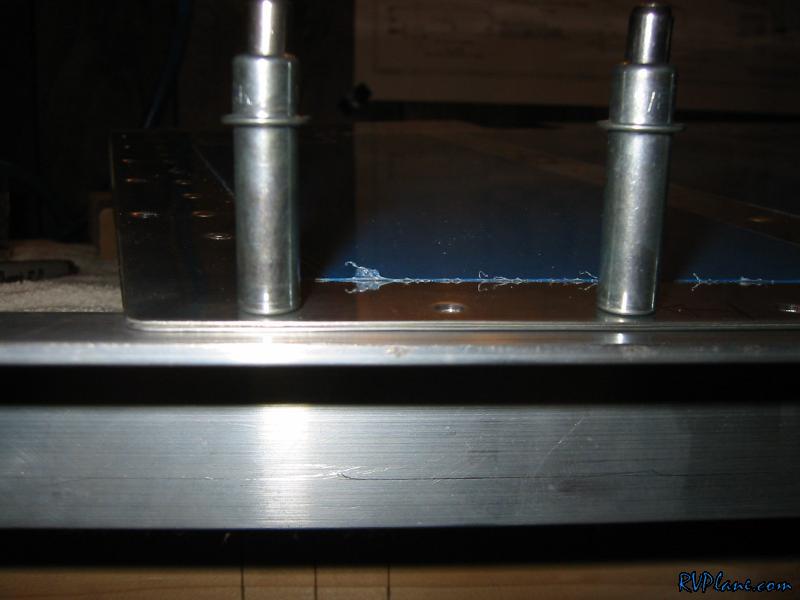 To keep the trailing edge open while I use ProSeal, I first opened up each side with 1/2" plywood bits. 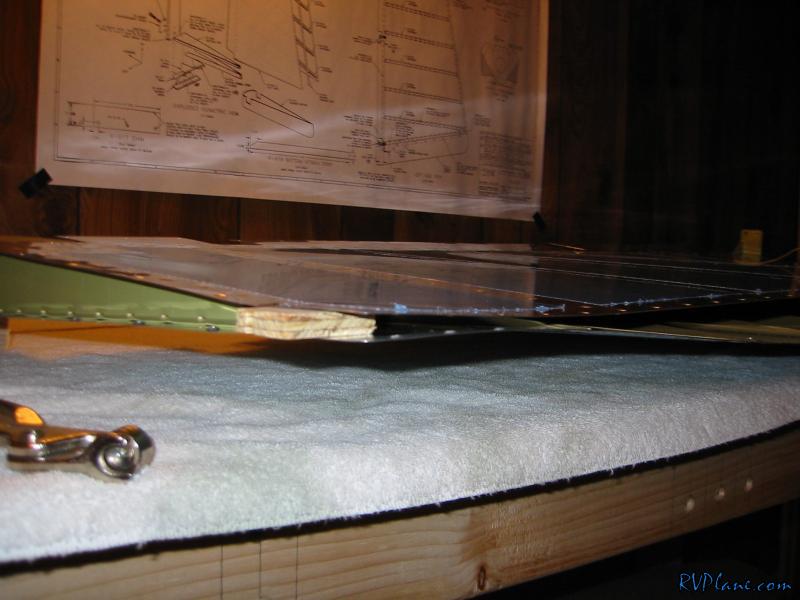 Then I ran a line up to the ceiling to hold the middle of the skin open. This gave me a ton of access to the insides of the skin, and a easy way to close them back up when the goop goes in. 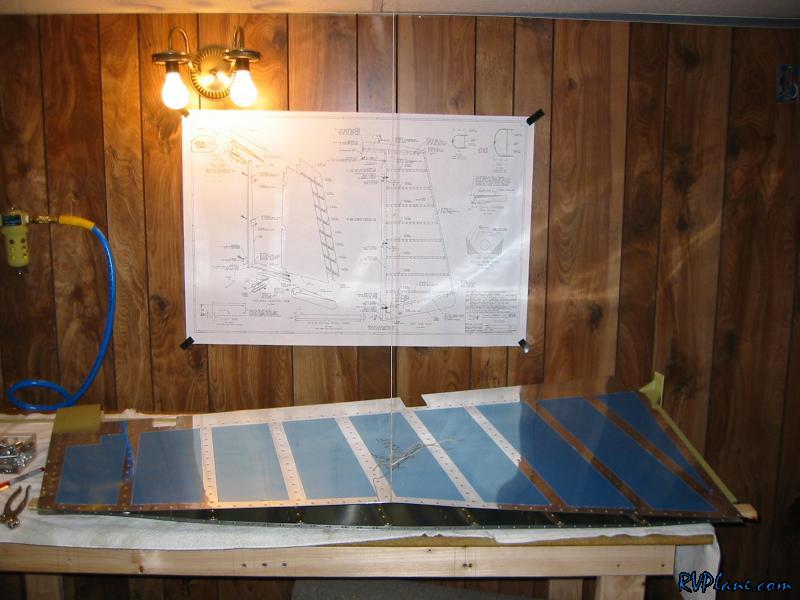
|
|||||
|
http://RVplane.com |
Last Modified: January 31, 2026 |