Build Time:
2236 Hours
Flying & Maintenance Time:
1732 Hours
Builders Log
Builder Resources
|
Tools....just as with everything else in for the RV, everyone has their own opinion as to what works best. Some people get away with the bare minimum of tools, others have everything - I fall into the 'have _almost_ everything' category - there is nothing like having the right tool for the job. The one thing that is for sure is that you can't just go out to the local Home Depot and buy most this stuff (Unless you live around one of the rare Home Depots with the infamous Aviation Isle ;-). Most people start out with a RV builders toolkit - Avery, Cleveland and Clear Air tools all provide these kits. The kits are pretty complete. They come with most all the tools you will need to finish your RV.
List of aircraft tool suppliers:
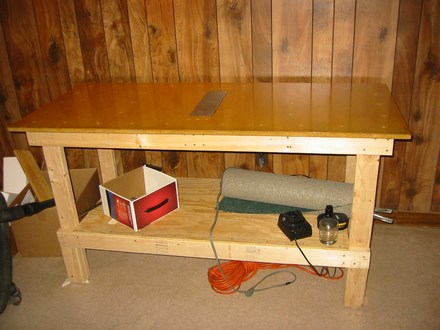
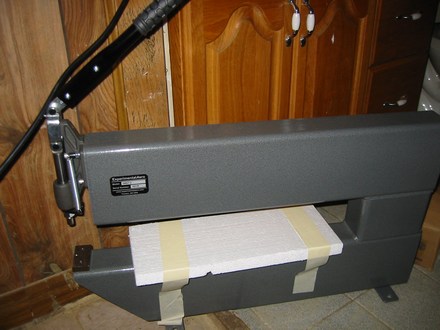
Workbench: If you are going to go through the effort to build an airplane, the least you can do is build a nice workbench. This workbench is modeled after the EAA1000 workbench, with the addition of a 2" overhang around the perimeter. I also flush mounted a backriveting plate in the middle and put a nice polyeurathane coating on the top. I plan on building at least one more of these before I finish the project. Besides airplane building, it is a great all around workbench.
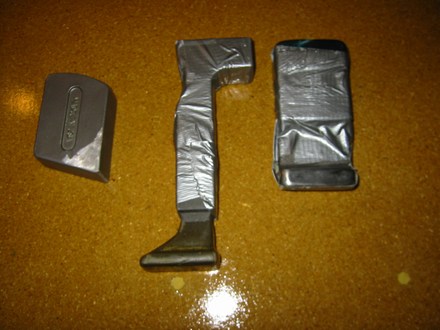
Bucking Bars: These are the three that came with the avery kit. They are sold according to weight and size - LEFT: Avery #610, $19, 1.5 lbs, MIDDLE: Avery #620, $24, 2 lbs, RIGHT: Avery #615, $21, 1.5 lbs.You can see that the one on the left was polished on the lower right corner because the polished corners that came with this bucking bar werent sufficient for some spaces. Also, the other two bucking bars are covered in duct tape to protect the primer inside the skins.
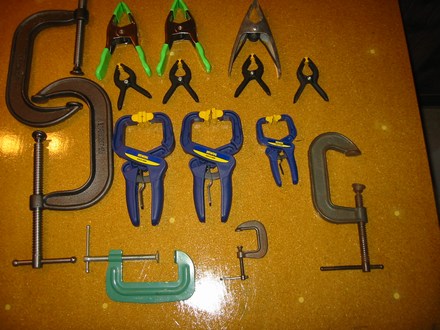
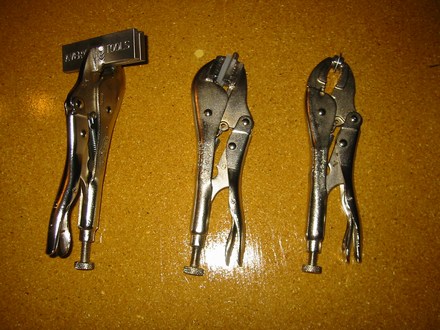
Clamps: These are an assortment of clamps that have seen the project in one way or another. Seems you can never have as many clamps as you need or the right one. The Irwin (3 blue ones in the middle, Home Depot) are very very userful for getting around spars, etc..
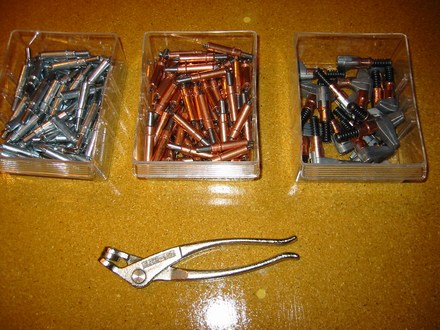
Clecos: These guys are used to hold together layers of metal. You use the cleco pliers (below) to actuate the spring mechanism, insert it into a hole, and release the spring. Voi La - your metal is now clamped together. The bucket on the right has cleco clamps. These are basically mini clamps that are actuated by the cleco pliers. Handy for holding parts together before drilling.
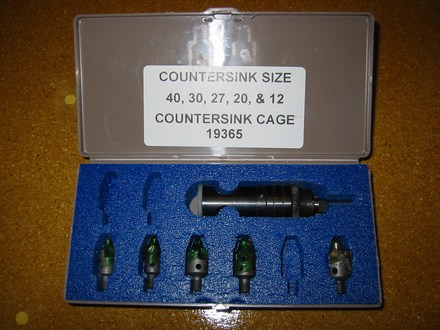
Countersink Kit: This is the Avery countersink kit with ball bearing cage. When you can't dimple (material too thick), this is the bad boy you use to remove metal to make rivets or dimpled skins sit flush. The avery kit comes with the countersink cage (top) with ball bearings and 4 countersink bits - #40, #30, #27, #20 and #12. Be aware that countersinking fiberglass rips up countersink bits. Get another set and mark them for use only with fiberglass so you don't get crappy looking countersinks after you get your tips on!
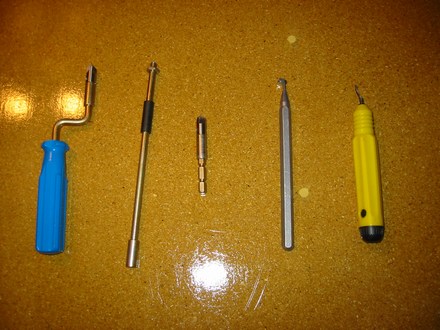
Deburring: With all of the cool tools you get to build a RV, unfortunately you will probably spend most of your time with these. Starting from the left, there is the Avery Speed Deburring tool, the 6" extension for the tool, the Avery Hex Adapter with deburring tip, the Avery Double Edge Deburring Tool and finally the Royal Multi-Burr tool. The Avery Hex Adapter is supposed to allow you to use a drill on low speed to debur, I havent used it yet other than twisting it in tight spots with my hand. The double edge deburring tool hasn't seen the light of the workshop much. I find that the multi-burr tool works a lot better, even though it would seem it would take twice as long. The royal multi-burr tool includes 5 different blades. Each blade has its own qualities - while there is no perfect b;ade for all tasks, I tend to use about 2 of them frequently.
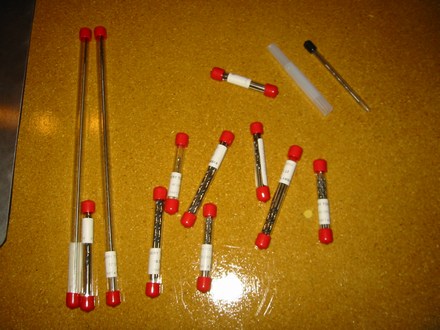
Drill Bits: You need a number of high quality drill bits to build and airplane. Pictured is what comes with the Avery kit (minus the reamers, upper right). On the left are a #40 and #30 12" drill bits. On the top right are a #40 and #30 reamers.
Angle Drill Kit: This Avery kit is used to drill in tight spots where you don't have a straight shot with the drill. It comes with a number of different size and length bits.

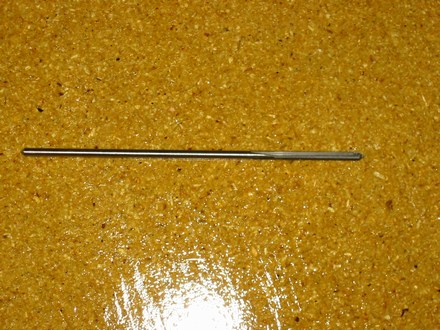
Reamer: Reamers are used when you need to enlarge a hole ever so slightly to high precision. For example, you could use a #40 reamer to match drill the pre-punched #41 holes that Van's gives ya.
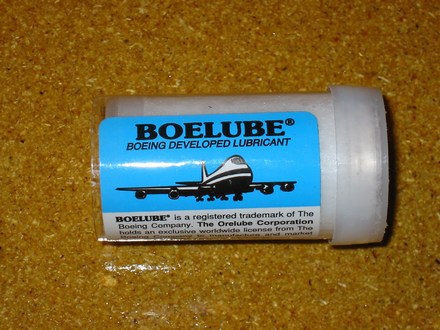
Boelube: From Boeing (hence the name), this is a wax-like substance used to lubricate drill bits, threads, etc. I have read that it is very helpful in mating the wings with the fuselage as a lubricant for the main wing spars to the fuselage bulkhead. I have heard that beeswax works is a good alternative.
Drill Stops: It's no surprise to what these are used for - making sure that you don't drill too far and ruin something behind the hole you want to make. Some people opt to use them for every drill operation. The way I see it is that when you drill, if the bit comes out the other side with so much force that you need one of these, then you are pushing WAY TOO HARD. In fact, if the drill bit surges at all when it is through the material, you are pushing too hard. I didn't know this until my RV builders class.

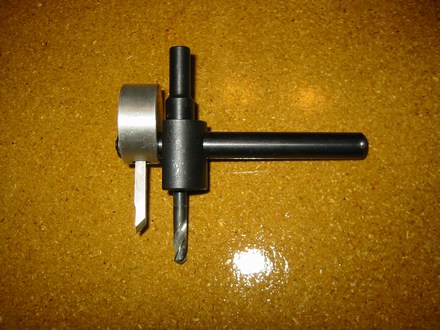
Fly Cutter: This is used in a drill press to make holes. I picked this up at Sears. Use this only in a drill press at very low speeds (300 RPM). This is a nasty tool that would mangle you nicely if you winked at it the wrong way!
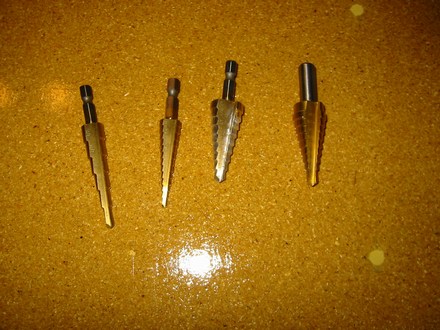
Unibits: I had never used one of these before. In fact, my only exposure to them was seeing Pauly Jr. on Orange County Choppers use nothing but one of these to build a bike. Avery gives you one of them - the other three I picked up elsewhere. The Unibit it used to enlarge holes without tearing them up. Have you ever tried to use a 1/2" drill bit to make a 3/8" hole bigger? It didn't take long for that 1/2" bit to be drug into the hole and you cursing. The Unibits make hole enlargment a non event.
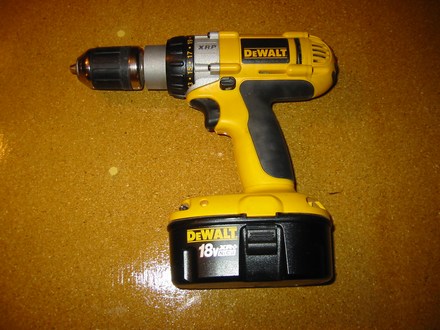
Cordless Drill: This is a 18V DeWalt cordless hammer drill. I had it well before the project started. I do not use it that much as I opt for the air drill. I also don't want to be constantly wearing out the battery by charging it every night when I have power at my beckoning. I use the air drill more not only because of that fact, but more importantly, it is very very light. It may not seem like a big deal, but a drill bit digs away a lot better when it does its work on its own and not a lot of force pushing behind it.
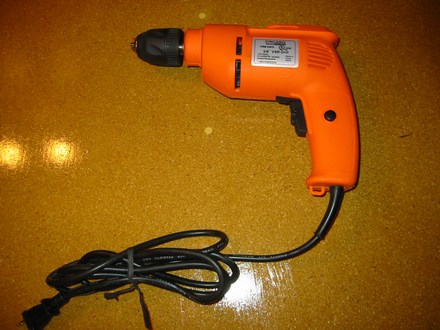
Electric Drill: This is a Harbor Frieght $10 drill. It isn't worth much more than that, but it is nice to have an electric drill when you don't want to power up the air compressor for a handful of holes. Now, a lot of people don't use electric drills for building airplanes. I have heard two theories on this. The first is that the electric drill doesn't spin fast enough for the drill bits to makes holes as clean as they could. The other is that if you slice that 110V power cord on a rough aluminum edge, you could get quite a shock.
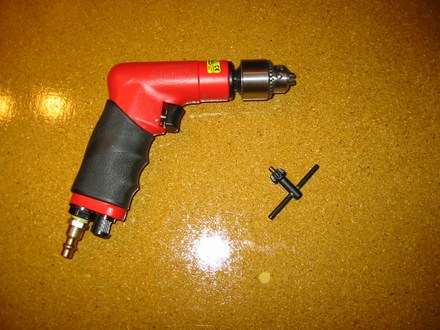
Air Drill: This is the Sioux air drill that came with the Avery kit. This drill is light and comfortable. I have no squawks with it.
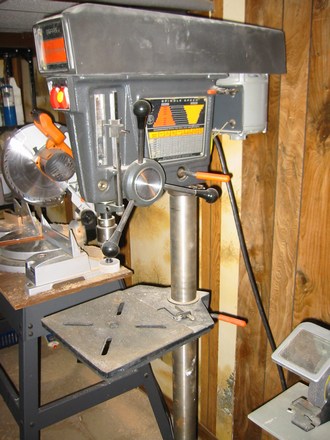
Drill Press: This was a freebe from my grandfathers tools. I would say that this tool is a must for any RV builder. You can see I have a small scotchbrite wheel mounted on it. This is very handy in deburring smaller parts.
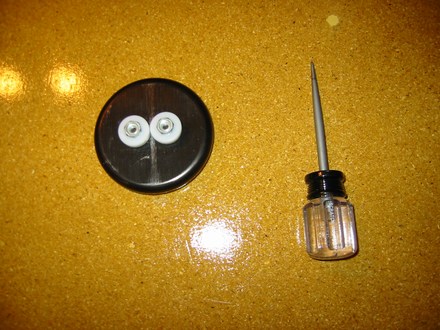
Edge Roller and Awl: On the left is the Avery edge roller. If you have to make a lap joint (two skins on top of each other with a rib below), you might notice that the top skins edge will curl upward once you rivet it. To keep that from happening, roll it with this before you put it all together to make it sit flush when completed. On the right is a Awl from Sears. I use this mainly to enlarge holes if some primer fills them in a little and the rivet won't fit.
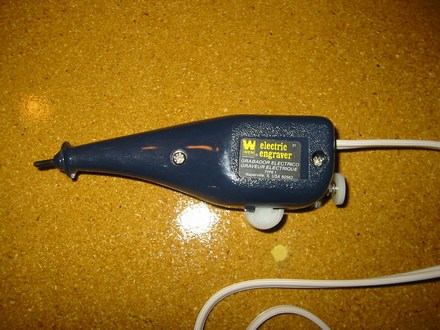
Electric Engraver: To mark parts, you can't just scratch part markings in aluminum because it will lead to a eventual crack along the scratch. The solution is to either use a series of small dents or use an electric engraver to mark your parts before you prime. With most primers, there is a sufficient amount of surface prep that can be anything from acetone to MEK, alumiprep and alodone. If you had any sort of marking on the part, these prep chemicals tend to wipe it right off. This thing is a sweet tool that works great.
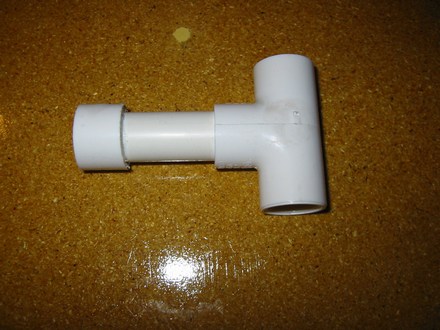
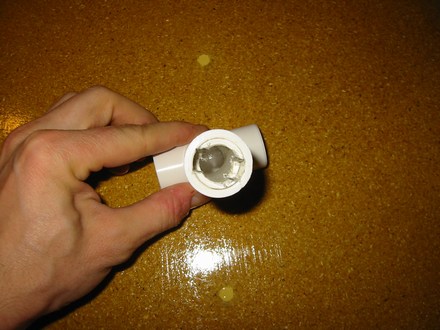
Eyebolt Tool: This is a homemade (duh) tool made out of 1/2" PVC pipe. It is used to screw in eye bolts without damaging the head.
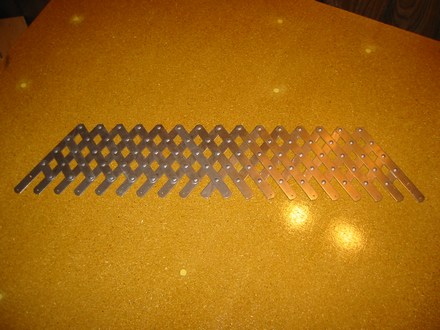
Fan Spacer: Used to evenly mark holes. If you know when the end holes are, you can easily mark the in-between ones with this.
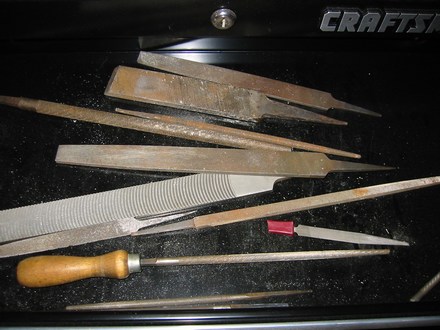
Files: The only file here that I didn't have before is a Avery Vixen file (middle, the one with the big teath). If you are working with metal, you are going to need any number of files.
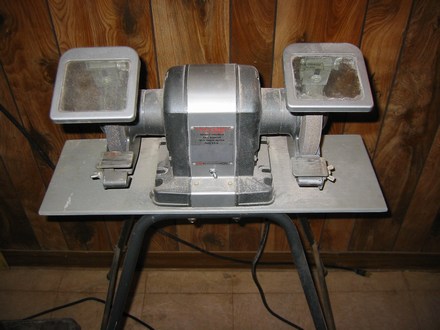
Bench Grinder: This is another freebe from my grandfathers collection. On the left if a normal grinding wheel and on the right is the scotchbrite wheel. The scotchbrite wheel really kicks ass for working with aluminum. This is used daily when fabricating. One word of caution here - don't ever use the scotchbrite wheel on anything other than aluminum. The reason for this is because if you use it on steel, some pieces of steel will become embedded into the wheel, and when you go to use it on aluminum, some steel becomes embedded into the aluminum, leading to disimiliar metal corrosion. Now, with all of that said, of course I used mine for steel parts before I knew this information! The good news about that is it was between the empennage and the wings that I used it and found out I shouldn't, so no airplane parts were harmed in that wrongdoing. The recommended procedure to "fix" the scotchbrite wheel is to throw it out and buy a fresh virgin one. Yeah right, throw out something that is $60 and salvagable....some of these RV buildings must have a better sponsor than I do. My solution was to wear down the wheel with a excess piece of thick angle stock I had laying around. After a few hard minutes, I will be happy.
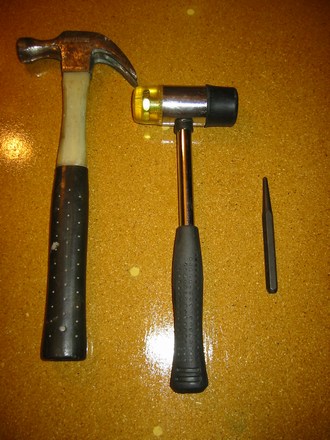
Hammer & Centerpunch: Basic tools. One word of advice is to not use the automatic centerpunches (spring loaded). When these hit the aluminum, then can cause small cracks that will become big cracks.
Measuring Tools: A nice Craftsman right angle and the Avery 12" ruler.

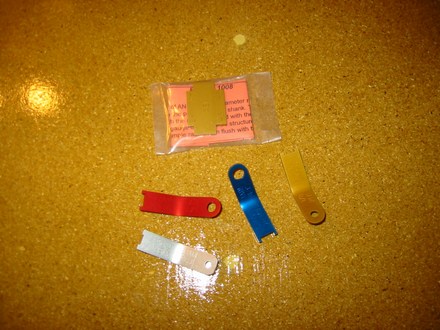
Rivet Measurement: On the top is a tool used to measure how much a shop head should stick out to determine what side rivet to use. Van's tells you what to use, so mine is still in the wrapper. Below are rivet shop head measurement tools for once the rivet has been set. The circular part measures the diameter of the finished rivet (1.5 times the original diameter) and there is a notch on the other end that measures how tall the rivet sets (should be 1/2 the size of the unset rivet). Please read the instructions that came with these to know how to use them. For the most part, you will know a good rivet from a bad one after you finish the HS. I just use these to keep myself happy from time to time.
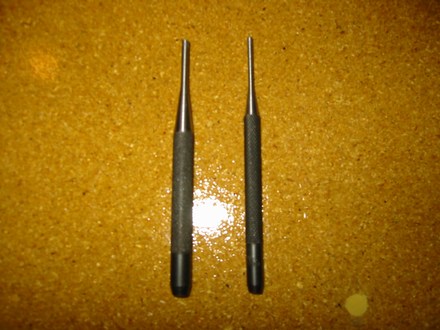
Pin Punch: In the unlikely (haha) event that you will have to drill out a rivet, these are used to punch out the bad rivet after you drill as little as you need to.
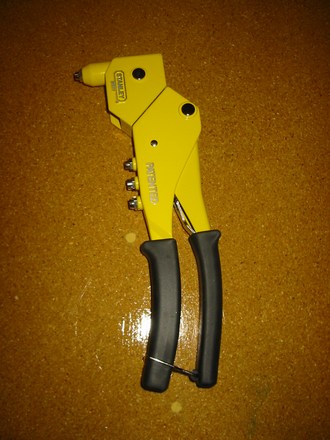
Blind Rivet Gun: This gun is used to set blind (Pop) rivets.
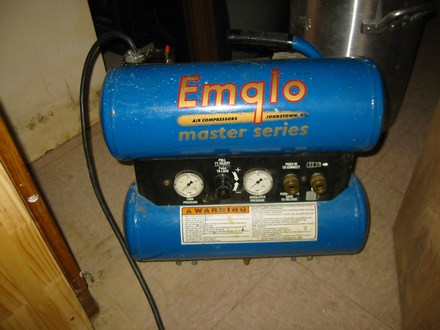
Air Compressor: This is the air compressor that I started the project with. I made it through the entire empennage with this. This particular compressor is an Emglo M79 HC4V 1.5 HP Oil Lubed 2.5 Gallon model. It really runs a lot when the air drill needs to go through anything that isn't pre punched.
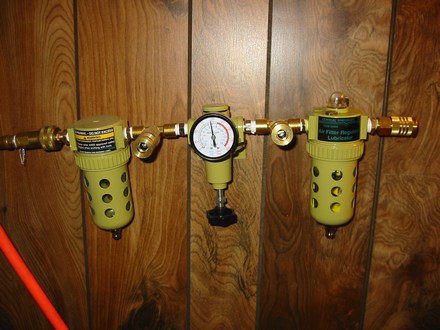
Air Regulator/Cleaner/Oiler: When you get air from the air compressor, it has 3 potential problems - it has water in it or is dirty, it has too much pressure and it may not have enough oil in the air to make your air tools happy...although you don't want to oil everything that gets air. This system is a Chicago Pneumatic 3 stage system that I got for $20 from Harbor Freight - it isn't worth a damn. The air cleaner (left) leaks, the pressure regulator (middle) isn't accurate and wanders, and the oiler (right) leaks and you only get no oil or a lot of oil. I did put quick disconnects between all of the systems to choose what flavor of air I wanted. That is about the best thing about this setup. I really need to get a new setup!
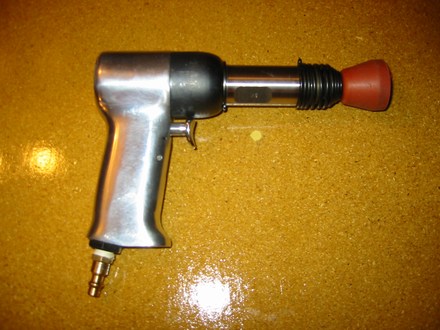
Rivet Gun: This is a Avery 3X rivet gun. The X has to do with how powerful the gun is. I have heard of 2X, 3X and 4X's used on RV's. The 2X is the least powerful, the 4X the most. The 2X seemed too weak for me, and the 4X seemed too powerful, so I settled on the 3X. On the end of the rivet gun in the picture is the Avery flush swivel rivet set.
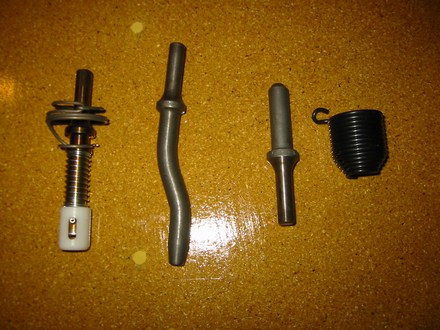
Rivet Sets: In addition to the flush rivet set, there is the (left to right) backrivet set, double offset set and shank rivet set. The backrivet set it used to squash the AN426 (flush rivet) shop head, while the flush manufactured head is against the backriveting bucking plate. The other sets are used to hit the universal AN470 head while the shop head is mashed with the bucking bar.
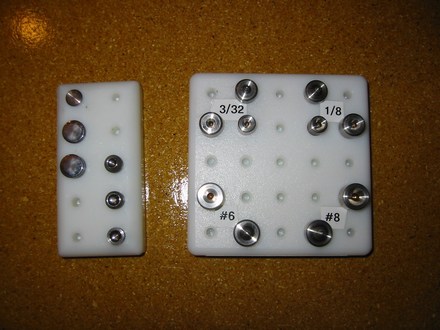
Screw Dimpler: This is Avery's Screw Dimpler for #10 aircraft screws. Its self explanatory how to use this. However, it took me about 2 hours to find this for the first time. With the rudder, you drill a couple of #12 holes for the counterweights. Van's then tells you to dimple the holes. Well, for the life of me I couldn't find a #12 dimple die. Turns out that a #10 screw uses a #12 hole.
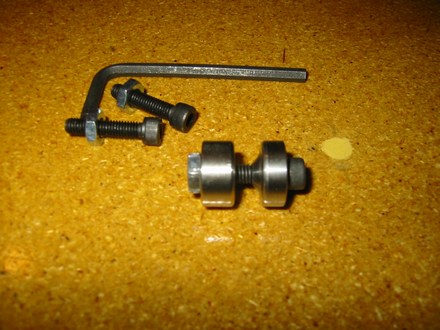
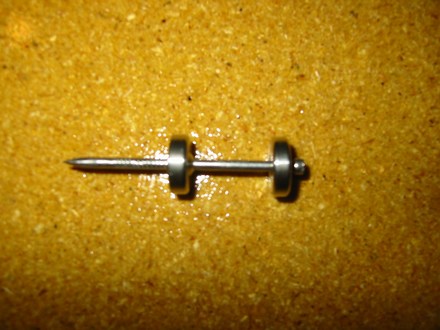
Pop Rivet Dimpler: This is a #40 dimpler that is pretty cool. You feed a nail through these, then you use the pop rivet gun to squeeze them together. The Avery kit comes with a bunch of nails - they tend to break.
DRDT-2 Dimpler: The DRDT-2 is a dimpling tool that is used to quickly, quietly and easily dimple skins. You simply put in dimple dies into the tool, align the hole in the skin, then pull down on the handle. Voila, a dimple. The alternative to using this tool is using something called a C-Frame dimpler. Same basic concept, except instead of pulling down on the handle, you hit a rod with a mallet. With this tool I can cruise through dimpling skins.
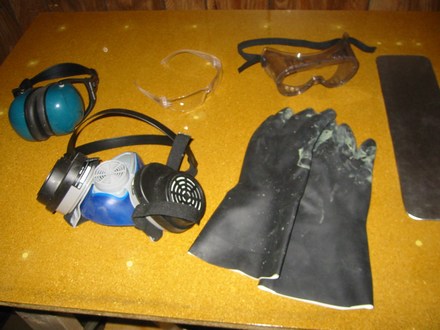
Safety Gear: Hearing Protection, Safety Glasses, Goggles, Respirator and heavy duty gloves. These are just a few of the many personal safety items you will need while building and priming.
Vice Seemers, Fluting Pliers and Vice Dimpler: The Vice Seemer (left) is used to squash/hold metal. They have 1000 purposes. Fluting pliers (middle) are used to form the flanges of ribs in order to cause them to sit flat and straight. The Vice dimpler (right) is a #40 dimpler that can get into right spaces.
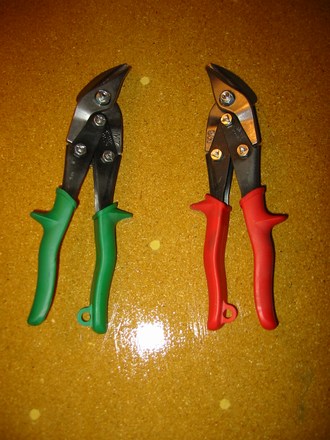
Wiss Offset Snips: Left and right offset snips for cutting through metal. I used these once on the rudder stiffeners. They distort and twist the metal way too much for my likings. Use a die grinder with a cutoff wheel instead if you can.
Soldering Iron - AKA Devinyling Tool: When you get your skins, Van's is nice enough to put a adhesive blue vinyl over the alclad finish to keep it fron scratching. You could remove it and work away, but I like to have the vinyl on to further protect the alclad. To do this, I use a 35 watt soldering iron that I got from Radio Shack. I put the wood yard stick on the vinyl as a guide, and melt away. About 1 second per inch is a good rate. Too fast and you won't etch the vinyl enough for it to peal away in a straight line. Too much and you will scratch a line in the alclad. Bill Cloughley recommended to me to use a cheapo wood ruler instead of a metal one because the metal one tended to conduct heat and cause the vinyl to stick to it. Wood it was.

Squeezer and Dimple Die Sets: On the left is the Avery squeezer set and on the right is the Avery Dimple Die set.
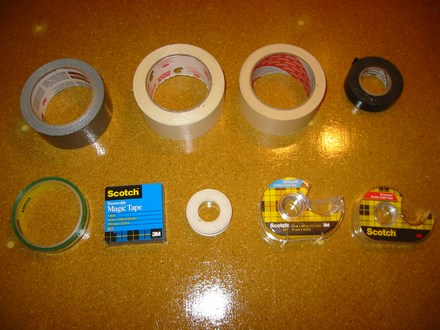
Tape: I have used all kinds of tape for different purposed so far on the project - Duct Tape, Carpet Tape, Masking Tape, Electrical Tape, Backriveting Tape, Removable Magic Tape, and double sided tape.
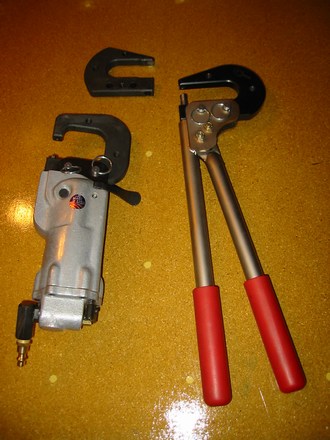
Yokes and Squeezers: Pictured is my Clear Air Tools Pneumatic Squeezer with the Longeron Yoke, Avery Hand Squeezer with the Standard Yoke, and a no-hole yoke all by itself. Some people build their hole plane with either no squeezer, a pneumatic squeezer only, a hand squeezer only or both. I went with both and I am happy I did. The pneumatic squeezer is great because it is quick and it gives you an extra hand (it only takes one hand to hold it and actuate it). The Hand Squeezer is nice because it is skinnier than the pneumatic squeezer (it has come in handy a couple time) and more importantly, it is easier to control action of it. The pneumatic squeezer can really get away from you. I have had it "miss the hole" twice while dimpling. Also, it is nice to have both setup for two differnent types of rivets. That way you dont have to readjust too often. To each their own on this, but I am glad I have both.
|

