
|
 |
||||
Today I called up Clear Air Tools to see where my Yokes and pneumatic squeezer were. I ordered them 2 weeks ago, but there was a delay in shipment because of a backordered part. When I talked to them, they said that the package was ready to ship ground, from CA. I asked them if they could speed it up any, and they offered UPS 3-day for free to get it here thursday. Works for me. I thought I would check if Salty had a rivet squeezer I could borrow. Unfortunately, his were at the airport. He offered to bring them home on wednesday, but I declined since I would have my own on Thursday. But I was definitely impressed with how he was totally willing to let me borrow his tools. I was looking at Sears.com for a Torque Wrench, center punch and a good square. They had a great sale on Torque wrenches - $55 for the 3/8"" 25-250 in-lbs wrench ($20 off normal price). For the RV, you will need a torque wrench that is in inch-pounds! So after work I scooted over to Sears and in the store the wrench was only $10 off. I got a price check on it and it was still $10 off. I bought it anyways with the centerpunch and the square. When I got home I checked the price again online, ordered it for $55 and opted for the in-store pickup. I will bring the one I got today back and pick up probably the same one for $10 less. Sears is about 1 mile from my work, so its totally worth the savings! On the way out the door from work, I talked to the guy who was in charge of the painting room in our warehouse. I wanted to know if he minded me doing my priming there after work or on the weekend. He said it was no problem! The room is nicely ventilated and its warm. Anyways enough about me trying to save a dime here and there. When I got home I worked on fluting the ribs again for the HS. I bought a nice square from Sears that was made out of stainless steel. I had a few squares already, but all of them were a little off. I wanted one that was pretty much dead nuts on. I first clamped a sliver of 3/4"" plywood to my bench to make a nice right angle to try to bend the flanges with, using Bill Swaim's suggesting. It worked OK. Next I tried bending them using the avery hand seamers, then test my new angle with the square laying on the table. It worked better, but it was very iterative. Finally, I took the piece of plywood off of the bench and held it in my hand, the rib in my other hand and worked the flange in with the plywood. I would say that the plywood was 14"" long, 1.25"" wide and 3/4"" thick. It had enough leverage in it to put a nice amount of force on the flange. After I did that, I checked the bend with the square, checked the hole alignment, fluted, rechecked my squareness and then used a scotch brite pad on it to take off any extra burs the seamers/fluting pliers might of left. I figured out this whole process on the last rib, of course. This is how the flanges look from the factory - about a 15 degree outward bend. 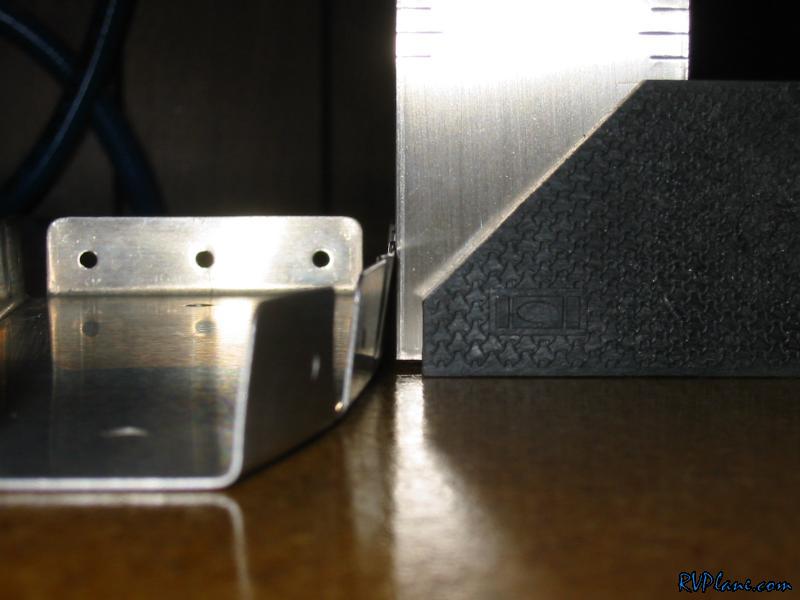 This is how the flanges whould look after the bending is done. 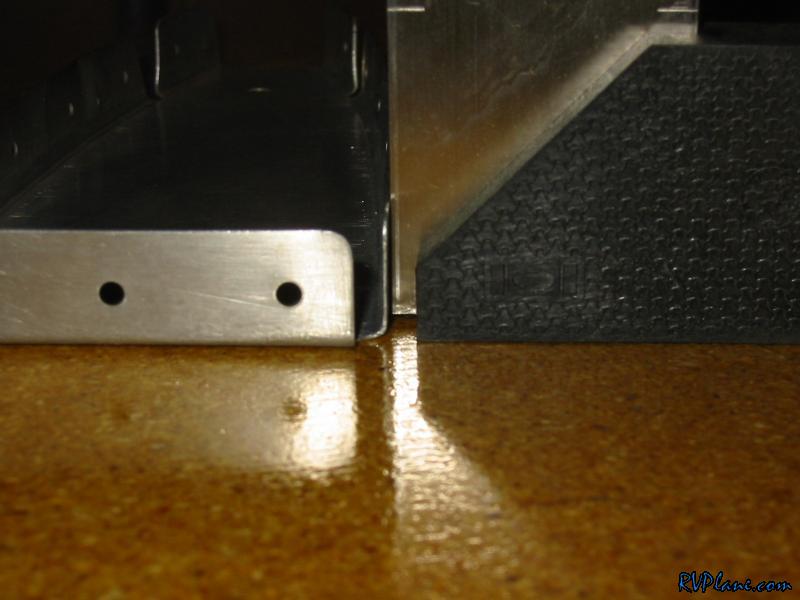 This was the first method I tried. I clamped the piece of plywood to the table and made sure its edge was perpendicular to the table.  Another shot of how I attached it. 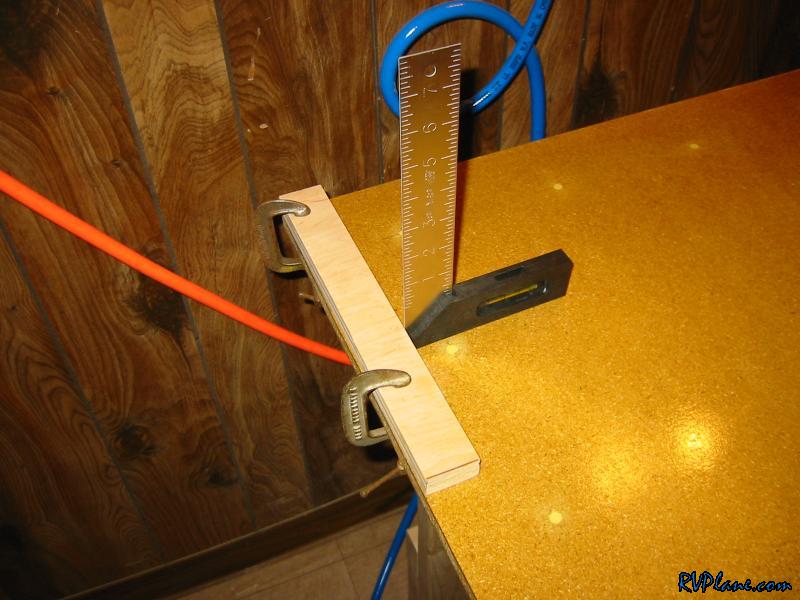 This is how I was trying to bend in the flanges. It didnt really bring in the sides all that much 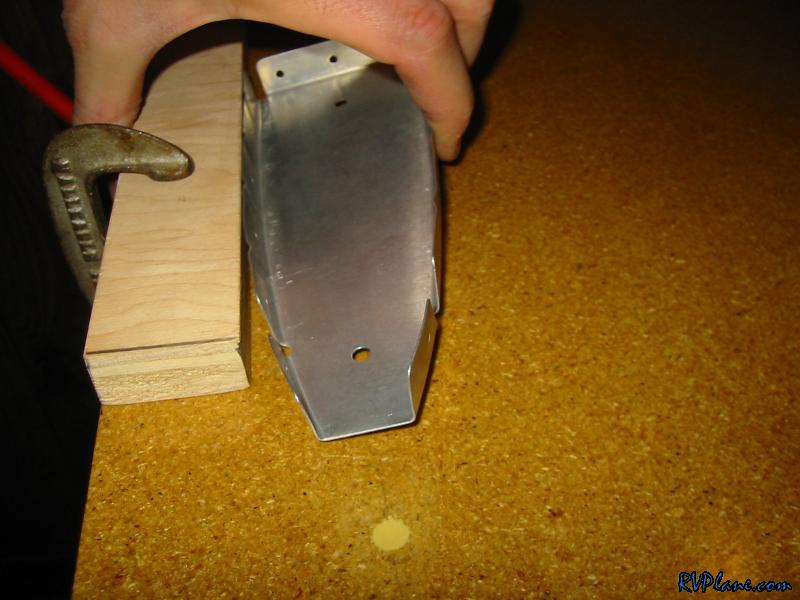 This is what worked well for me. Held the rib with one hand, and use the piece of plywood I had clamped to the bench to push in the flanges. Notice how close my thumb is on the face of the rib to the flange. This was to prevent the warping of the rib. 
|
|||||
|
http://RVplane.com |
Last Modified: January 31, 2026 |