
|
 |
||||
Wow, what a whirlwind (pun intended!) week it's been. I was going to have the propeller installed yesterday (less than 48 hours between removal to install, with overhaul!), but my parents AC went out and I needed to of course help them out. Whirlwind did a great job packing the propeller for the car ride home. 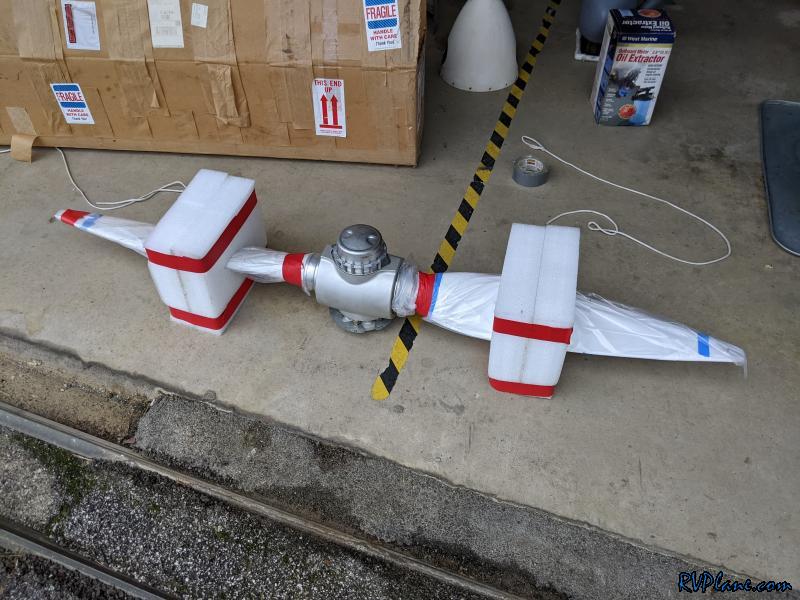 I might as well replace the alternator belt, but I was unsure of what size of belt would work. The current belt installed is I believe original, and is a 35.5". Amazon has such an amazing return policy, I ordered one of every size I thought I could need. 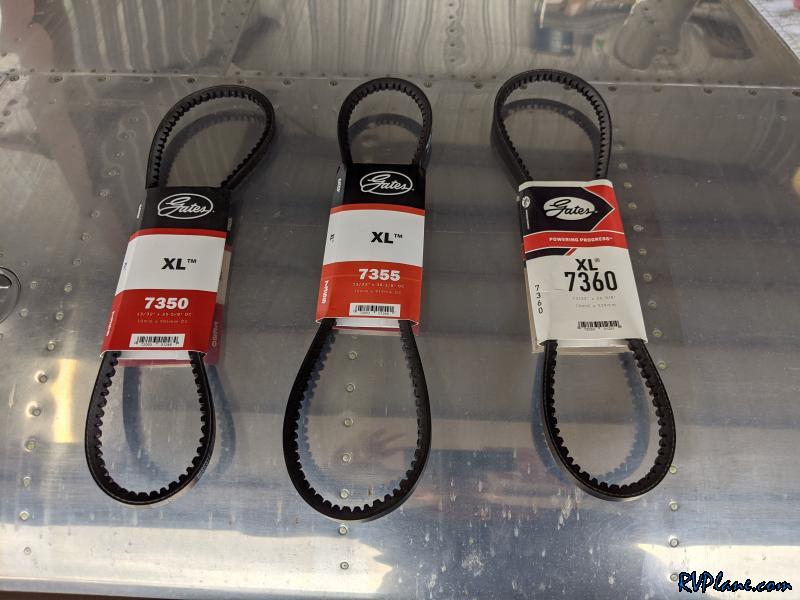 The current belt is also a little too long. With some aerobatic maneuvers, the alternator pulley wears away at the lower cowl. 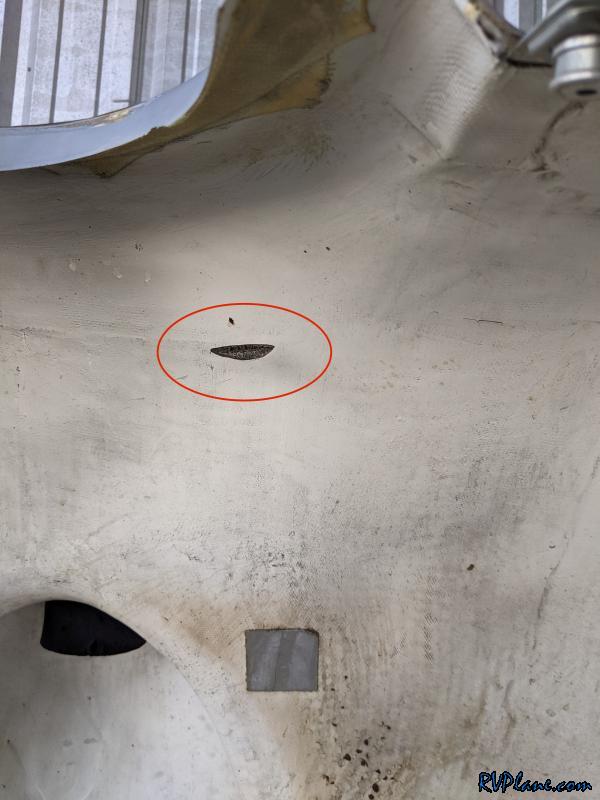 This is the current belt - Dayco 15355, 35.5" belt. 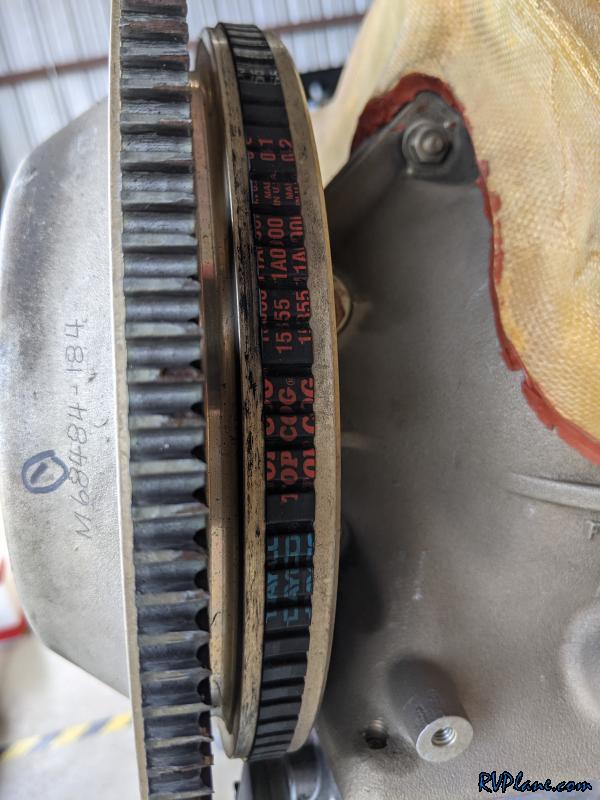 It is definitely time for this belt to be changed. It was missing a few chunks of rubber. 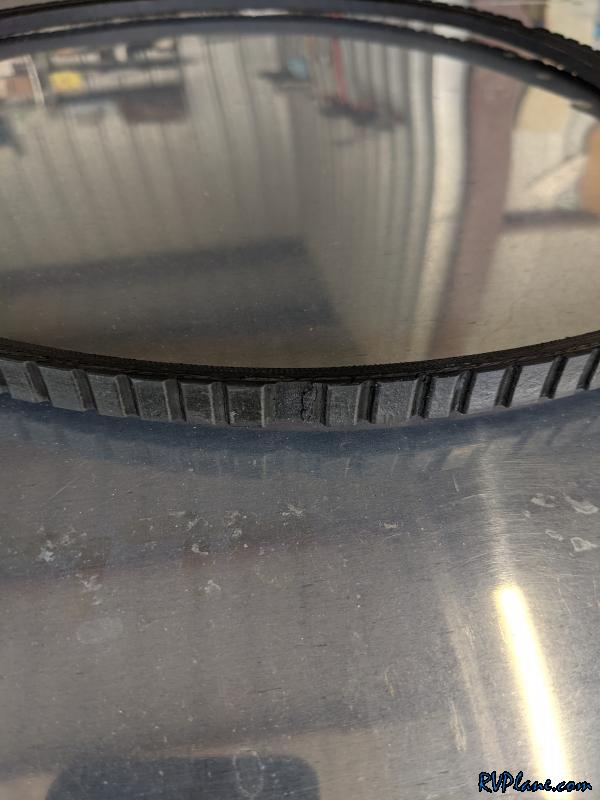 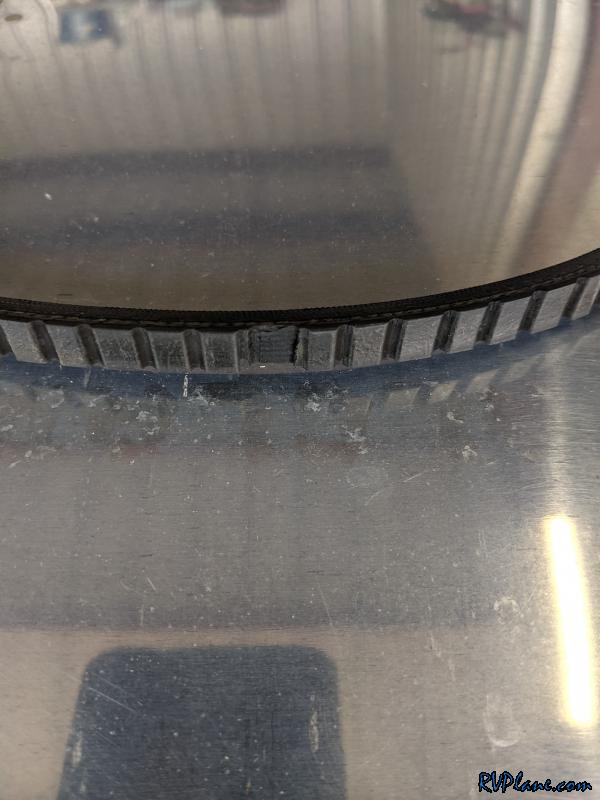 Another reason for it needing to be replaced - some cracks in it.....  As a baseline, I measured the distance between the flywheel and the center of the alternator pulley to figure out the best length belt to use. This current belt looks like about 1 1/8". 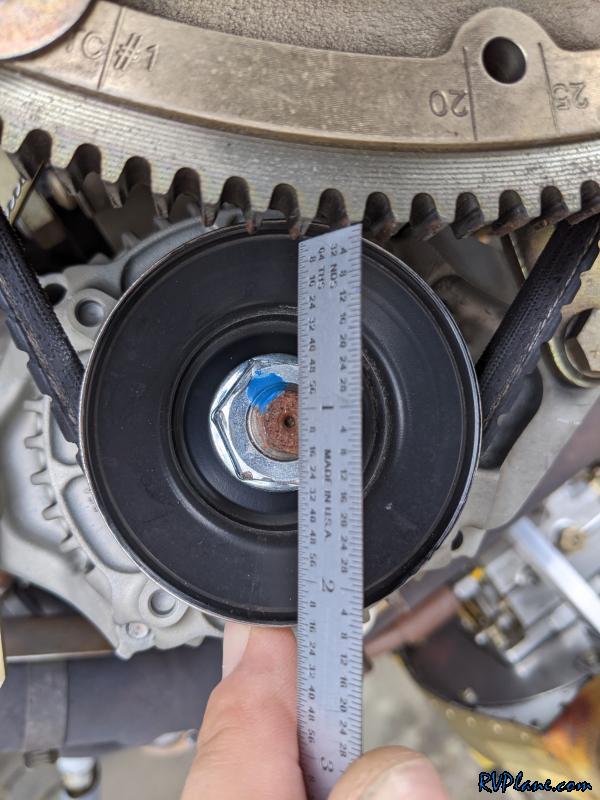 The 35.0" belt gave me the best distance of about 5/8" - roughly an extra 1/2" of separation between the lower cowl and alternator. Looks good! 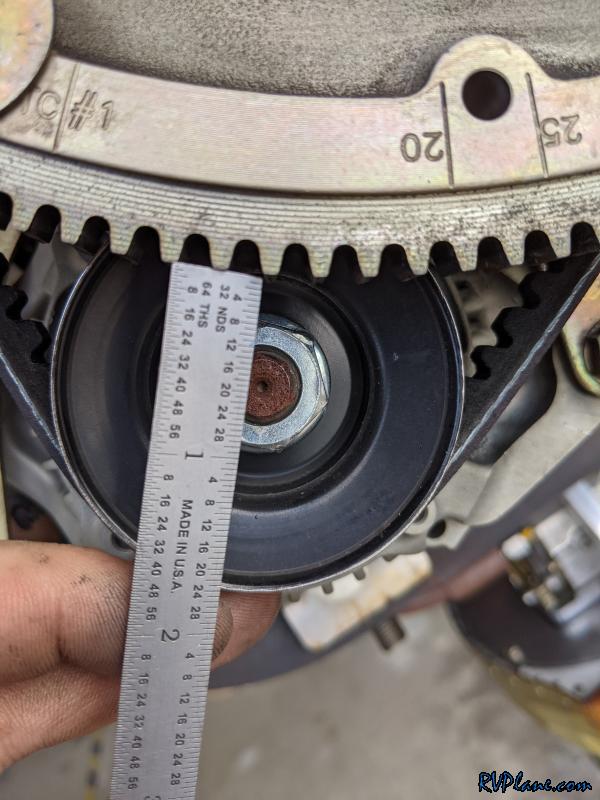 Well, almost looks good. The alternator mounting bracket's hole was not long enough to accommodate the alternator being so close to the engine. 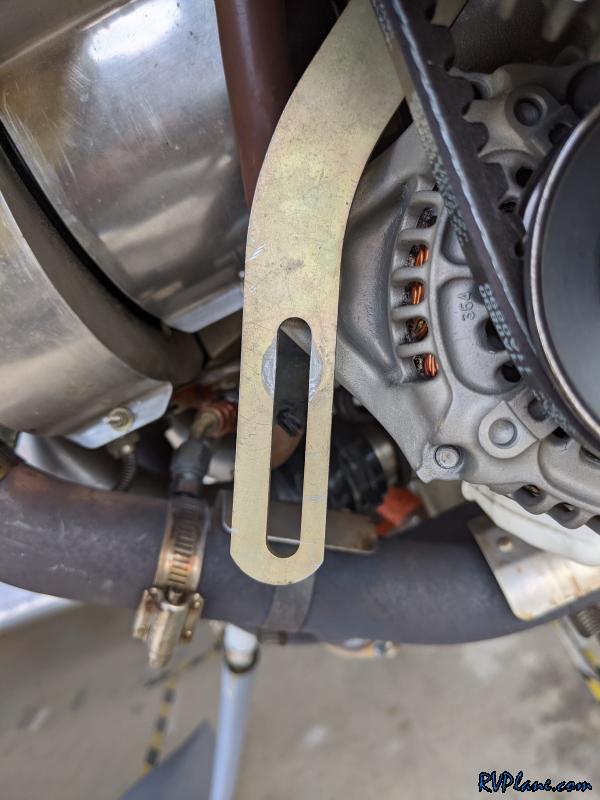 Easy enough mod to add a little extra room to this steel bracket. 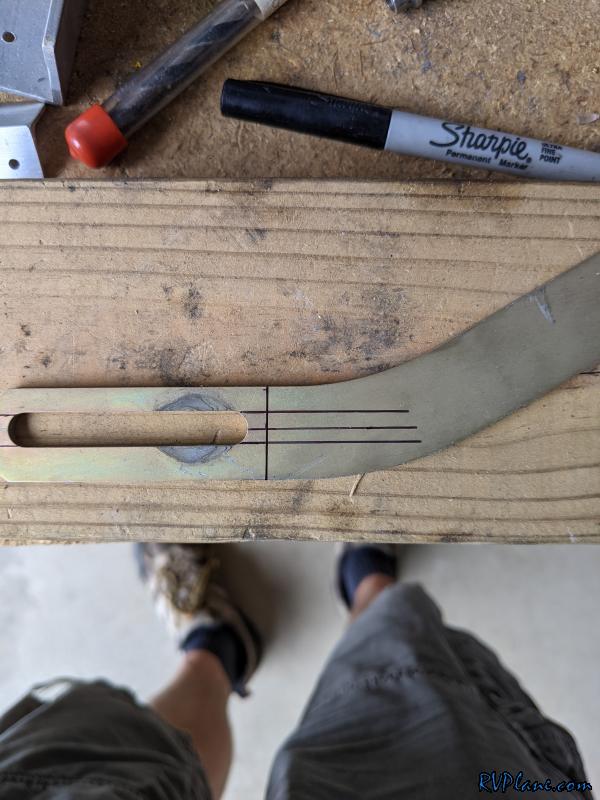 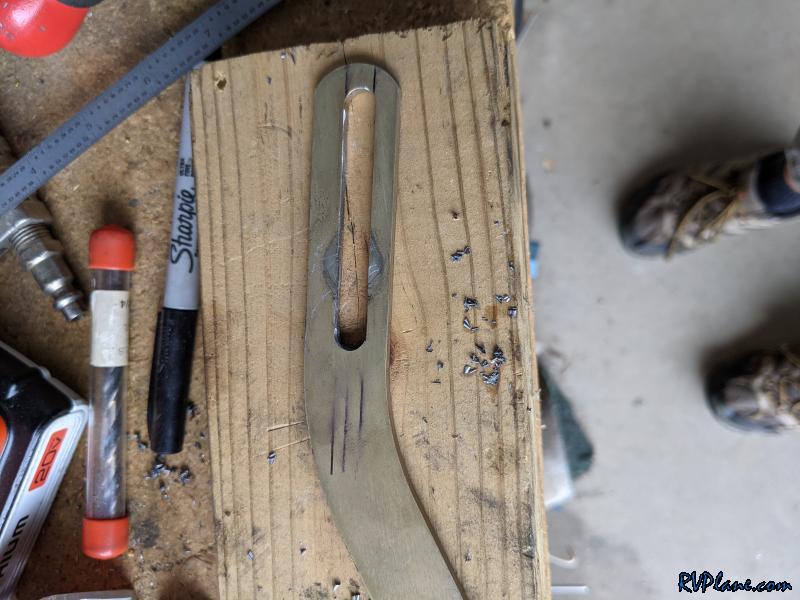 Fits perfectly now, and no interference! I am really happy the 35.0" belt worked out. One less thing to worry about. 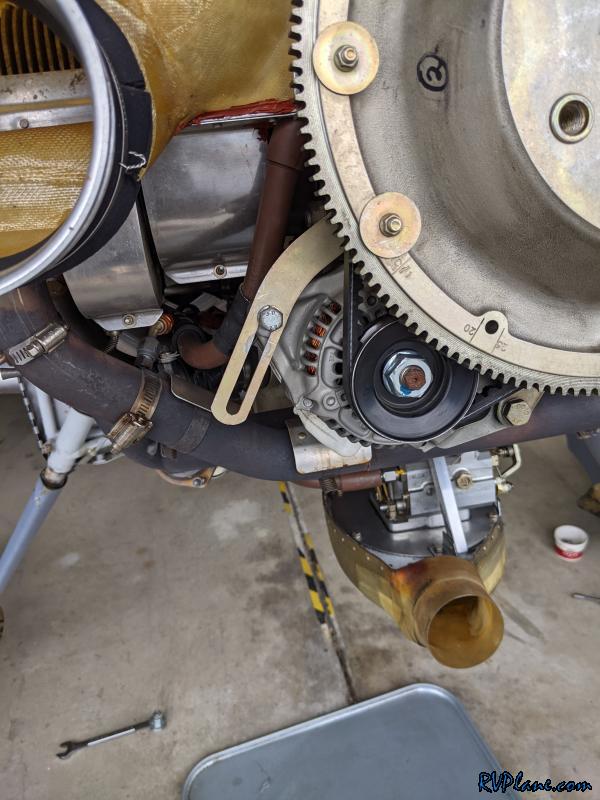 Before installing the propeller, I wanted to clean out the center of the crankshaft of any oil and sludge that's been building up in here for the past 820 hours.  There was a very small amount of oil coming out of the crank seal - but not enough in my opinion to justify replacing it.  I had a "oil sucker" pump I used on my old boat that worked perfectly to remove all of the oil in the crankshaft. 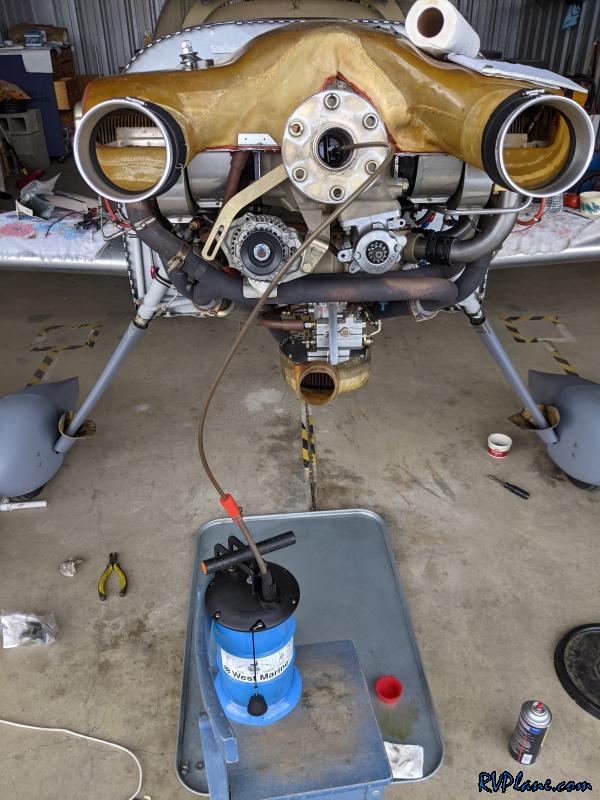 Cleaning out the center of the crankshaft took a lot longer than I anticipated. There was an impressive layer of sludge built up on the inside that was not easily removed. The best thing I could come up with to remove it was using a wood dowel and scraping it off. Towards the back, I used small pieces of a cut up popsicle stick in a long hemostat. I followed it up with a rag soaked in acetone for the final cleaning. It looks brand new in there now. 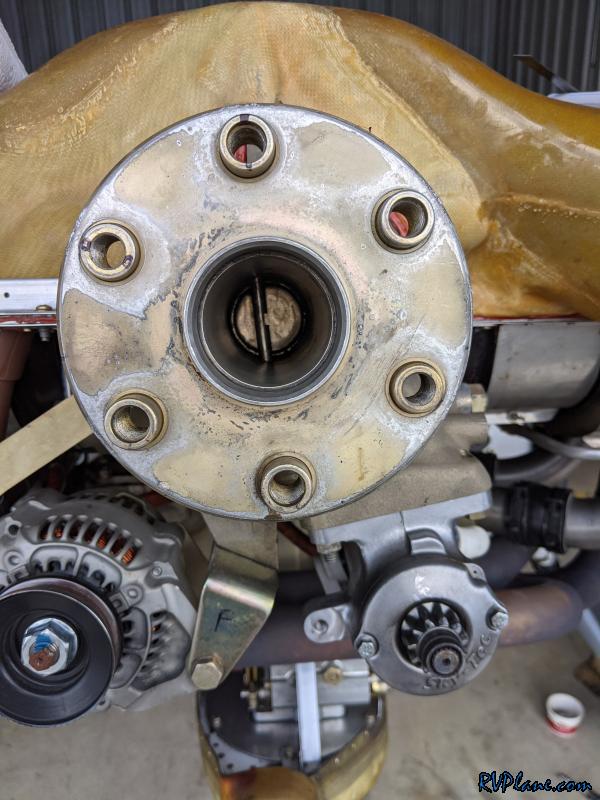 Always a painful process to put on my C/S propeller. You have to be meticulous and turn each of the 6 bolts a handful of flats, on order. Nothing difficult, just very time consuming. 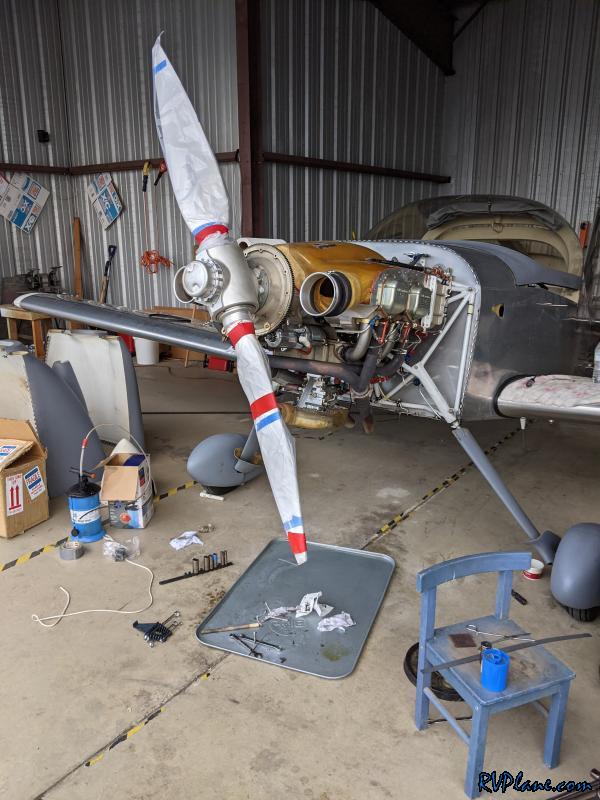 Another task I was not looking forward to was safety wiring the propeller bolts. However, my safety wire skills have VASTLY improved since the day of me building the RV. A big shout out goes to Mike Rollison (RV6) who taught me this trick. Installing the safety wire in some of the torqued bolts is nearly impossible. So the first thing I do is mark where the bolt is supposed to be in it's torqued position (Black Sharpie). 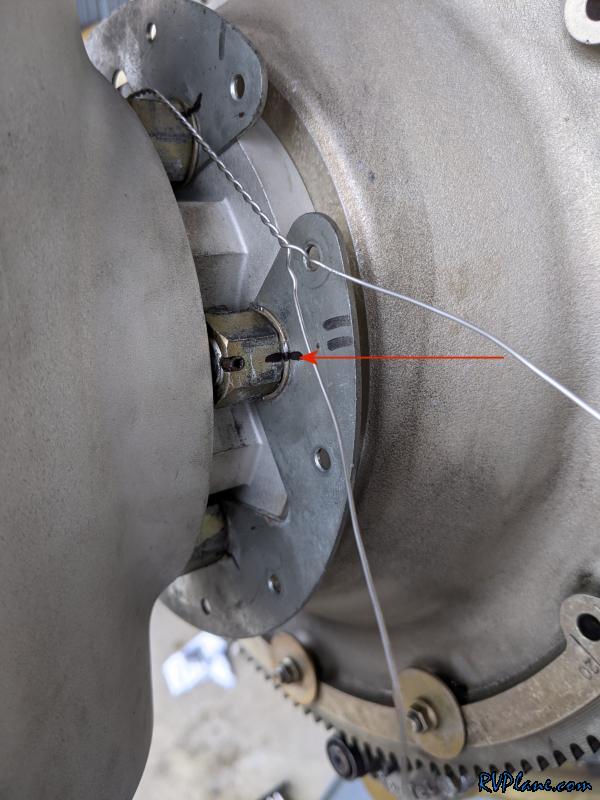 And then you back off the bolt in order to install the safety wire in it. 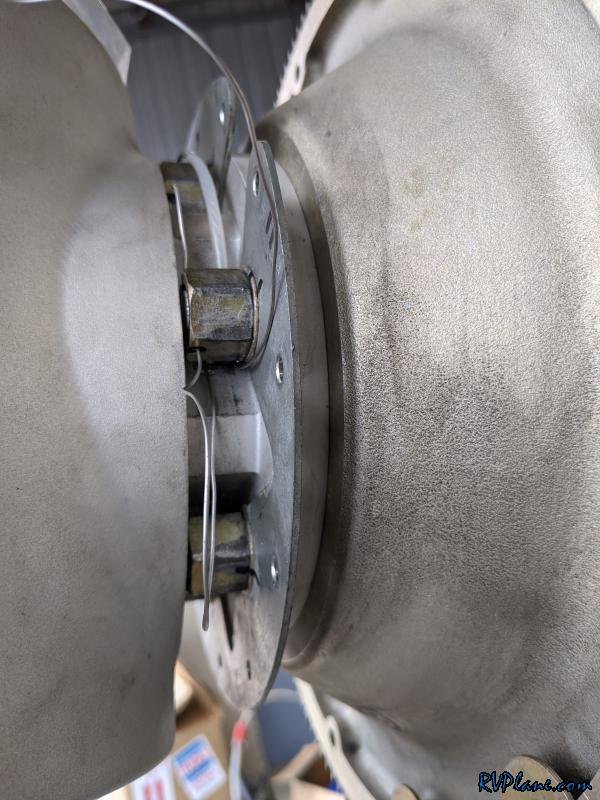 Once the safety wire is threaded through the bolt, you can rotate the bolt to the marked position. Double check the torque, and then finish the installation the safety wire! Seems simple, and it is! And a HUGE time saver, and makes for better safety wire.  Boom! Propeller is on and ready to spin. I did a runup and was amazed at how much the governor needed to be cycled before pressure built up in the hub. No leaks! This boy is a happy camper. 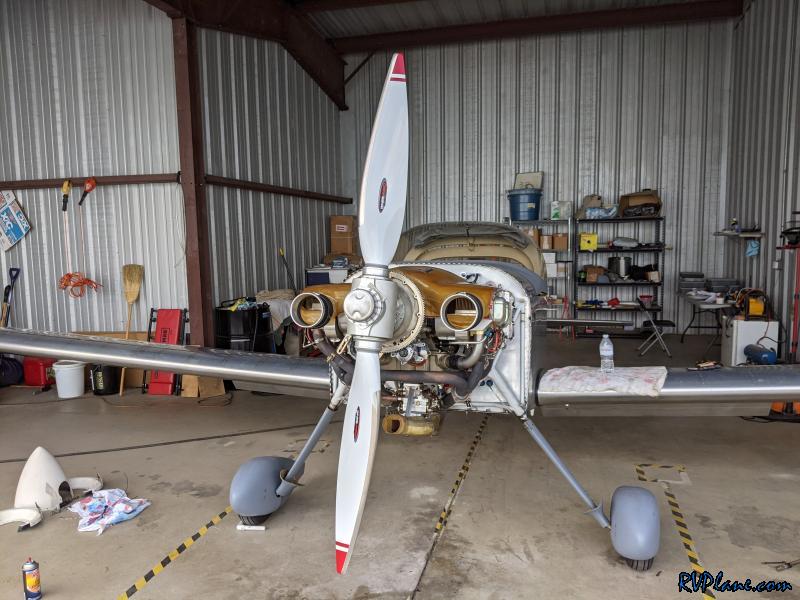 My old stickers were falling off - and Whirlwind put new ones on with their new logo! Looks great, right???? 
|
|||||
|
http://RVplane.com |
Last Modified: January 31, 2026 |