
|
 |
||||
The internet we "poached" from the FBO had been somewhat reliable at best with constant outages. We were relatively happy with it for the price we paid for it ($0.00/mo)! About a month ago the FBO redid their entire IT closet and unplugged and cut our wires to the AP we installed covering the hangars. I didn't want to get into politics with the FBO over getting it back online, and work was paying for an unused Starlink I had in my house, so it was the natural successor to the crappy wifi we had before. The only issue was I wanted a low-profile mount of the Starlink, and "Dishy" as they call their antenna was pretty bulky. 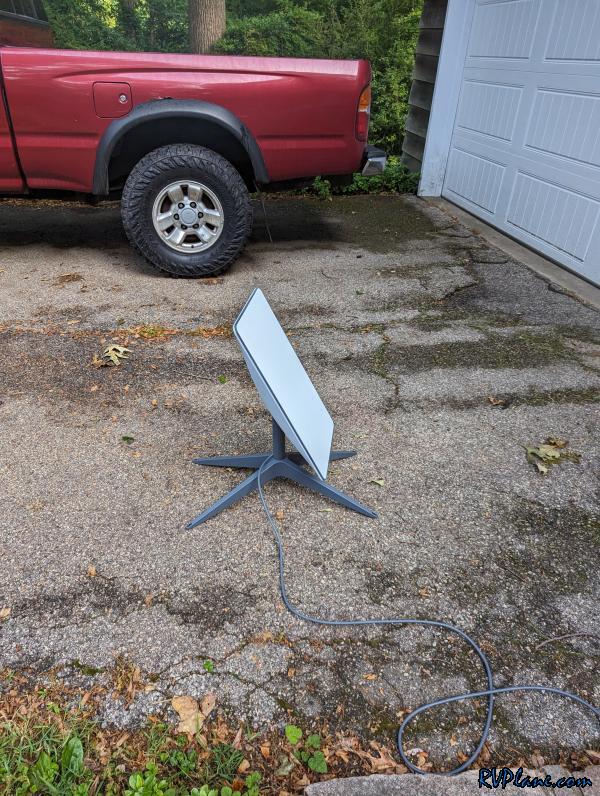 I have seen some people cut open their Dishy's and make their own low profile mounts. Some companies offered kits, but they were stupid expensive at $400 for something I am sure I could do on my own. So I fired up "Dishy" so it would point itself to the sky and roughly get the motorized mast centered (it stores collapsed). 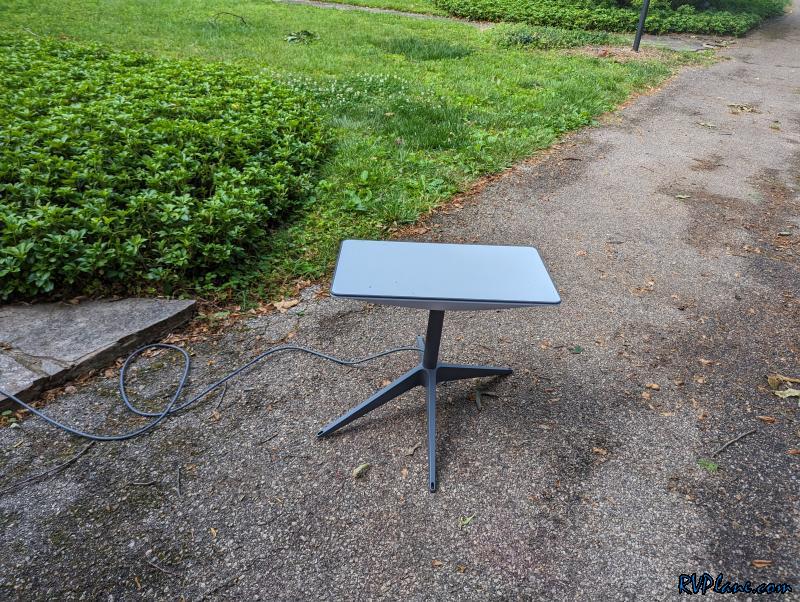 I chucked my cutoff wheel in the drill press and this is how I thought would be best to cut open Dishy.  The mark I used for a reference was the drain holes on the perimeter of the case. I didn't want to go too low and potentially cut into the PCB or other wires, rendering Dishy useless. 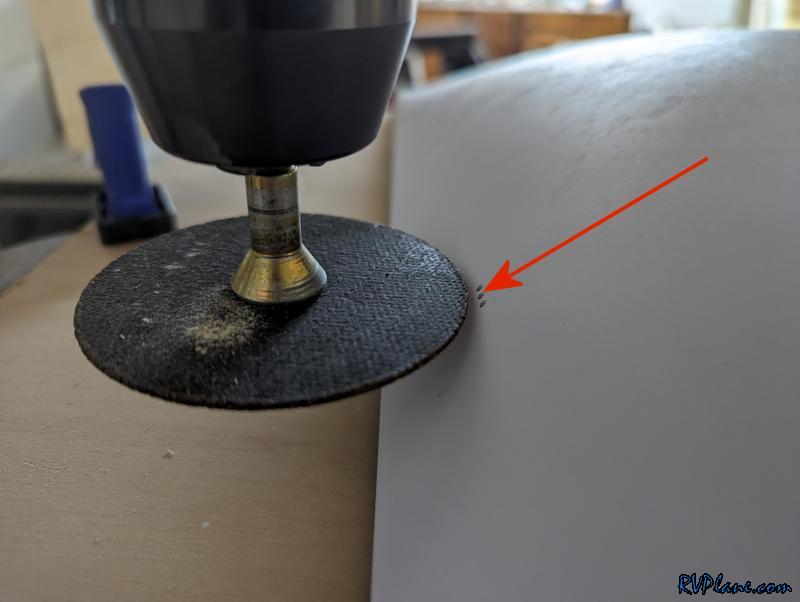 My rough cut mark. 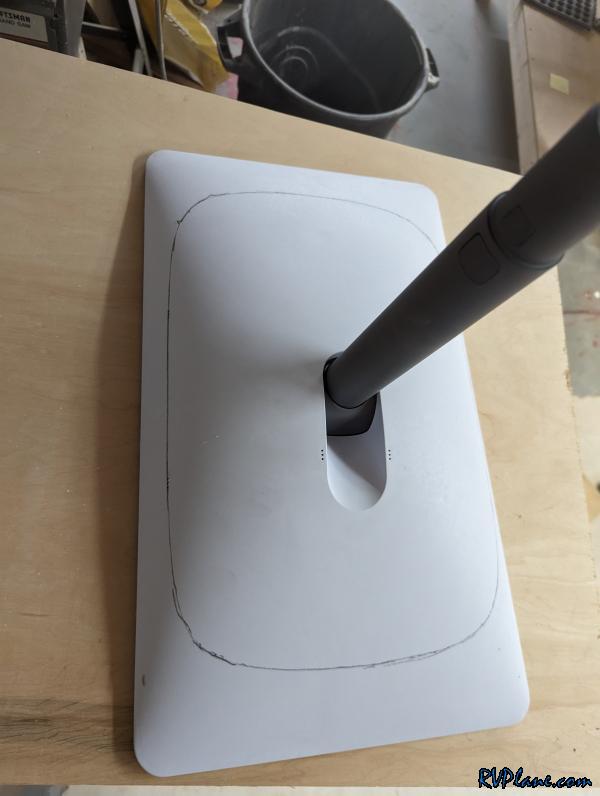 The cut actually went very smoothly. Took about10 minutes. 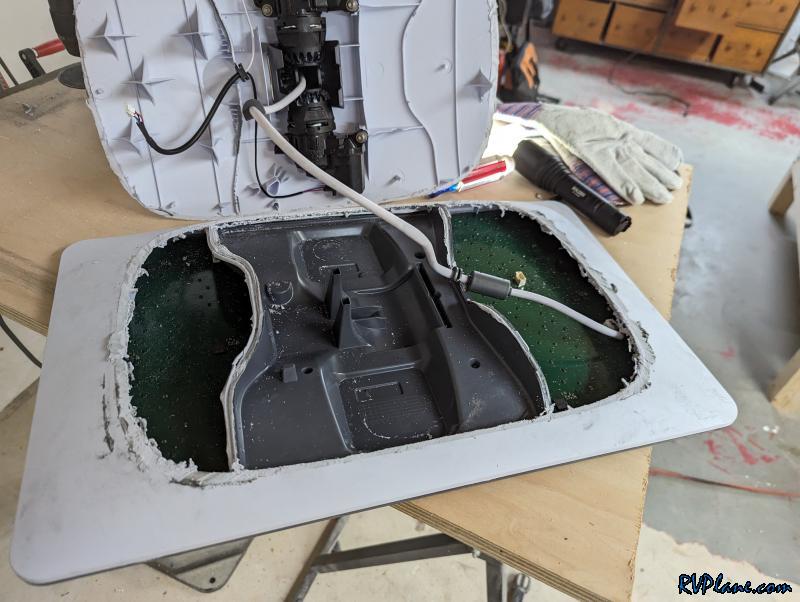 I did slightly nick the ethernet/data wire. 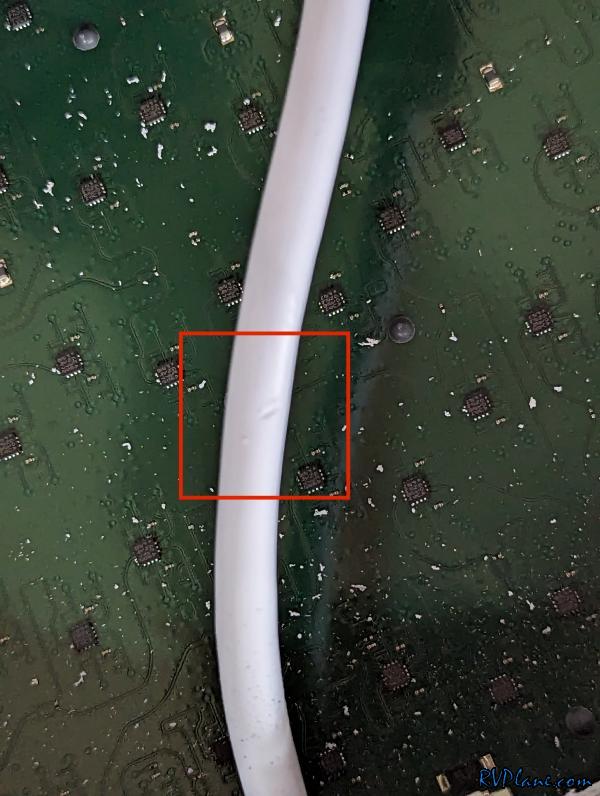 This is the area of the antenna where I came close to cutting into the data cable. So be careful in this ares. 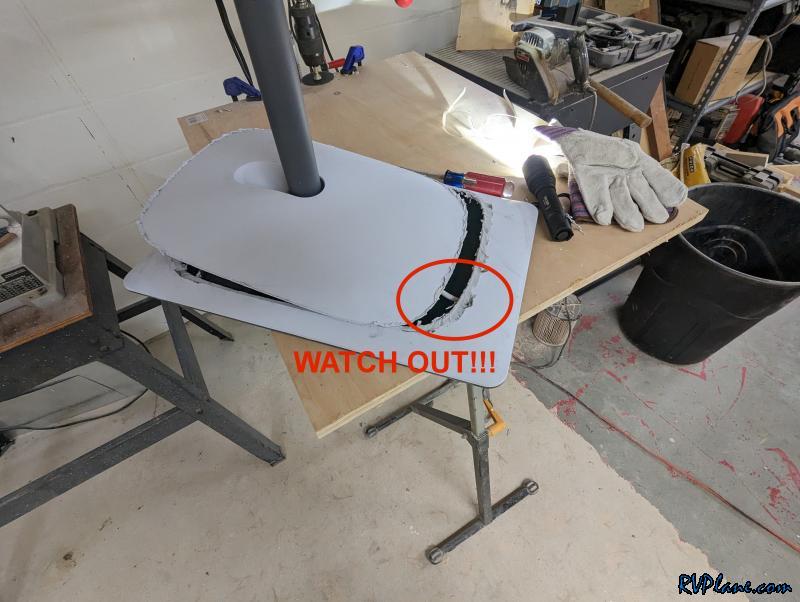 I disconnected the motor and ethernet connectors from the PCB. 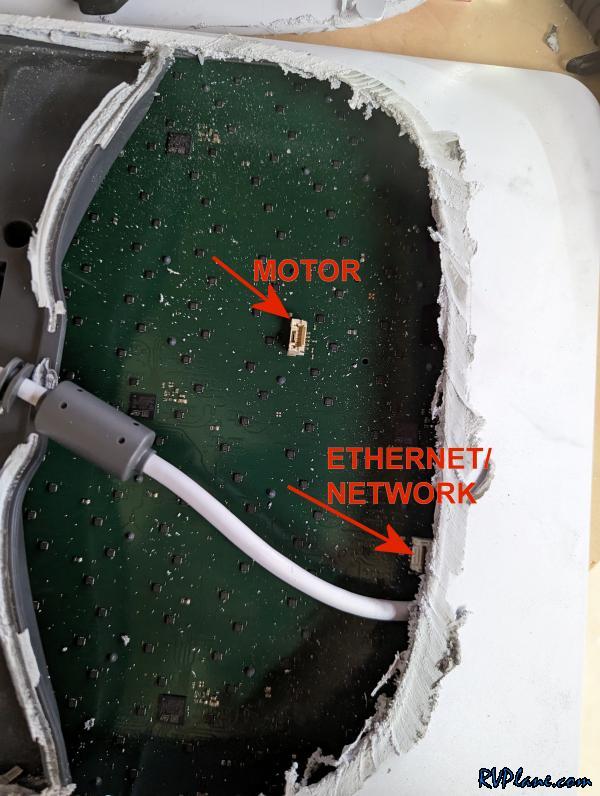 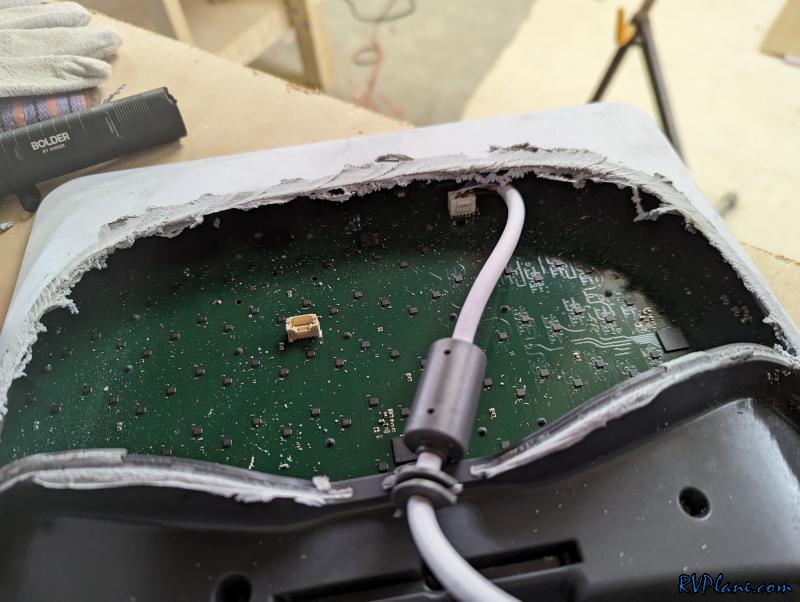 26AWG shielded ethernet - that is all that the cable is for Starlink. 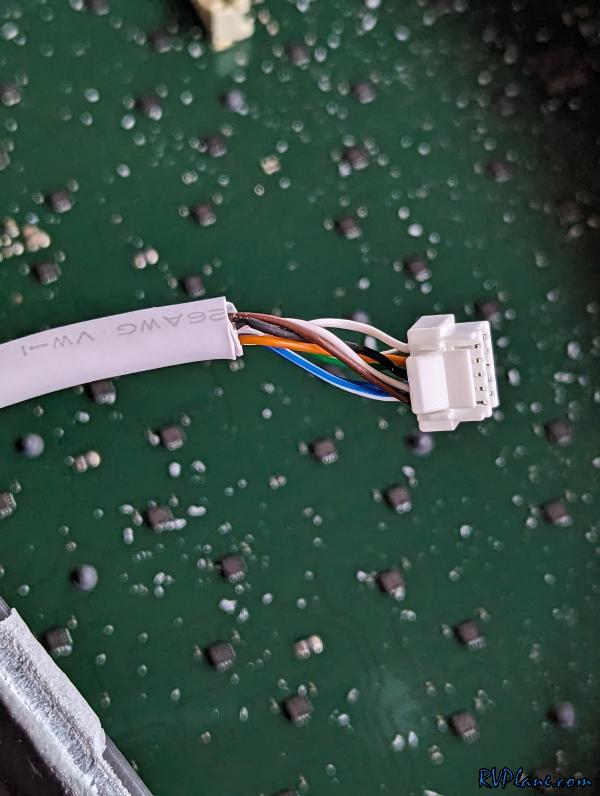 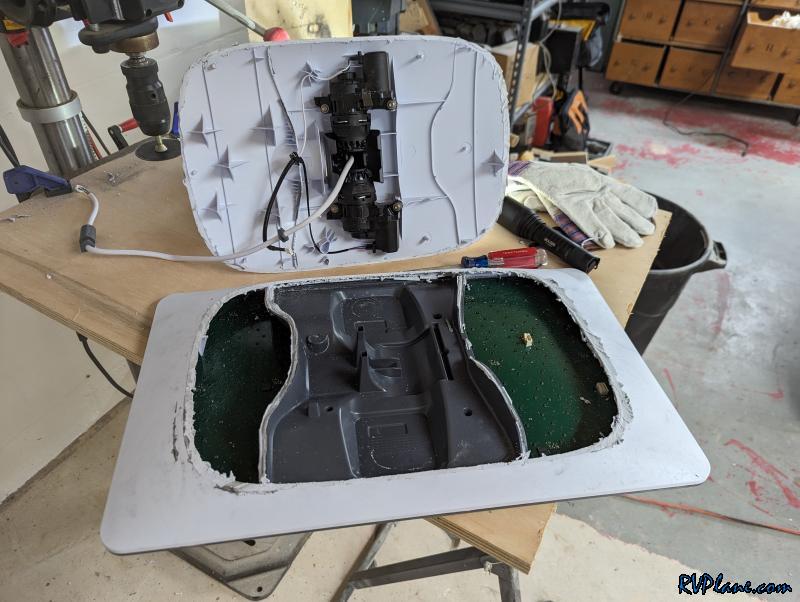 I wanted to remove the plastic used to support the motor. I needed to get the dremel out make cuts at all 4 corners. 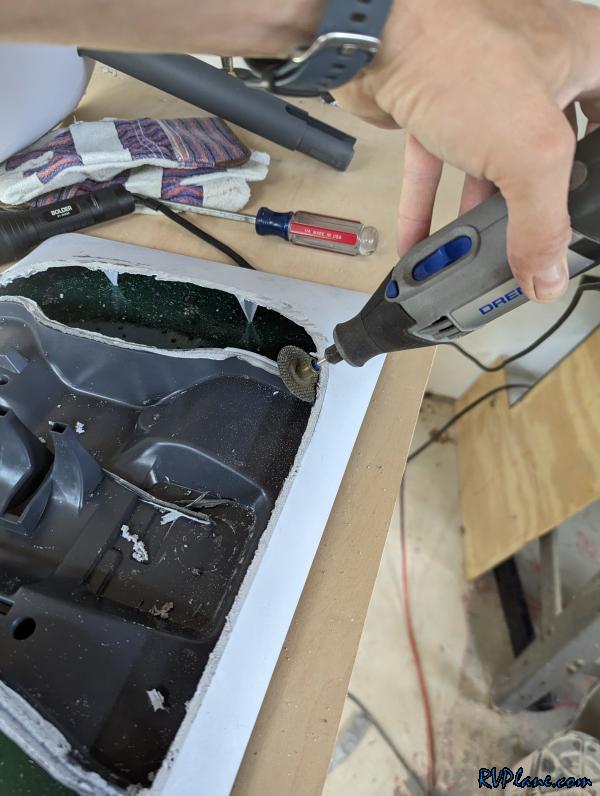 I intended on breaking the plastic in the center, but I didn't want to dremel too close to the PC Board. I made cuts on the thick parts of this piece of plastic to make it easier to break into two using just the force of my hand. 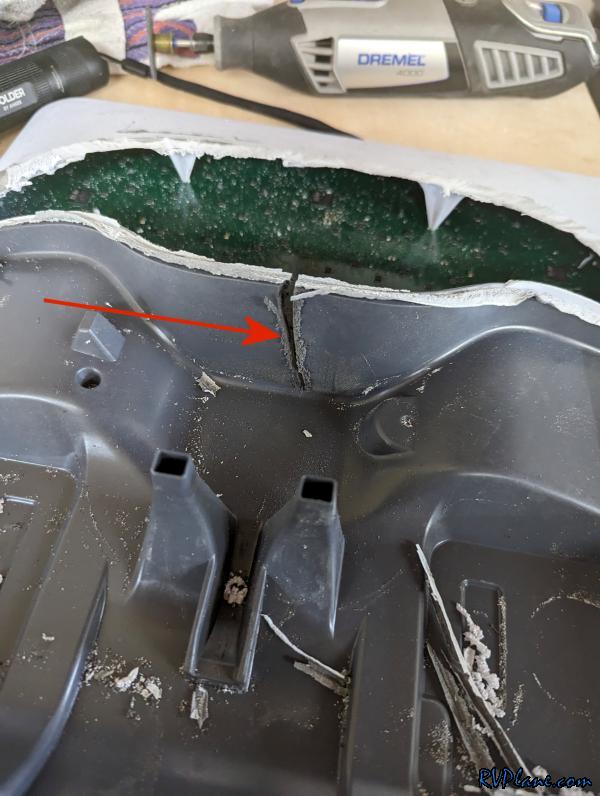 Cut on the opposite side. 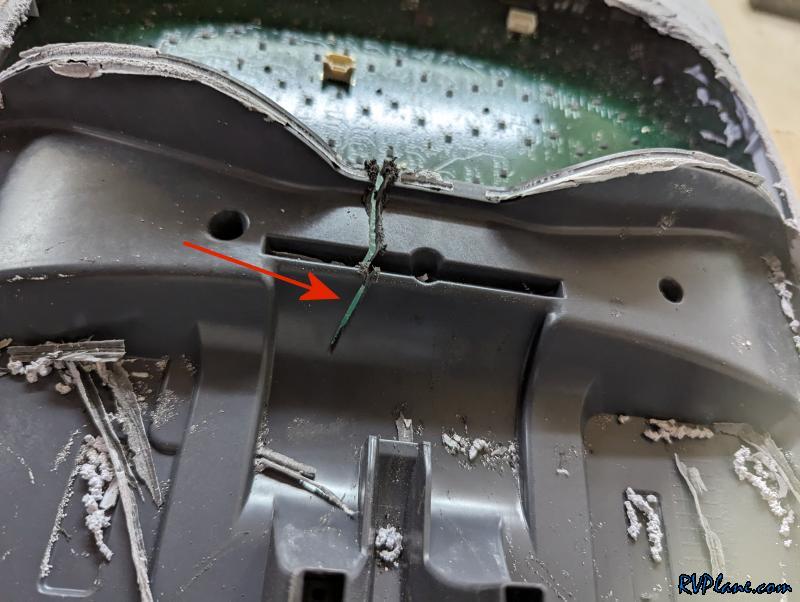 This piece cracked in half very easily. 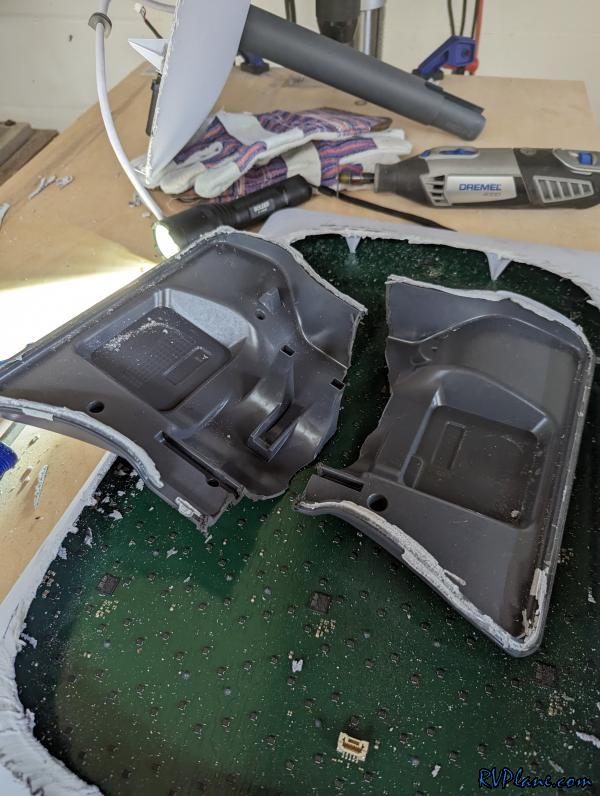 And this is what remains. I am really happy it's gone so smoothly so far. 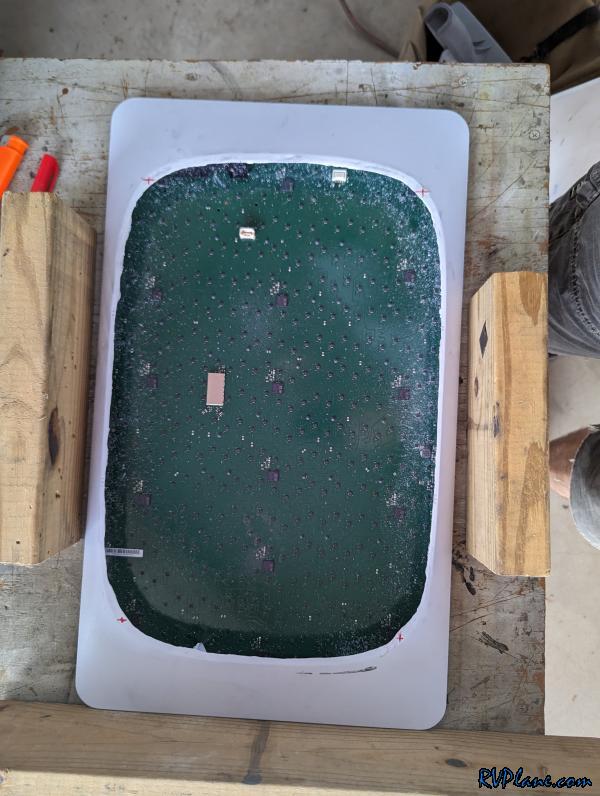 I put 4 #8 holes int he 4 corners to attach it to the new backing plate I bought.  I cut the data cable in half that was inside of Dishy. 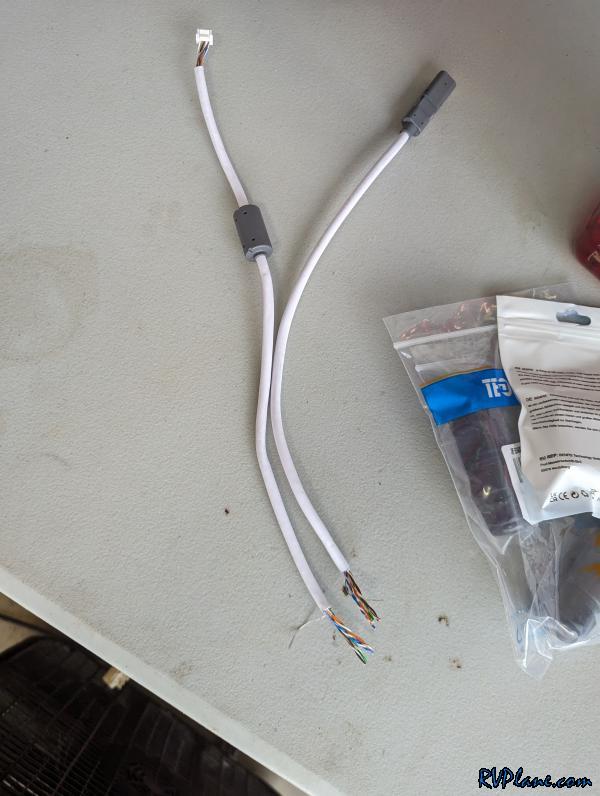 In case you didn't believe me in the prior post - good old fashion Ethernet.  I wanted to mount Dishy to a piece of UV resistant plastic, so I bought a sheet of PTFE, 1/4" Thick x 12" x 24". It wasn't cheap ($85!), but it will definitely survive the elements. Probably longer than Dishy will!! 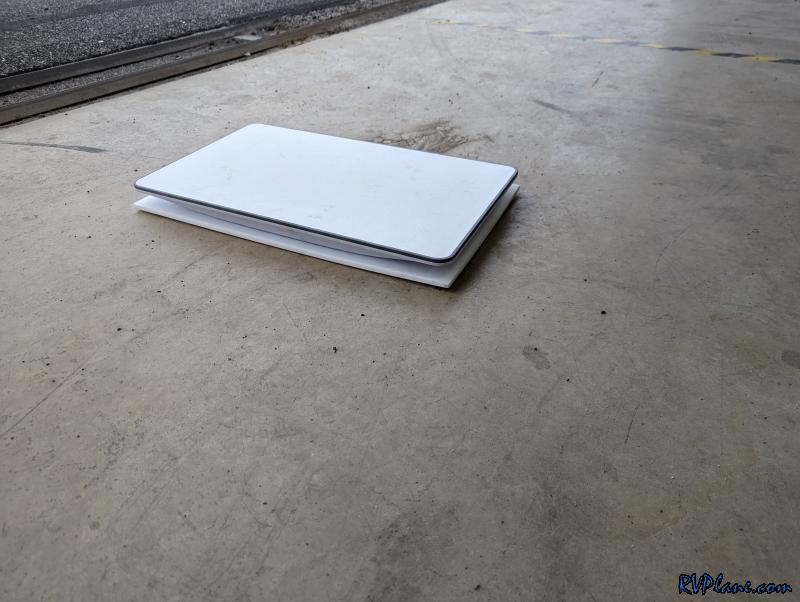 I used 4 #8 screws to attach the bottom plate. 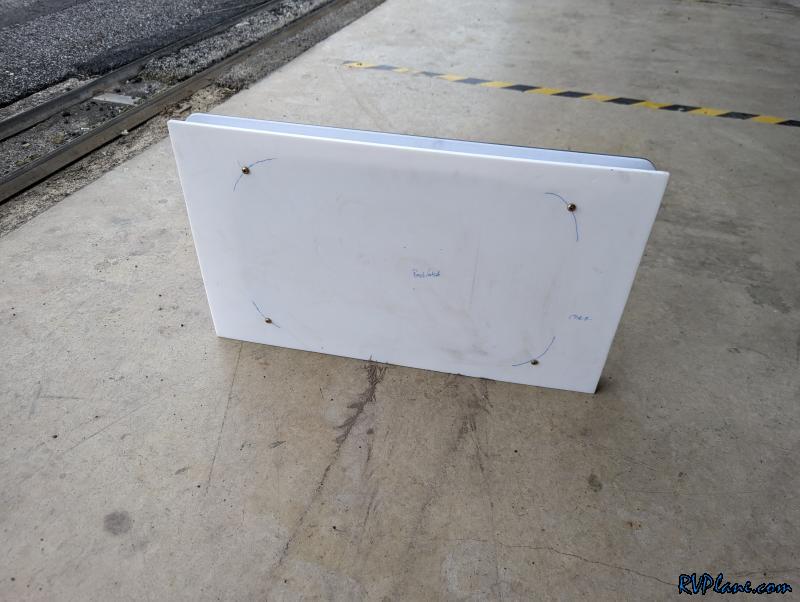 I put some shielded CAT6E ends onto the internal data cable to connect it to some shielded CAT6E I was running from Dishy into my hangar. 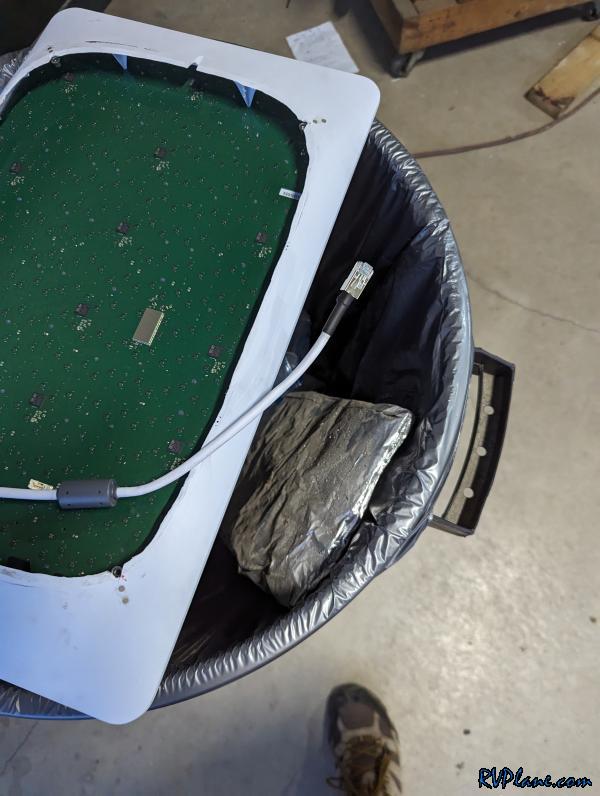 And the final product. I put a good bead of silicon caulk between the hacked up Dishy and the PTFE backing plate and used some 2"x36"x1/8" stock from Lowes-Depot to attach the dish to existing screws in the hangar roof. Total cost for the project: PTFE Sheet: $89.19 2"x36"x1/8" AL Bar: $29.96 CAT6E Inline Couplers: $8.99 Waterproof inline couplers: $13.99 50' Shielded CAT6E: $18.99 Shielded CAT6E Ends: $18.99 Klein Pass-through Crimp Tool: $49.96 So $231 for all, and $50 of that was for a really nice Crimper tool that I will get a lot of use out of for other projects. s 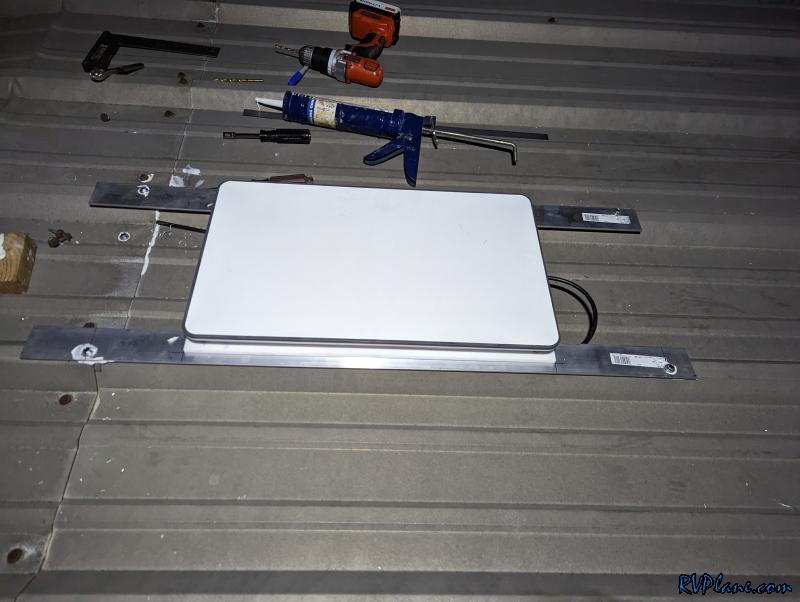 How's the performance with it not aiming itself? Quite a lot better than the FBO wireless! 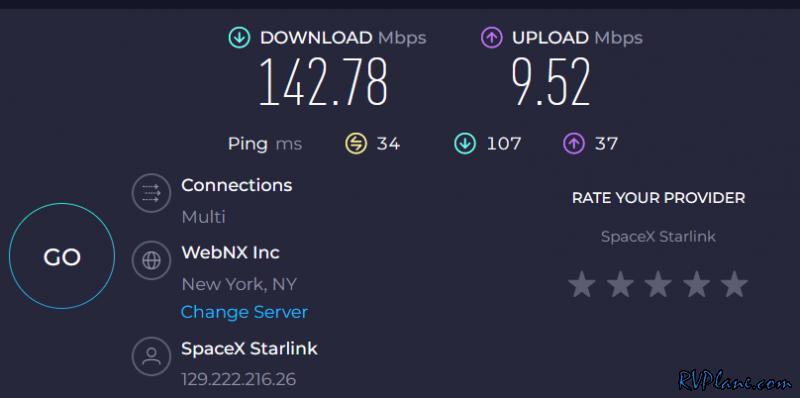
|
|||||
|
http://RVplane.com |
Last Modified: January 31, 2026 |