
|
 |
||||
When I started out today, I had about 1/32" of a gap on the front left of the canopy. Well, after some trimming to fix it, I made it worse - about 3/32"! It took another hour to get it back to where I started...maybe a little better. Once I was there, I did some more light trimming for symmetry. Once that was done, it was time to tighten everything down in preparation for the "Big Cut". The Big Cut is when you slice the canopy into two pieces, with the cut line around the center of the roll bar. You clamp everything down to try to get the closest fit to the final form the canopy will take on. 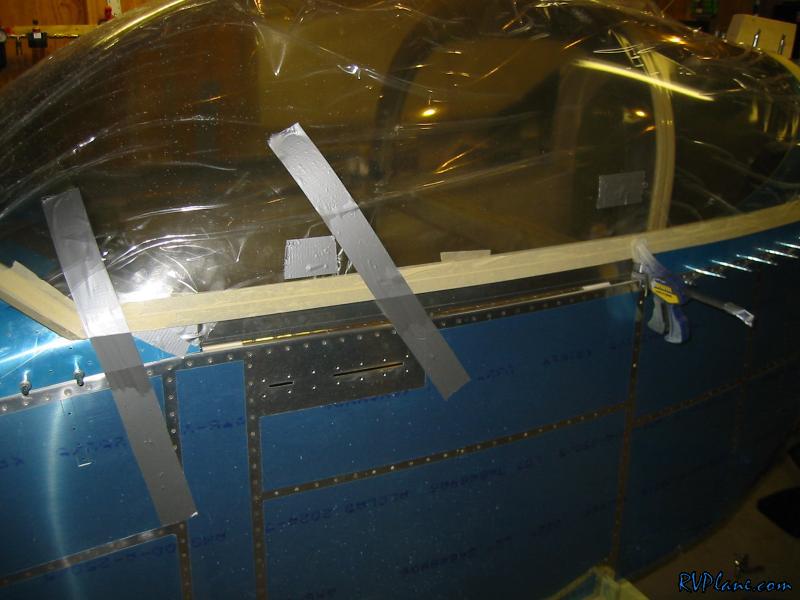 I wasn't a fan of using scissors to cut the protective plastic that covers the canopy, so I waded through my drawer of "junk from trade shows" at work and found this letter opener. I literally have 1,000's of pens, screwdrivers, coffee mugs, meditation balls and other knick knacks that they give away at trade shows. My goal is always to walk out with the most "goodies". 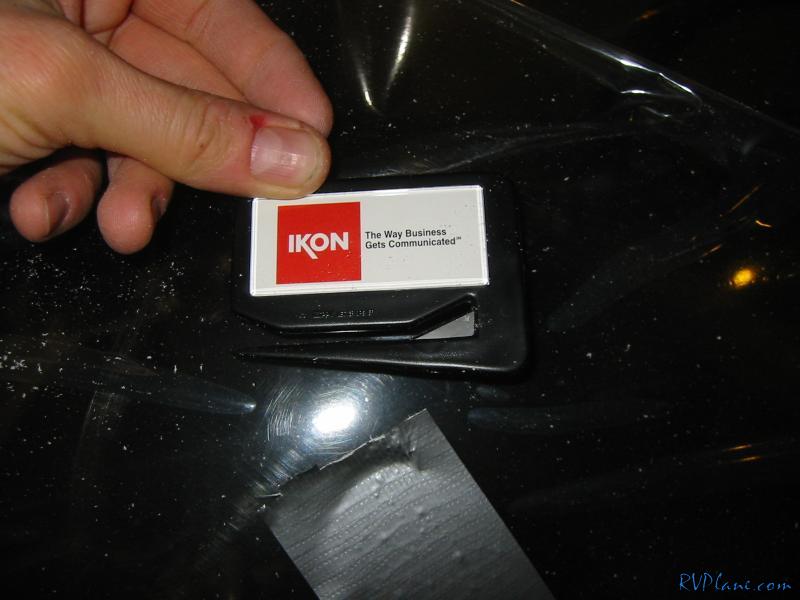 OK, with the envelope opener I trimmed back the plastic on either side of the cut line. Then I used a sharpie to mark where the center of the roll bar is, putting a dash about every 1" around the perimeter of the roll bar. It doesn't look like it's centered in this pic, and that's because its taken at an angle to show the marks.  Here is the shot straight on. 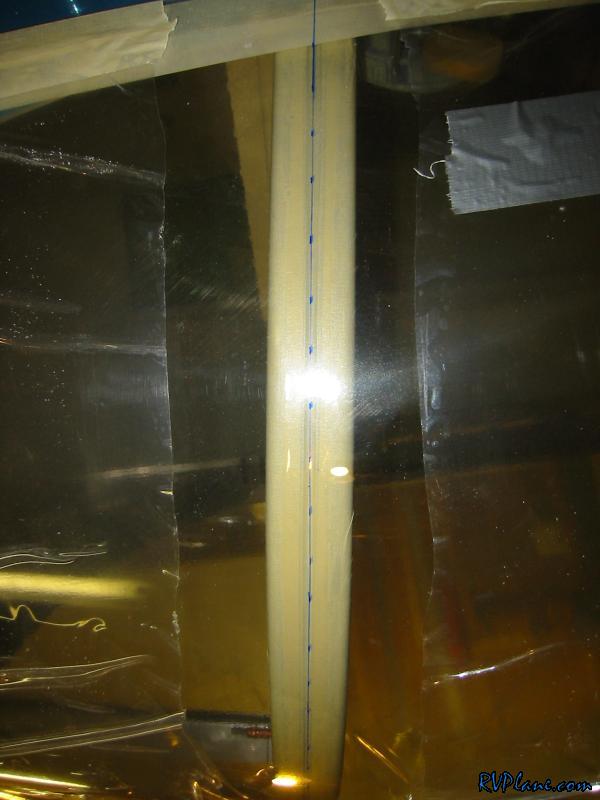 I took a trick from Dan Checkoway and put 3 layers 1.5" thick tape on either side of the cut line, leaving about 1/32" gap between the strips of tape (approx the width of the cutting wheel). Multiple layers of tape were used to try to attempt to make a "guide" for the wheel to follow. I have plenty of tape, and it can't hurt, so why not? I don't want to mess this up! 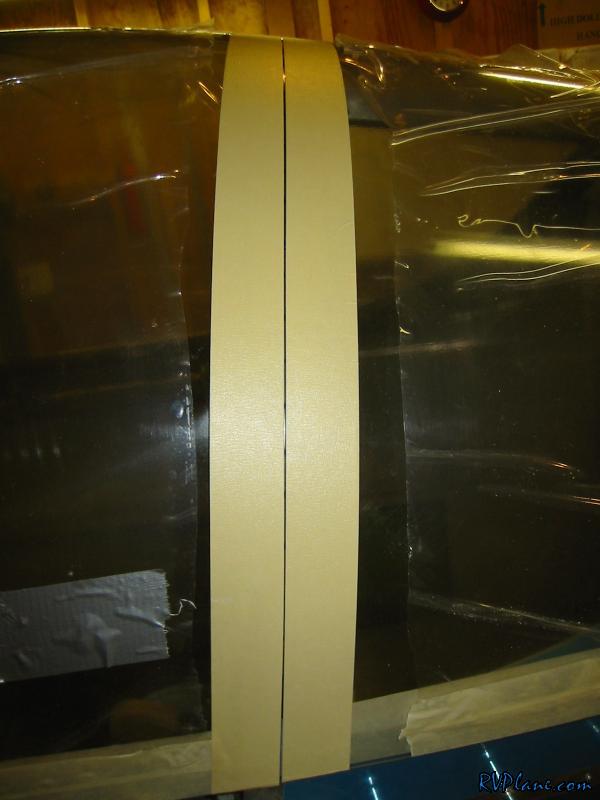 I made up a way to secure the canopy to keep it from spreading with some 2x4's and 4x4's. 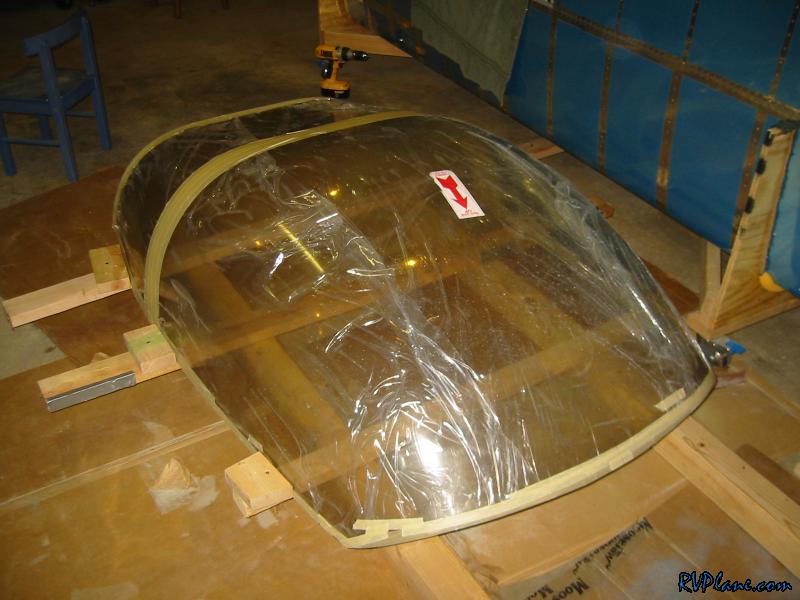 I layed some 4x4's lengthwise under the canopy to help raise the canopy off the floor a little. It can't be too close to the floor or else the cutting blade will hit it. 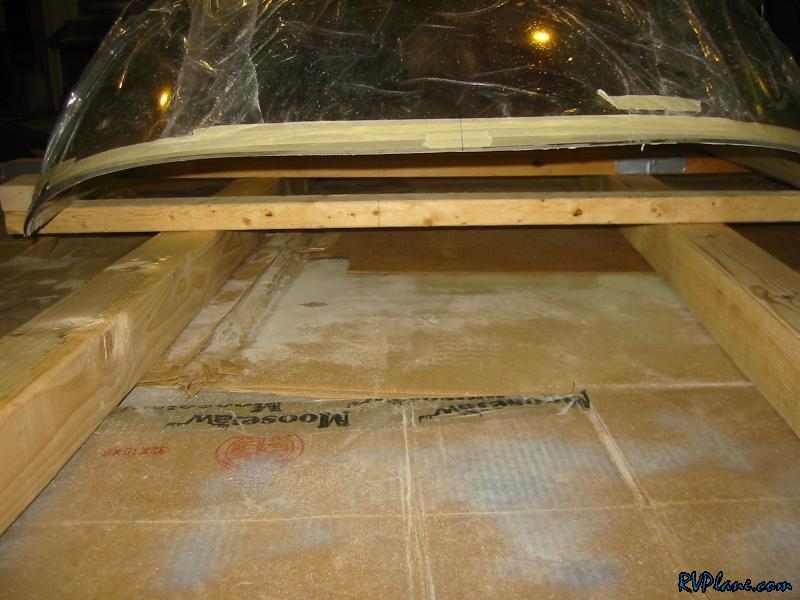 I traversed the 4x4'2 with some 2x4's, and then used some smaller 2x4 chunks drilled to the long 2x4's to keep the canopy pushed in. 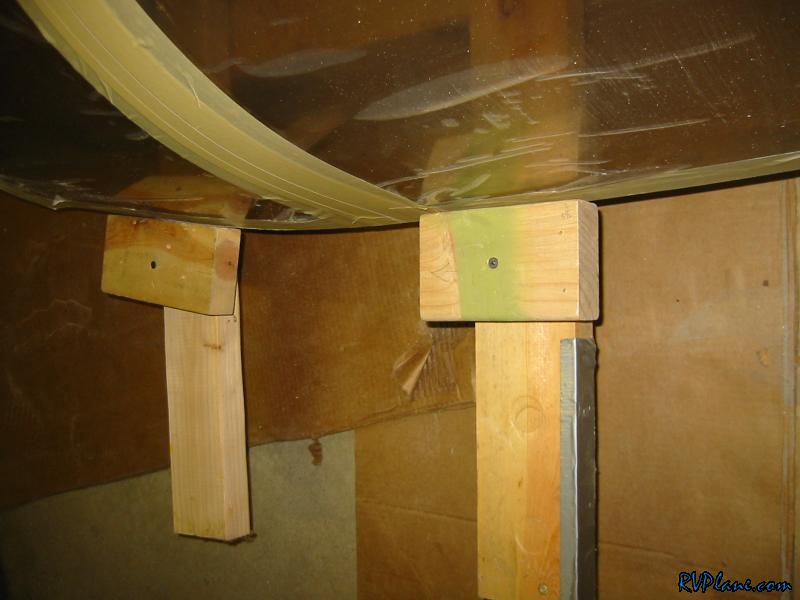 Next I busted out the big heater and forced heat under the canopy. I knew it was working well because the plexi got nice and toasty. Also, a nice breeze of hot air was coming out of the front. 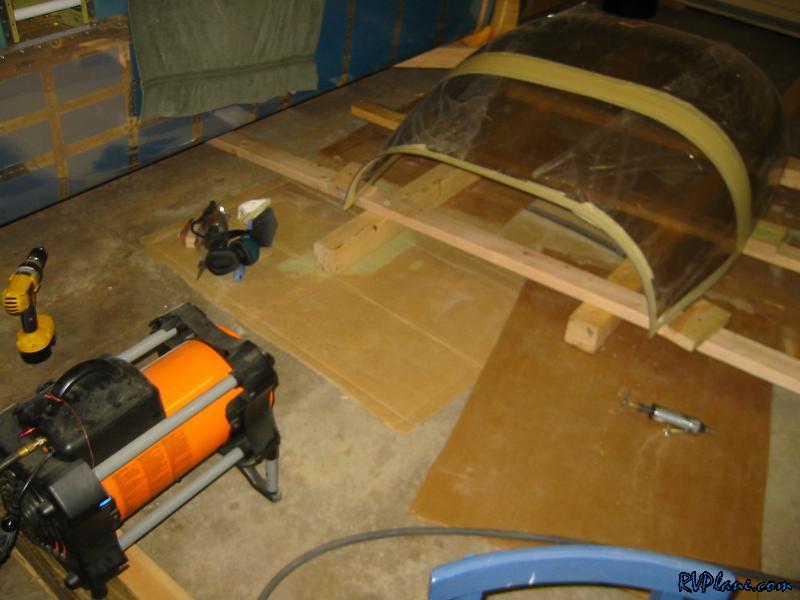 I got on my protecting wear and started cutting. I started on the left and worked right, only to keep the plexi "snow" thrown away from me. Once the cut was started, I used a clamp to hold the canopy halves together. Then as I went along, I taped the two halves together, about every 6". In the end, it was a total non event. I then sanded each side down thoroughly up to 240 grit. 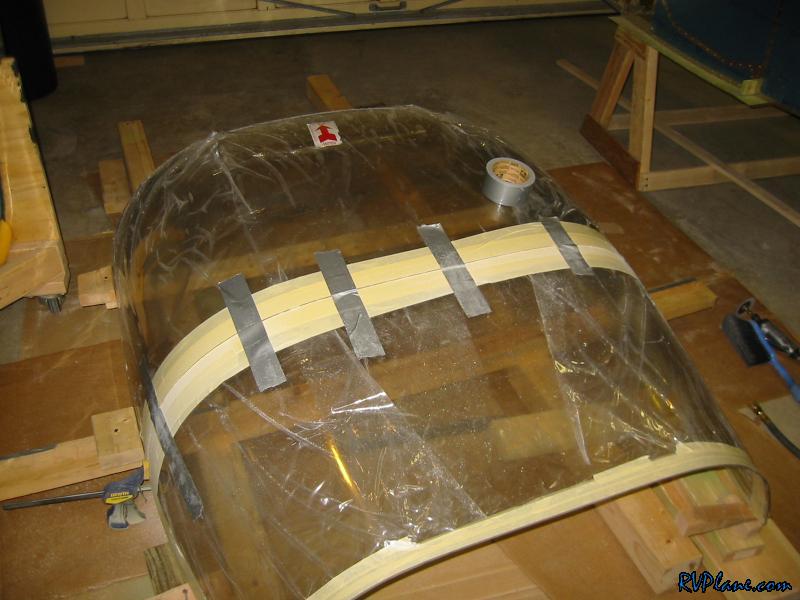 And the moment of truth........ With the canopy split, it is easier to get onto the fuselage - not nearly as awkward to handle. 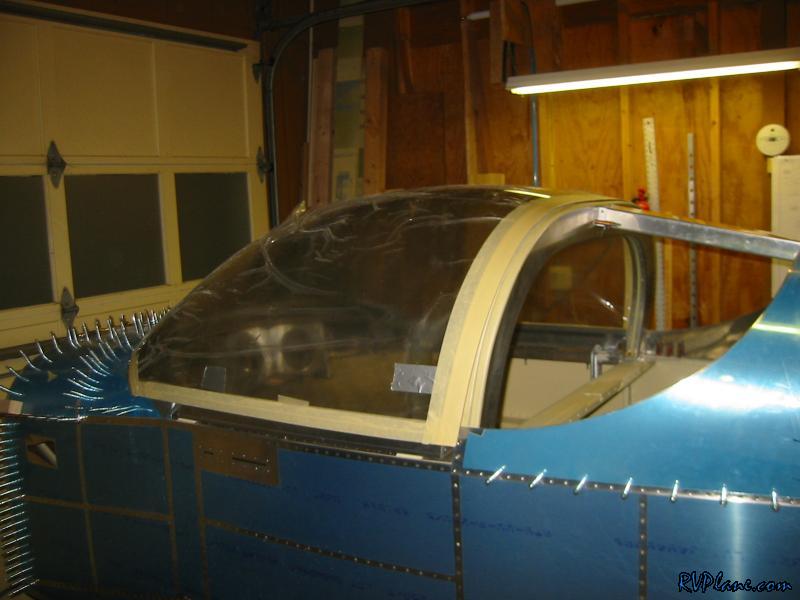 The final fit turned out as I expected, with a little offset at the bottom of the rollbar. This is due to the fact that the top of the plexi isn't exactly sitting on top of the rollbar (there is about a 3/4" space between the top of the rollbar and the plexi before it is cut). Once the canopy is cut, it is allowed to sit on the rollbar and that causes the whole orientation of the canopy to change. No big deal, as this can be easily trimmed now. But that's enough fun for this evening. Time for a well deserved beer and the veg out to some TV for a little. 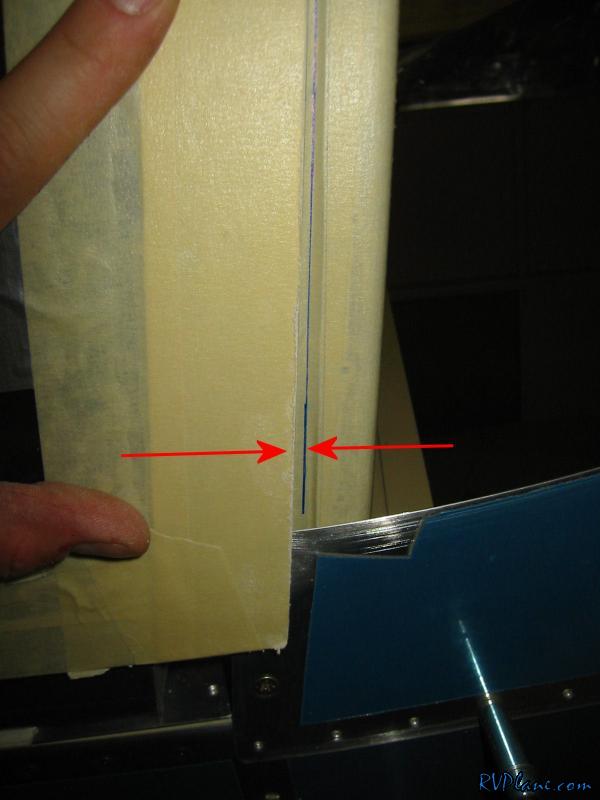
|
|||||
|
http://RVplane.com |
Last Modified: August 13, 2023 |