
|
 |
||||
I wanted to finish up the ailerons tonight. Although all I had left were the rivets on the bottom, these took a lot longer than I thought, only because I checked if the aileron was twisting frequently. I needed to re-cleco the aileron with it weighted down with 2 2x8's to get it without twist. I used the smartlevel on the inboard and outboard-most stiffeners to determine twist. I couldn't use the ribs because they slightly deflect the skin. I used the belt-and-suspenders method of double checking my work with a straight edge. On the bottom skin, I checked the front, back and both diagonals for any deflection. Now, these ailerons have a slight bow so that threw it off (very small bow - 3/32's at the most, Vans said it isn't an RV without a bowed aileron1!) but I checked that everything was symmetrical, letting me know there is not a twist. Anyways this is a pic of the outboard end. 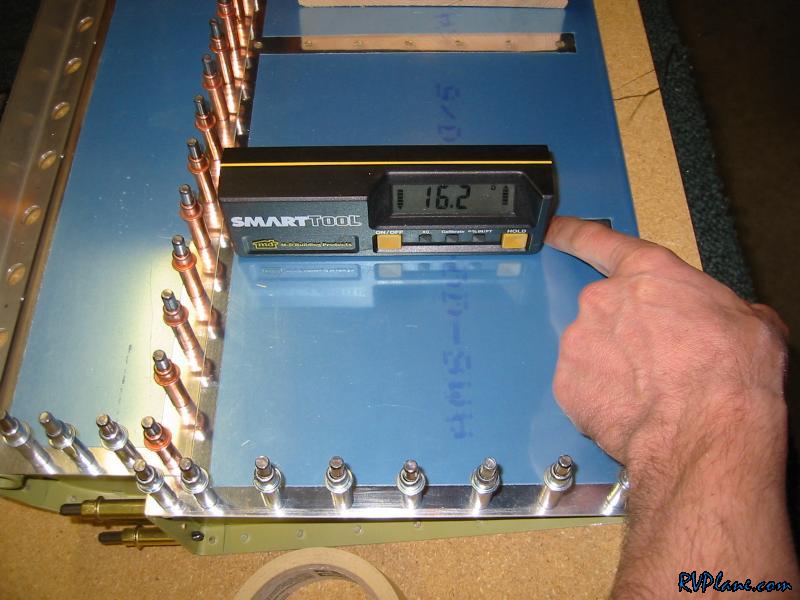 And the inboard end. 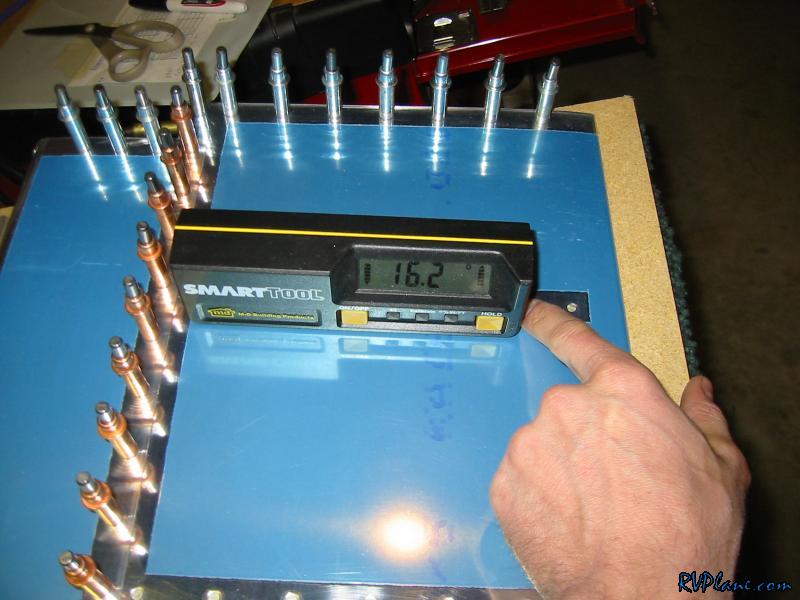 The finished aileron (without the brackets in this pic) fairly quickly. All of the rivets have good access, and the pneumatic rivet puller made the bling rivets a snap. I feel sorry for all ya sucka's that have to hand squeeze all of these! 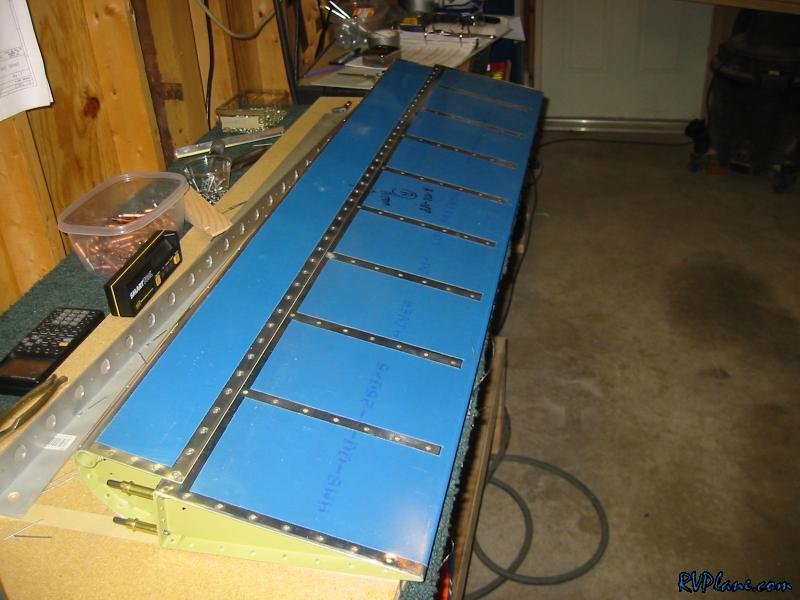 After I finished riveting the aileron, I flipped it over and double checked for any twist. 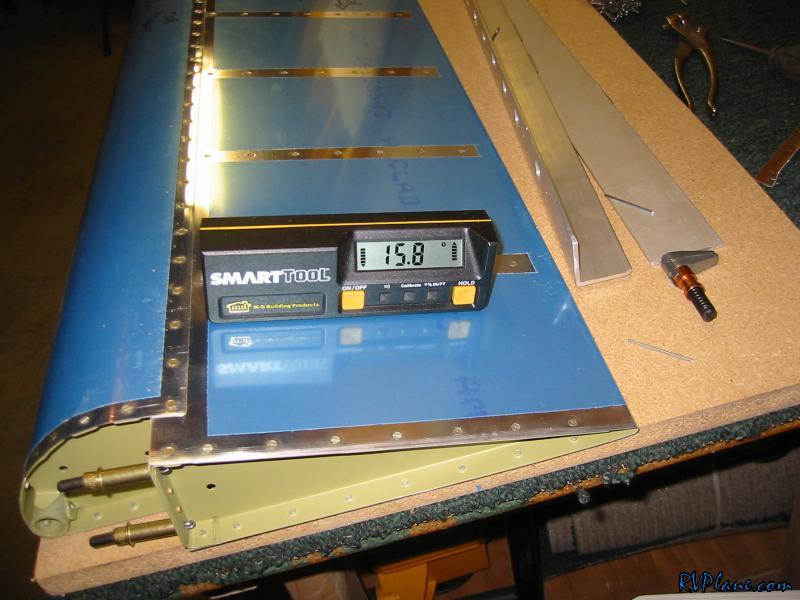 Nope! I lucked out - well, not really, I measured these things too many times to count to get these nice and straight. They probably would of turned out fine without all of the checking, but I didn't want to chance redoing all the BS involved in these things. 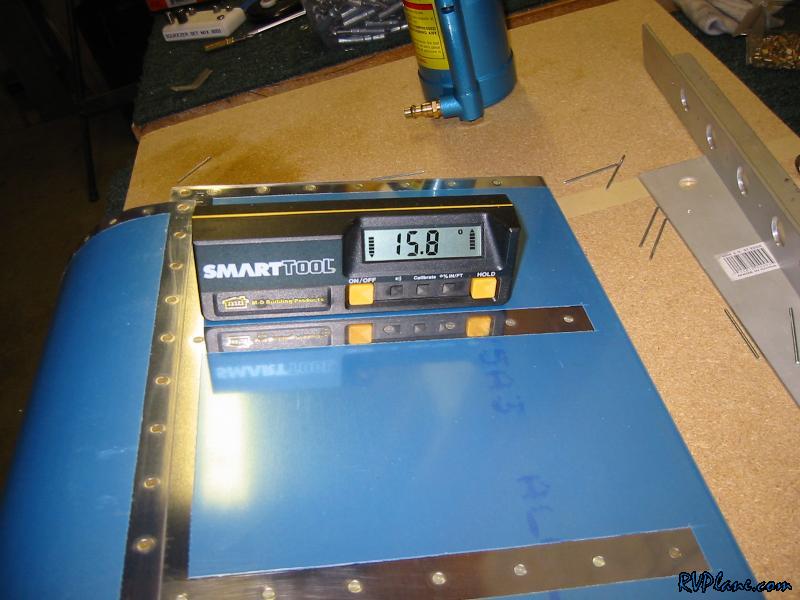 This is the inboard bracket. Easy to get a 1/4" socket in on these bolts. I only torque sealed the one bolt because it goes into a nutplate. The other two bolts go into nuts that have the seal on it. 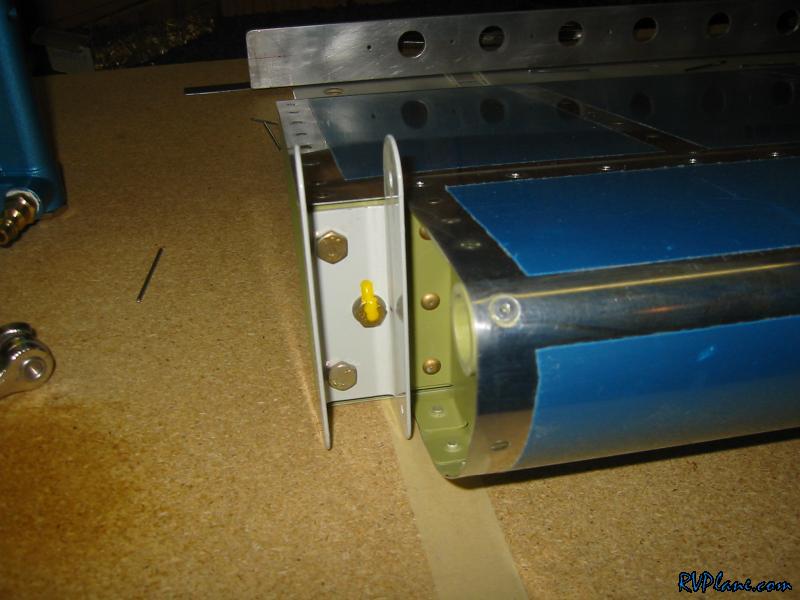 You can't get a socket on these bolts, so I used an open end wrench sideways to keep em from spinning. I did all of this for the left aileron and got the same twist free results! 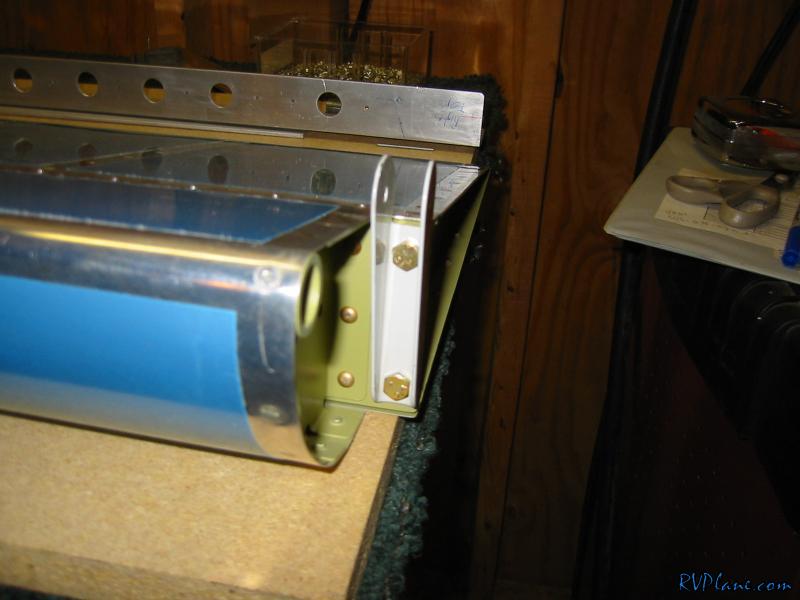
|
|||||
|
http://RVplane.com |
Last Modified: August 13, 2023 |