
|
 |
||||
Today I tackled the final priming session for the elevators. I did all of the prep work yesterday so today was pretty easy. Mix primer, let it set, paint, cleanup. It was really windy out today, but luckily there was one corner of my open garage that the wind didn't touch. I usually prime at my work, but I can't anymore. Someone a few weeks ago was using a bench sander on some steel and the sparks almost lit a fire with some sawdust bellow. The president caught wind of this and put a lock on the door the next day. I tried to get in, but supposedly its some legal thing now and liability issue. Leave it to the lawyers to screw everything up. I have been lucky to be able to use the paint shop through the winter thus far on those bone chilling unprimable days. In a few weeks I will be buying a house (hopefully) that is being bought specifically with the idea of building an airplane in. Anyways to get back on the subject of priming, I tried to take some pics of what I do. First thing is to pop open the cans of AKZO. Make sure you are outside or have plenty of ventilation, because this stuff is foul! The green can needs to be mixed. I have a drill mounted mixer that works great. In 30 seconds the one can is mixed up nicely. Next I use a ladle (yes, I bought it at target in the spoon isle) to dip out the AKZO to a pirex measuring cup thingy. I start with the translucent one first because its easy to clean it off with a acetone soaked rag. Next I get the other can. I then use the drill mounted mixed to stir the two together. I let them sit for 30 minutes, stiring them about every 10 or so. The 2 part epoxy primer needs this time to setup and do its thing. While it's setting up, I got everything ready to prime. Layed out all of the parts and got the air compressor ready for priming. I used 40 PSI and then fine tune it on the gun. After the primer is setup, I pour it into the gun, test the settings on some paper/cardboard and then hit up the parts. After all of that fun is done its cleanup time. I find that acetone works the best for this job. Laquer thinner just doesn't have the balls for it. I haven't tried MEK yet because frankly I only like breaking it out when I absolutely have to. MEK is about the nastiest stuff out there. I try to avoid it whenever possible and use alternatives. One thing that I did was mark all of my polarized parts (Left and right, front and back) with a sharpie after alodining them. Now, I don't know what this does to the alodone, nor do I care. If using a sharpie really screws up the priming process, then there is something wrong here. Anyways, the fresh sharpie marks bleed right through the AKZO primer very nicely! I like this approach better than using a deeper etch with the electric etching tool. Everything setup for the priming. 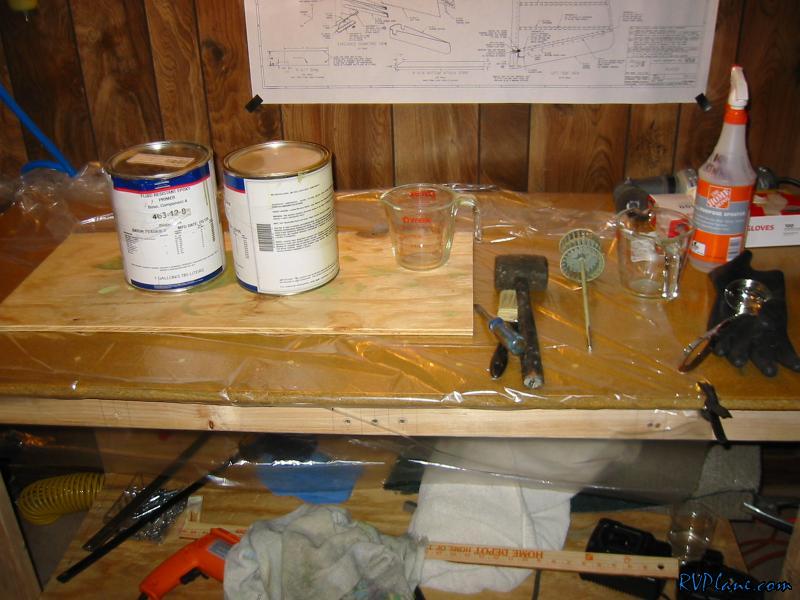 The AKZO cans opened up. The one on the left needs to be mixed up. You can see this a little with how it has layers in the goop. 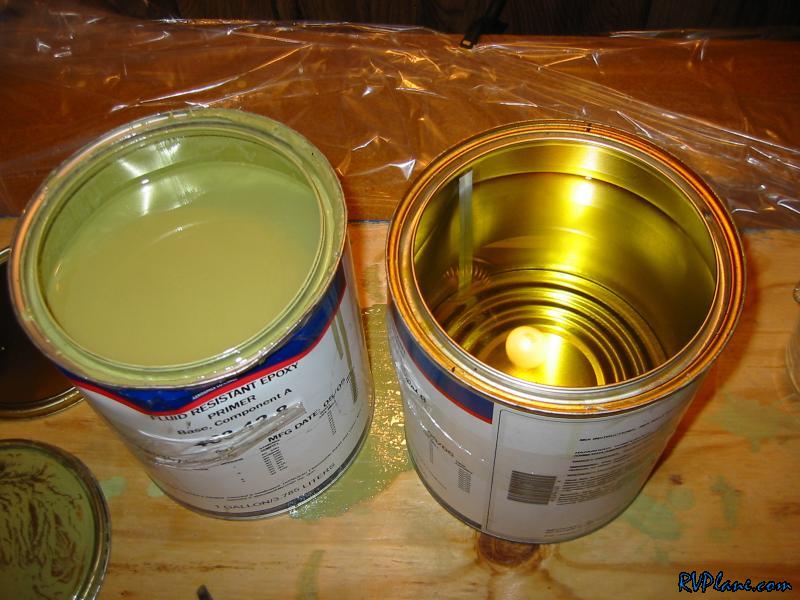 Mixin' it up with my favorite cordless drill. 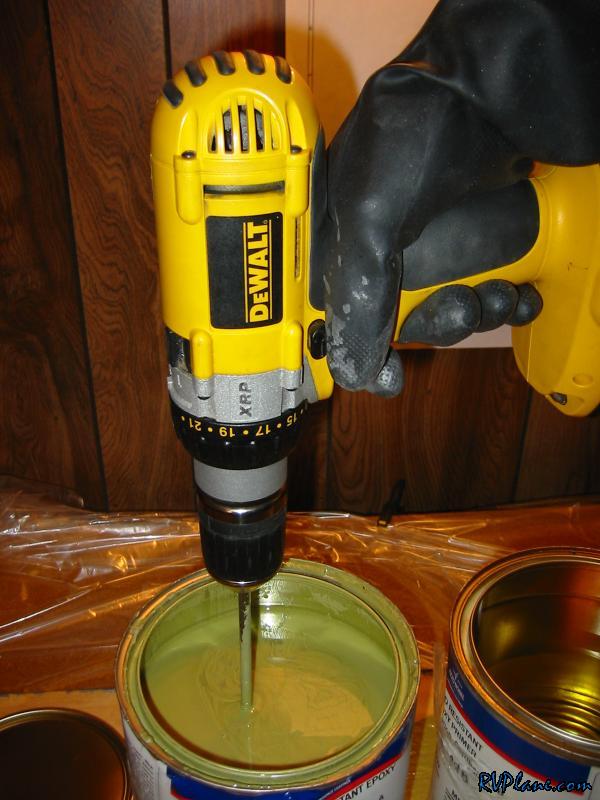 The parts finished on my chickenwire frame. 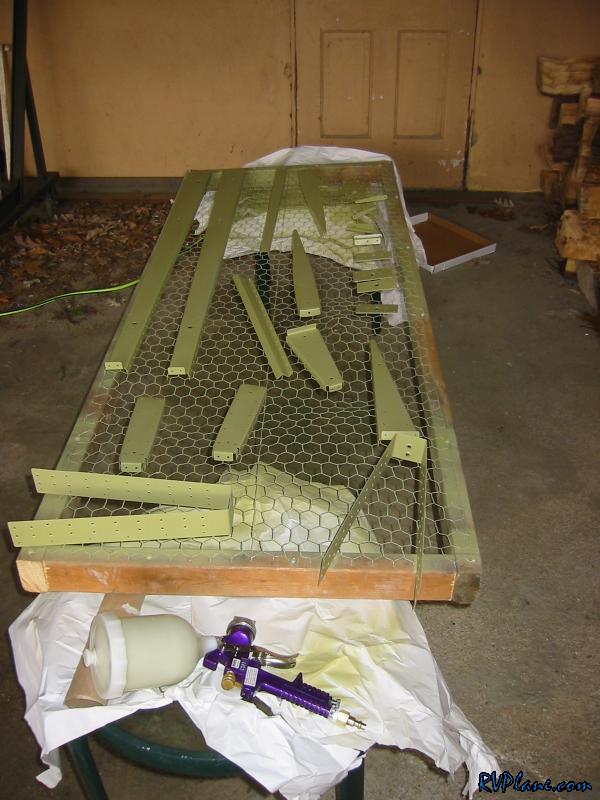 This shows the bleedthrough of the sharpie. 
|
|||||
|
http://RVplane.com |
Last Modified: August 13, 2023 |